adult-reusing-objects-creative-ways

What Happens When Mold Is Found During a Home Inspection?

Buying or selling a home is already stressful. However, discovering mold during a home inspection can quickly make things more complicated. Many people immediately worry about costs, delays, or health risks—and rightly so.

So, what actually happens when mold is found during a home inspection? And how does it affect your home, your deal, and your health?

In this guide, we’ll break down the entire process. We will also explain the connection between Mold and Health, so you understand why inspectors take it seriously.

Why Mold Matters in a Home Inspection

Mold is not just a surface issue. Instead, it often indicates a deeper moisture problem within the home.

Inspectors pay close attention to mold because it can signal:

  • Water leaks behind walls
  • Poor ventilation
  • Roof or plumbing issues
  • Long-term moisture damage

Therefore, finding mold during inspection is a red flag that requires further investigation.

The Connection Between Mold and Health

Before diving into the inspection process, it is important to understand the link between Mold and Health.

Mold releases spores into the air. When inhaled, these spores may cause:

  • Allergic reactions
  • Respiratory issues
  • Skin irritation
  • Headaches and fatigue

As a result, inspectors and buyers treat mold concerns seriously, especially in homes with children, elderly individuals, or people with asthma.

What Inspectors Look for When Checking Mold

Home inspectors do not just look for visible mold. Instead, they assess conditions that may lead to mold growth.

They typically check:

  • Damp or humid areas
  • Water stains on ceilings or walls
  • Musty odors
  • Poor ventilation
  • Signs of leaks or moisture buildup

Therefore, even if mold is not visible, warning signs can still trigger further testing.

What Happens When Mold Is Found?

Once mold is discovered, the inspection process usually moves to the next level.

  1. Mold Is Documented in the Report

First, the inspector documents the finding. This includes:

  • Location of mold
  • Visible severity
  • Possible cause
  • Photos or evidence

As a result, the buyer and seller both receive a clear record of the issue.

  1. Moisture Source Is Investigated

Next, inspectors try to identify where the moisture is coming from.

Common sources include:

  • Leaking pipes
  • Roof damage
  • Poor drainage
  • Appliances like washing machines or HVAC systems

Without fixing the source, mold will likely return.

  1. Recommendation for Further Testing

In many cases, inspectors recommend a specialized mold assessment.

This may involve:

  • Air quality testing
  • Surface sampling
  • Laboratory analysis

Therefore, the issue is evaluated more thoroughly before final decisions are made.

  1. Repair Estimates May Be Required

Once mold is confirmed, repair estimates are often needed. These costs depend on severity.

For example:

  • Small area cleanup: minimal cost
  • Hidden mold behind walls: moderate cost
  • Structural mold damage: high cost

Consequently, buyers may renegotiate the price or request repairs.

  1. Negotiations Between Buyer and Seller

After inspection, both parties typically enter negotiations.

Possible outcomes include:

  • Seller agrees to fix the mold
  • Buyer requests a price reduction
  • Seller offers credit for repairs
  • Deal is paused or canceled

Therefore, mold findings can significantly impact real estate transactions.

Types of Mold Found During Inspections

Not all mold is the same. Inspectors often categorize it based on severity and location.

Surface Mold

This type appears on visible surfaces like walls or tiles. It is usually easier to clean.

Hidden Mold

Hidden mold grows behind walls, under flooring, or inside ceilings. It is more serious because it is harder to detect and remove.

Widespread Mold

This indicates a larger moisture problem. It often requires professional remediation.

Common Causes of Mold Found During Inspections

Understanding the cause helps determine how serious the issue is.

Plumbing Leaks

Leaky pipes are one of the most common causes. Even small leaks can lead to major mold growth.

Roof Damage

Roof leaks allow water to enter the home, especially during rainstorms.

Poor Ventilation

Bathrooms, kitchens, and basements often trap moisture due to lack of airflow.

Appliance Issues

Faulty appliances such as washing machines or HVAC systems can also contribute to mold growth.

How Mold Affects Home Value

Mold can significantly impact a property’s value.

It may lead to:

  • Lower selling price
  • Fewer buyer offers
  • Delayed transactions
  • Higher repair costs

Therefore, addressing mold early can help maintain property value.

Health Risks That Concern Buyers

The link between Mold and Health plays a major role in buyer decisions.

Even minor mold findings can raise concerns about:

  • Indoor air quality
  • Long-term exposure risks
  • Family safety

As a result, buyers often request professional remediation before proceeding.

What Sellers Should Do If Mold Is Found

If you are selling a home and mold is discovered, take immediate action.

  1. Do Not Ignore It

Ignoring mold will only make the situation worse and reduce buyer trust.

  1. Hire a Professional

A licensed mold remediation specialist can assess and remove the problem safely.

  1. Fix the Source

Repair leaks, improve ventilation, or address drainage issues.

  1. Document Repairs

Keep records of all remediation work. This helps reassure future buyers.

What Buyers Should Do After Mold Is Found

If you are buying a home, you still have options.

  1. Request Detailed Inspection Reports

Make sure you fully understand the extent of the issue.

  1. Get a Second Opinion

A mold specialist can confirm severity and required repairs.

  1. Negotiate Repairs or Price

Use the findings to adjust your offer.

  1. Consider Long-Term Risks

Think beyond cost. Consider health and future maintenance as well.

Can You Still Buy a Home With Mold?

Yes, but with caution. Many homes with mold issues are still purchased after repairs.

However, it is important to ensure:

  • Proper remediation is completed
  • The moisture source is fixed
  • The home is retested if necessary

Therefore, due diligence is essential.

How to Prevent Mold Issues Before Inspection

If you are preparing a home for inspection, prevention can help avoid problems.

Fix Leaks Early

Repair plumbing and roof leaks immediately.

Improve Airflow

Use fans and ventilation systems to reduce moisture.

Clean Damp Areas

Pay attention to bathrooms, basements, and kitchens.

Monitor Humidity

Keep indoor humidity below 50% whenever possible.

Final Thoughts

Finding mold during a home inspection can be stressful, but it is not the end of the world. Instead, it is a warning sign that should be taken seriously.

The connection between Mold and Health highlights why inspectors pay close attention to it. Mold can affect both property value and indoor air quality.

By understanding the inspection process, you can make informed decisions whether you are buying or selling a home. Most importantly, addressing mold early ensures a safer, healthier, and more valuable property in the long run.

 

top-view-man-tired-from-cleaning

Is Carpet Ruined If It Gets Wet? What You Need to Know

Water on your carpet can feel like a disaster. Whether it’s from a spilled drink, a leaking appliance, or something more serious, many homeowners immediately assume the worst. But is your carpet truly ruined if it gets wet? The answer depends on several factors, including the amount of water, how long it sits, and how quickly you act.

In this guide, we’ll break down everything you need to know. You’ll learn what happens when carpets get wet, when they can be saved, and how to prevent future issues caused by problems like clogged toilets, dish washer leaks, and more.

What Happens When Carpet Gets Wet?

Carpet is made up of multiple layers. These include the fibers, backing, and padding underneath. When water seeps in, it doesn’t just stay on the surface. Instead, it penetrates deep into these layers.

As a result, several problems can occur:

  • The fibers may become weak or discolored
  • The padding underneath can absorb water like a sponge
  • Mold and mildew may start to grow
  • Unpleasant odors can develop

Therefore, wet carpet is not just a surface issue. It becomes a deeper problem if left untreated.

Is Wet Carpet Always Ruined?

The good news is that wet carpet is not always ruined. In fact, many carpets can be saved if action is taken quickly.

When Carpet Can Be Saved

Your carpet is likely salvageable if:

  • The water is clean (like from a broken pipe or spill)
  • The area is dried within 24–48 hours
  • There is no visible mold growth
  • The padding has not been heavily soaked

In these situations, proper drying and cleaning can restore your carpet to its original condition.

When Carpet Is Likely Ruined

Unfortunately, there are cases where replacement is the better option. This includes:

  • Exposure to contaminated water (such as sewage from clogged toilets)
  • Water sitting for more than 48 hours
  • Strong odors that persist after drying
  • Visible mold or mildew growth

In these cases, keeping the carpet can pose health risks. Therefore, replacement becomes necessary.

Common Causes of Wet Carpets

Understanding the source of the problem helps you respond more effectively. Let’s look at some common causes.

  1. Plumbing Issues

Leaky pipes and overflowing sinks often lead to water damage. For example, clogged toilets can overflow and spread contaminated water onto carpets.

  1. Appliance Leaks

Household appliances are another major culprit. A faulty dish washer can leak water slowly, soaking the carpet over time without immediate notice.

  1. Flooding and Weather

Heavy rain or flooding can cause water to enter your home. This type of water is often more difficult to deal with because it may carry dirt and bacteria.

  1. Spills and Accidents

Simple spills can also cause damage if not cleaned properly. Although less severe, repeated spills can still weaken carpet fibers.

Why Acting Quickly Matters

Time is the most critical factor when dealing with wet carpet. The longer water sits, the more damage it causes.

Within the first 24 hours, you still have a strong chance of saving your carpet. However, after 48 hours, mold can begin to grow. Once mold sets in, it becomes much harder to restore the carpet safely.

Additionally, prolonged moisture can damage the subfloor beneath the carpet. This increases repair costs and complicates the situation.

Step-by-Step: What to Do If Your Carpet Gets Wet

Taking the right steps can make all the difference. Here’s what you should do immediately.

  1. Stop the Water Source

First, identify where the water is coming from. If it’s due to clogged toilets, dish washer leaks, or a broken pipe, fix the issue right away.

  1. Remove Excess Water

Next, remove as much water as possible. You can use:

  • Towels
  • Wet vacuums
  • Mops

The goal is to reduce moisture quickly.

  1. Increase Airflow

After removing water, improve ventilation. Open windows and use fans to speed up drying. Dehumidifiers are also very effective.

  1. Lift the Carpet

If possible, lift the carpet to check the padding underneath. Often, the padding holds more water than the carpet itself.

  1. Clean and Sanitize

If the water source is questionable, cleaning becomes essential. Use disinfectants to eliminate bacteria and prevent odors.

  1. Monitor for Mold

Keep an eye on the area for any signs of mold. These include:

  • Musty smells
  • Dark spots
  • Increased allergy symptoms

If you notice these signs, consider professional help.

Can You Dry Carpet Yourself?

In many cases, yes—you can dry carpet yourself. Small spills or minor leaks are usually manageable with household tools.

However, there are limits to DIY solutions.

DIY Works Best When:

  • The affected area is small
  • The water is clean
  • You act quickly

Professional Help Is Better When:

  • The area is large
  • The water is contaminated
  • The padding is soaked
  • Mold is present

Professionals use specialized equipment that removes moisture more effectively. This reduces the risk of long-term damage.

The Hidden Danger: Mold Growth

Mold is one of the biggest concerns with wet carpet. It thrives in moist, warm environments, making carpets an ideal breeding ground.

Once mold develops, it spreads quickly. It can also affect indoor air quality and cause health issues such as:

  • Respiratory problems
  • Allergies
  • Skin irritation

Therefore, preventing mold is a top priority when dealing with wet carpet.

How to Prevent Carpet Water Damage

Prevention is always better than repair. Fortunately, there are several steps you can take to protect your carpet.

Regular Maintenance

Check your plumbing and appliances regularly. Fix minor leaks before they become major problems.

Address Clogged Toilets Quickly

Never ignore slow drains or recurring clogs. These can lead to overflows and serious water damage.

Inspect Your Dish Washer

Look for signs of leaks around your dish washer. Even small drips can cause significant damage over time.

Use Waterproof Barriers

In high-risk areas, consider using waterproof mats or barriers. These provide an extra layer of protection.

Improve Home Ventilation

Proper airflow helps prevent moisture buildup. This reduces the chances of mold growth.

When to Replace Your Carpet

Sometimes, replacement is unavoidable. While it may seem costly, it is often the safest option.

You should consider replacing your carpet if:

  • It has been exposed to sewage water
  • Mold is widespread
  • The odor cannot be removed
  • The structure of the carpet is damaged

In these situations, keeping the carpet may do more harm than good.

Final Thoughts

So, is carpet ruined if it gets wet? Not always. In many cases, quick action can save your carpet and prevent lasting damage.

However, the outcome depends on the source of the water, how long it sits, and how effectively you respond. Issues like clogged toilets, dish washer leaks, and flooding can escalate quickly if ignored.

Therefore, acting fast is essential. By removing water, improving airflow, and monitoring for mold, you can protect your home and extend the life of your carpet.

If the damage is severe, don’t hesitate to call professionals. It’s better to address the problem early than deal with costly repairs later.


is black mold in the toilet tank dangerous

Is Black Mold in the Toilet Tank Dangerous? 5 Health Risks

Black mold in the toilet tank is something many homeowners overlook. After all, it is hidden behind the tank lid and not part of daily cleaning routines. However, ignoring it can lead to serious concerns.

So, is black mold in the toilet tank dangerous? The short answer is yes—it can be. While not all mold is toxic, certain types can affect your health and indoor air quality.

In this guide, we’ll explore the risks, causes, and prevention methods. We will also explain the connection between Mold and Health and why addressing the issue early is essential.

What Is Black Mold in the Toilet Tank?

Black mold refers to dark-colored fungal growth that thrives in damp, humid environments. Toilet tanks provide the perfect conditions for mold to grow because they are:

  • Moist
  • Dark
  • Often neglected

Over time, mold can form on the inner walls of the tank, on components, and even in the water itself.

Therefore, regular inspection is important, even if the mold is not visible at first glance.

Is Black Mold in the Toilet Tank Dangerous?

Not all black mold is harmful. However, some types—such as Stachybotrys chartarum—can produce toxins that may impact your health.

Even less toxic molds can still cause allergic reactions and respiratory issues. As a result, any mold growth should be treated as a potential risk.

The Connection Between Mold and Health

The relationship between Mold and Health is well documented. Mold releases tiny spores into the air. When inhaled, these spores can affect your body in different ways.

For example, exposure may lead to:

  • Breathing difficulties
  • Allergic reactions
  • Skin irritation

Therefore, even mold hidden in a toilet tank can impact your overall indoor environment.

5 Health Risks of Black Mold in the Toilet Tank

Let’s take a closer look at the most common health risks.

  1. Respiratory Problems

Mold spores can travel through the air when the toilet is flushed. As a result, they may enter your lungs.

This can lead to:

  • Coughing
  • Wheezing
  • Shortness of breath

People with asthma or existing respiratory conditions are especially vulnerable.

  1. Allergic Reactions

Many individuals are sensitive to mold. Even small amounts can trigger symptoms such as:

  • Sneezing
  • Runny nose
  • Itchy eyes

Therefore, persistent allergies may be linked to hidden mold in your home.

  1. Skin Irritation

Direct or indirect exposure to mold can cause skin issues. This includes:

  • Rashes
  • Itching
  • Redness

Although less common, it can still occur in sensitive individuals.

  1. Headaches and Fatigue

Some people report headaches, fatigue, and general discomfort when exposed to mold over time.

While research is ongoing, prolonged exposure may contribute to these symptoms.

  1. Weakened Immune Response

Long-term exposure to mold can affect your immune system. This is especially true for:

  • Children
  • Elderly individuals
  • People with weakened immunity

Therefore, addressing mold early helps reduce health risks.

Why Mold Grows in Toilet Tanks

Understanding the cause helps prevent future growth.

Constant Moisture

Toilet tanks are always filled with water. This creates a damp environment ideal for mold.

Lack of Cleaning

Most people clean the toilet bowl but ignore the tank. Over time, this allows mold to develop.

Mineral Buildup

Hard water can leave behind minerals. These deposits provide a surface for mold to grow.

Poor Ventilation

Bathrooms with poor airflow tend to stay humid. This increases the likelihood of mold growth.

Signs of Mold in Your Toilet Tank

Even though the tank is hidden, there are warning signs to watch for:

  • Musty odors in the bathroom
  • Dark or black spots inside the tank
  • Discolored water in the bowl
  • Increased allergy symptoms at home

If you notice these signs, it’s time to inspect your toilet tank.

How to Safely Remove Black Mold

Removing mold from a toilet tank is manageable with the right approach.

Step 1: Turn Off the Water Supply

Shut off the water valve and flush the toilet to empty the tank.

Step 2: Use Cleaning Solutions

You can use:

  • White vinegar
  • Baking soda
  • Mild bleach solution

Apply the cleaner and let it sit for 10–15 minutes.

Step 3: Scrub the Tank

Use a brush or sponge to remove mold from surfaces.

Step 4: Rinse and Refill

Turn the water supply back on and flush to rinse the tank.

Step 5: Repeat if Necessary

Stubborn mold may require multiple cleanings.

Prevention Tips to Keep Mold Away

Preventing mold is easier than removing it.

Clean the Tank Regularly

Check and clean your toilet tank every few months.

Improve Ventilation

Use exhaust fans or open windows to reduce humidity.

Use Mold-Resistant Products

Consider adding tablets designed to prevent mold growth.

Fix Leaks Promptly

Leaks can increase moisture levels and encourage mold growth.

Monitor Indoor Humidity

Keep humidity levels below 50% to discourage mold.

When to Call a Professional

In some cases, professional help is necessary.

Call an expert if:

  • Mold keeps returning
  • The growth is extensive
  • You experience severe health symptoms
  • Mold spreads beyond the toilet tank

Professionals can identify the source and ensure complete removal.

The Cost of Ignoring Black Mold

Ignoring mold can lead to:

  • Health complications
  • Increased cleaning costs
  • Damage to plumbing fixtures
  • Reduced indoor air quality

Therefore, taking action early is always the best choice.

Final Thoughts

So, is black mold in the toilet tank dangerous? Yes, it can be. While it may seem harmless at first, it has the potential to affect both your health and your home.

The connection between Mold and Health makes it important to address the issue promptly. By cleaning regularly, improving ventilation, and staying alert to warning signs, you can prevent mold from becoming a serious problem.

If you notice mold in your toilet tank, do not ignore it. A small effort today can protect your health and save you from bigger issues in the future.


is a leaking water heater an emergency

Is a Leaking Water Heater an Emergency? 5 Critical Signs

A leaking water heater is more than just an inconvenience. In many cases, it signals a serious problem that requires immediate attention. However, not every leak is an emergency. So how do you know when to act fast?

In this guide, we’ll break down the warning signs, causes, and what you should do next. We will also explore how household issues like clogged toilets, dish washer leaks, and plumbing failures can increase the risk of water heater problems.

Why a Leaking Water Heater Should Never Be Ignored

Water heaters are essential for daily comfort. They supply hot water for showers, cleaning, and cooking. However, when a leak develops, it can lead to:

  • Water damage to floors and walls
  • Mold and mildew growth
  • Increased utility bills
  • Potential system failure

Therefore, even a small leak deserves attention. Ignoring it can turn a minor issue into a costly emergency.

Is a Leaking Water Heater Always an Emergency?

Not every leak requires immediate panic. However, some situations demand urgent action.

When It May Not Be an Emergency

In certain cases, the issue may be minor. For example:

  • Loose connections
  • Small valve leaks
  • Condensation buildup

These problems are usually manageable if addressed quickly.

When It Is an Emergency

On the other hand, some leaks indicate serious damage. For instance:

  • A cracked tank
  • Continuous water pooling
  • Sudden pressure buildup
  • Electrical or gas hazards

In these situations, immediate action is necessary to prevent further damage or safety risks.

5 Critical Signs Your Water Heater Leak Is an Emergency

Recognizing the warning signs can save you time, money, and stress. Below are the five most important indicators.

  1. Water Pooling Around the Tank

If you notice water collecting around the base of your heater, take it seriously. While a few drops may come from condensation, consistent pooling suggests a leak.

Moreover, standing water can damage your flooring and create a slipping hazard. Therefore, this is often one of the first signs of a developing emergency.

  1. Sudden Loss of Hot Water

A leaking tank can affect your heater’s ability to function properly. If your hot water suddenly runs out or fluctuates, it may indicate internal damage.

Additionally, this could mean the tank is no longer holding water efficiently. As a result, the system may fail completely if not addressed.

  1. Rusty Water or Corrosion

Discolored water is another red flag. If your hot water appears rusty, it could mean the inside of the tank is corroding.

Over time, corrosion weakens the tank walls. Eventually, this can lead to cracks or complete failure. Therefore, rusty water should never be ignored.

  1. Strange Noises from the Tank

Unusual sounds like popping or rumbling often indicate sediment buildup. While this may seem harmless, it can increase pressure inside the tank.

As pressure builds, the risk of leaks or even rupture increases. Consequently, these noises can signal a developing emergency.

  1. Rapid Increase in Water Bills

A hidden leak can waste a significant amount of water. If your utility bill suddenly spikes without explanation, your water heater could be the cause.

Furthermore, ongoing leaks can worsen over time. Therefore, identifying the issue early can prevent further financial loss.

Common Causes of Water Heater Leaks

Understanding the root cause helps you take the right action. Several factors can lead to leaks.

  1. Aging Tank

Most water heaters last 8–12 years. As they age, internal components wear out. Eventually, the tank may develop cracks.

  1. High Water Pressure

Excessive pressure puts stress on the tank and connections. Over time, this can lead to leaks or bursts.

  1. Faulty Valves

The temperature and pressure relief valve is designed to release excess pressure. If it fails, leaks may occur.

  1. Loose Connections

Pipes and fittings can loosen over time. Although minor, these leaks can still cause damage if ignored.

  1. Household Plumbing Issues

Problems like clogged toilets, dish washer malfunctions, and blocked drains can increase overall pressure in your plumbing system. As a result, your water heater may experience additional strain.

What to Do Immediately If You Notice a Leak

Acting quickly can prevent serious damage. Follow these steps as soon as you detect a problem.

  1. Turn Off the Power Supply

First, shut off the power. For electric heaters, switch off the circuit breaker. For gas heaters, turn off the gas supply.

  1. Shut Off the Water Supply

Next, stop the water flow to prevent further leakage. Locate the shut-off valve near the heater.

  1. Drain the Tank

If necessary, drain the tank to reduce pressure and minimize water damage.

  1. Inspect the Leak Source

Try to identify where the leak is coming from. This helps determine whether it’s a minor fix or a major issue.

  1. Call a Professional

If the problem is unclear or severe, contact a licensed plumber immediately. Professional help ensures the issue is handled safely and effectively.

Can You Fix a Leaking Water Heater Yourself?

In some cases, yes. However, it depends on the severity of the issue.

DIY Fixes May Work For:

  • Tightening loose connections
  • Replacing minor valves
  • Addressing condensation issues

Professional Help Is Needed For:

  • Tank leaks
  • Internal corrosion
  • Gas-related problems
  • Major pressure issues

Attempting complex repairs without proper knowledge can be dangerous. Therefore, it’s best to leave serious problems to experts.

Preventing Water Heater Leaks

Prevention is always better than repair. With regular maintenance, you can extend the life of your water heater.

Schedule Routine Inspections

Annual check-ups can identify potential issues early. This reduces the risk of unexpected leaks.

Flush the Tank Regularly

Removing sediment buildup helps maintain efficiency and prevents pressure issues.

Monitor Water Pressure

Keep your home’s water pressure within a safe range. This protects your plumbing system and appliances.

Fix Plumbing Issues Promptly

Address problems like clogged toilets, dish washer leaks, and slow drains as soon as they appear. These issues can indirectly affect your water heater.

Replace Old Units

If your water heater is nearing the end of its lifespan, consider replacing it before it fails.

When to Replace Instead of Repair

Sometimes, replacing the unit is the smarter choice. You should consider replacement if:

  • The tank is leaking
  • The unit is over 10 years old
  • Repairs are frequent and costly
  • Efficiency has significantly decreased

Although replacement requires an upfront investment, it can save money in the long run.

Final Thoughts

So, is a leaking water heater an emergency? It can be. While some leaks are minor, others signal serious problems that require immediate action.

By recognizing the warning signs, you can respond quickly and avoid costly damage. Issues like clogged toilets, dish washer malfunctions, and overall plumbing pressure can contribute to the problem, making regular maintenance essential.

Ultimately, staying proactive is the best way to protect your home. If you’re ever unsure, it’s always safer to treat a leak as an emergency and seek professional help right away.


How Weather Conditions Lead to Mold Growth in Homes

Mold is a common problem in many homes. However, what most homeowners do not realize is how strongly weather conditions influence its growth. From humidity to heavy rainfall, the environment outside your home can directly affect what happens inside.

So, how do weather conditions lead to mold growth in homes? More importantly, how can you prevent it?

In this guide, we’ll explore the connection between climate and indoor mold. We will also explain why understanding Mold and Health is essential for maintaining a safe living space.

Why Weather Plays a Major Role in Mold Growth

Mold thrives in specific conditions. These include moisture, warmth, and limited airflow. Weather often creates the perfect combination of these factors.

For example, rainy seasons increase moisture levels. Similarly, high humidity creates a damp environment inside your home.

As a result, your home becomes more vulnerable to mold growth.

The Connection Between Mold and Health

Before diving deeper, it is important to understand the link between Mold and Health. Mold releases spores into the air, which can affect indoor air quality.

Exposure may lead to:

  • Respiratory issues
  • Allergic reactions
  • Skin irritation
  • Headaches and fatigue

Therefore, controlling mold is not just about protecting your home—it’s also about protecting your health.

Key Weather Conditions That Cause Mold Growth

Different weather patterns contribute to mold in different ways. Let’s explore the most common ones.

  1. High Humidity Levels

Humidity is one of the biggest contributors to mold growth. When indoor humidity rises above 50%, moisture begins to accumulate on surfaces.

This often occurs during:

  • Summer months
  • Tropical climates
  • Coastal regions

As a result, mold can grow on walls, ceilings, and furniture.

  1. Heavy Rainfall

Rain introduces excess moisture into your home. If your roof, windows, or foundation are not properly sealed, water can seep inside.

Consequently, hidden damp areas develop. These areas are perfect for mold growth.

  1. Flooding and Storms

Flooding is one of the most severe causes of mold. Large amounts of water enter the home quickly, soaking materials like:

  • Carpets
  • Drywall
  • Wood

If not dried within 24–48 hours, mold growth becomes almost inevitable.

  1. Temperature Fluctuations

Sudden changes in temperature can cause condensation. For example, warm air meeting cold surfaces creates moisture.

This often happens:

  • Around windows
  • On pipes
  • Inside walls

Therefore, temperature swings can indirectly lead to mold.

  1. Cold Weather and Poor Ventilation

During winter, homes are often sealed tightly to retain heat. While this improves energy efficiency, it reduces airflow.

As a result:

  • Moisture becomes trapped
  • Condensation increases
  • Mold growth becomes more likely
  1. Coastal and Damp Climates

Homes in coastal areas face constant exposure to moisture in the air. This makes mold prevention more challenging.

Even without visible leaks, humidity alone can cause mold to develop.

How Weather-Related Mold Affects Your Home

Weather-driven mold growth can damage various parts of your home.

Structural Damage

Moisture weakens materials like wood and drywall. Over time, this can lead to costly repairs.

Damage to Belongings

Mold can affect furniture, clothing, and personal items. Leather, fabric, and paper are especially vulnerable.

Reduced Air Quality

Mold spores circulate through the air, affecting indoor air quality. This is where the connection between Mold and Health becomes critical.

Signs of Mold Caused by Weather Conditions

Recognizing the signs early can help you take action.

Look for:

  • Musty odors
  • Dark spots on walls or ceilings
  • Peeling paint
  • Condensation on windows
  • Warped surfaces

If you notice these signs, investigate the cause immediately.

High-Risk Areas in Your Home

Certain areas are more prone to weather-related mold growth.

Bathrooms

Humidity from showers creates a moist environment.

Kitchens

Cooking and appliances add moisture to the air.

Basements

Basements are often damp and poorly ventilated.

Attics

Roof leaks and poor insulation can lead to moisture buildup.

How to Prevent Mold Growth in Changing Weather

Preventing mold requires proactive steps, especially during extreme weather conditions.

Control Indoor Humidity

Use dehumidifiers to keep humidity below 50%. This is one of the most effective ways to prevent mold.

Improve Ventilation

Ensure proper airflow by:

  • Using exhaust fans
  • Opening windows when possible
  • Maintaining HVAC systems

Inspect Your Home Regularly

Check for leaks in:

  • Roofs
  • Windows
  • Pipes

Fixing small issues early prevents larger problems.

Seal Cracks and Gaps

Prevent water from entering your home by sealing any openings.

Dry Wet Areas Quickly

After rain or spills, dry affected areas within 24–48 hours. This reduces the chance of mold growth.

What to Do If Mold Develops

Even with precautions, mold can still appear. Acting quickly is essential.

Clean Small Areas

Use appropriate cleaning solutions such as vinegar or specialized mold removers.

Remove Damaged Materials

Heavily affected materials may need to be replaced.

Improve Conditions

Address the underlying cause, such as humidity or leaks.

Call Professionals

For large infestations, professional remediation is the safest option.

Long-Term Benefits of Mold Prevention

Taking preventive measures offers several advantages:

  • Protects your home’s structure
  • Improves indoor air quality
  • Reduces health risks
  • Saves money on repairs

Therefore, investing in prevention is always worthwhile.

Final Thoughts

Weather conditions play a significant role in mold growth. From high humidity to heavy rainfall, environmental factors can create the perfect conditions for mold to thrive.

Understanding the connection between Mold and Health highlights why prevention is so important. Mold is not just a cosmetic issue—it can impact your well-being and your home.

By controlling moisture, improving ventilation, and staying proactive, you can reduce the risk of mold growth. In the end, protecting your home from weather-related mold starts with awareness and timely action.


Things to Know Before Hiring a Bathroom Remodeling Contractor in San Diego

Bathroom remodeling is a great way to update your home, enhance your living space, and even increase the value of your property. Whether you’re updating an outdated bathroom, fixing water damage, or completely redesigning the space, choosing the right contractor is essential. A bathroom remodeling project requires skill, attention to detail, and expertise, so finding a qualified and reliable contractor is key to achieving the results you want.

In this post, we’ll walk you through the important things you need to know before hiring a bathroom remodeling contractor in San Diego. From understanding your needs to finding a professional who can handle bathroom water damage repair in San Diego, we’ll cover everything you need to make an informed decision.

  1. Define Your Remodeling Goals

Before reaching out to any contractors, it’s important to clearly define your remodeling goals. The more specific you can be about what you want, the easier it will be to find a contractor who can meet your expectations.

  • What’s your vision? Are you looking for a simple update with new fixtures and paint, or do you have a more ambitious plan involving changes to the layout or plumbing? Understanding the scope of your project will help you narrow down contractors who specialize in the kind of work you need.
  • What’s your budget? Setting a clear budget is essential. Knowing how much you’re willing to spend on your bathroom remodel will help contractors suggest realistic solutions and prevent surprises down the road.
  • Specific needs: If you’re dealing with bathroom water damage repair in San Diego, make sure to outline the areas that need to be addressed—whether it’s fixing leaks, replacing damaged flooring, or addressing mold issues.

Having a clear vision will make it easier to communicate your expectations with potential contractors, helping you find the best fit for your project.

  1. Research Contractors and Gather Recommendations

Once you have a clear idea of what you want, the next step is finding potential bathroom remodeling contractors. In San Diego, there are numerous options available, so it’s essential to do thorough research to ensure you hire the right one.

  • Ask for recommendations: Reach out to friends, family, or neighbors who have recently completed bathroom remodels. Personal referrals are often the best way to find a trusted contractor who delivers high-quality work.
  • Search online: Look for bathroom remodeling companies with strong reviews on Google, Yelp, and other review platforms. Check for consistency in positive feedback, particularly regarding timeliness, professionalism, and quality of work.
  • Check credentials: Ensure the contractors you’re considering are licensed and insured. A licensed contractor has met the necessary standards and regulations in San Diego, ensuring that the job will be done safely and professionally.

By gathering recommendations and conducting thorough research, you can narrow down your options and start reaching out to potential contractors for quotes.

  1. Review Experience and Specialization

Not all contractors are created equal, and each will bring different strengths to the table. When hiring a bathroom remodeling contractor, experience and specialization are crucial factors to consider.

  • Experience with bathroom remodels: While a general contractor can handle a variety of projects, look for a contractor who specializes in bathroom remodeling. They will have the expertise to handle the unique challenges of bathroom design, such as plumbing, tiling, and waterproofing.
  • Experience with bathroom water damage repair: If you’re dealing with water damage, look for a contractor who has specific experience in repairing bathroom water damage. They will understand how to identify the underlying issues and ensure that repairs are done properly to prevent future damage.
  • Previous work: Ask the contractor for a portfolio of their past bathroom remodeling projects. This will help you assess the quality of their work and get a better idea of their design style and capabilities.

Choosing a contractor with the right experience and specialization ensures that your project will be completed to a high standard and that potential issues are handled effectively.

  1. Get Multiple Estimates and Compare Quotes

When you’ve found a few contractors that meet your requirements, it’s time to get estimates. A detailed quote is an essential part of hiring a contractor, as it gives you an idea of the cost and helps you compare different options.

  • Detailed estimates: Ensure that the estimate includes all aspects of the project, including labor, materials, and any additional fees. A detailed breakdown will help you understand where your money is going and avoid hidden costs.
  • Get multiple quotes: Always get at least three estimates before making your final decision. Comparing quotes will give you a sense of the going rates for bathroom remodeling in San Diego and help you identify any contractors whose prices are significantly higher or lower than the others.
  • Ask about the timeline: In addition to cost, ask each contractor for an estimated timeline for the project. A reputable contractor should be able to give you a realistic idea of how long the work will take based on your specific needs.

Getting multiple estimates allows you to make an informed decision based on both cost and quality. Remember, the lowest price isn’t always the best choice—consider the value each contractor provides.

  1. Check for Insurance and Licensing

Before you sign a contract, make sure the contractor is properly licensed and insured. This is a crucial step to ensure that your project is completed safely and professionally.

  • Licensing: In San Diego, contractors are required to hold a valid license to perform work on homes. Ask the contractor to provide their license number and verify it with the California Contractors State License Board (CSLB) to confirm that it’s active and in good standing.
  • Insurance: A licensed contractor should also have insurance, including liability insurance and workers’ compensation. This protects you in case of accidents, damage, or injury during the project. Make sure to ask for proof of insurance before hiring a contractor.

Hiring a licensed and insured contractor protects both you and the contractor, ensuring that your project is completed legally and safely.

  1. Review Contract and Terms

Once you’ve chosen a contractor, it’s time to sign a contract. A written agreement outlines the details of the project, including the scope of work, materials, timeline, and payment terms. Make sure the contract is clear and comprehensive to avoid misunderstandings.

  • Scope of work: The contract should clearly define the work to be completed, including the materials and finishes to be used. If you’re dealing with bathroom water damage repair, make sure the contract specifies the areas that will be addressed and how.
  • Timeline: The contract should include a realistic timeline for the completion of the project. Make sure it also includes provisions for delays, as unexpected issues can arise during renovations.
  • Payment terms: Understand the payment schedule outlined in the contract. Most contractors require a deposit upfront, with the remaining balance paid at different stages of the project. Be wary of contractors who ask for a large upfront payment.

A clear, detailed contract ensures that both you and the contractor are on the same page and helps prevent any disputes during the remodeling process.

  1. Communication and Project Management

Effective communication is key to a successful bathroom remodel. The contractor should keep you informed at every stage of the project, from start to finish.

  • Regular updates: Make sure the contractor provides regular updates on the progress of the project. If issues arise, they should communicate them promptly and provide solutions.
  • Point of contact: Establish a clear point of contact for questions or concerns during the remodel. It could be the contractor themselves or a project manager, but ensure you know who to reach out to.

Good communication helps ensure that your bathroom remodel goes smoothly and that any issues are addressed in a timely manner.

Conclusion: Choosing the Right Bathroom Remodeling Contractor

Hiring a bathroom remodeling contractor is an important decision that will impact the success of your project. By following these steps—defining your goals, researching contractors, checking credentials, getting multiple estimates, and reviewing contracts—you can ensure that you choose a qualified professional who meets your needs. Whether you’re dealing with bathroom water damage repair or looking to redesign your space, selecting the right contractor will make all the difference in achieving a successful and stress-free renovation.

professional kitchen remodeling services

Smart Ways to Upgrade Your Home with Professional Kitchen Remodeling Services

The kitchen is often considered the heart of the home. It’s where meals are prepared, memories are made, and families gather. If you’re looking to enhance your home’s functionality and aesthetic appeal, a kitchen remodel is a smart investment. However, a successful kitchen remodeling project requires the expertise of professional kitchen remodeling contractors who can turn your vision into reality. In this post, we’ll explore smart ways to upgrade your home with professional kitchen remodeling services. From layout adjustments to selecting the right materials, we’ll guide you through the process of creating a kitchen that fits your needs and style.

  1. Create an Open Concept Layout

One of the most popular trends in kitchen remodeling is an open concept layout. This design philosophy removes barriers between the kitchen and other areas of the home, creating a more spacious and interactive living environment.

  • Why it works: An open concept kitchen allows for better flow and increased interaction between the cook and guests. It also makes the space feel larger and more welcoming, especially in homes with smaller kitchens.
  • Professional input: Professional kitchen remodeling contractors can help you decide if your home is suitable for an open concept kitchen. They will assist with structural changes like removing walls or repositioning appliances, ensuring that the redesign aligns with the overall flow of your home.

With the help of experienced kitchen remodeling services, you can transform your kitchen into a functional and social space.

  1. Upgrade Your Cabinets for Style and Storage

Cabinets are one of the most important components of any kitchen. They not only provide essential storage but also define the room’s aesthetic. Upgrading your cabinets can improve both the functionality and visual appeal of your kitchen.

  • Cabinet styles: From traditional to modern, there are countless cabinet styles to choose from. Professional kitchen remodeling contractors can help you select the best design that suits your taste and the overall style of your home.
  • Maximizing storage: A well-designed cabinet layout can maximize your storage space. Consider incorporating pull-out shelves, deep drawers, and built-in organizers to optimize space. These upgrades will make it easier to store kitchen tools and reduce clutter.

Whether you’re looking for a complete cabinet replacement or a simple facelift, professional remodeling services can help you achieve a functional and stylish result.

  1. Invest in High-Quality Countertops

Countertops are an essential feature of your kitchen, providing both practical workspace and an aesthetic focal point. Choosing the right material is crucial for long-term durability and style.

  • Durable materials: Materials like granite, quartz, and marble are popular choices for high-end countertops due to their durability and easy maintenance. A professional kitchen remodeling service can help you choose the best countertop material for your needs, balancing beauty, durability, and budget.
  • Design considerations: The design of your countertops should complement the overall kitchen style. Whether you prefer sleek, modern finishes or warm, rustic textures, your kitchen remodeling contractors can help you select a material that enhances your space’s aesthetic.

Investing in high-quality countertops not only increases your kitchen’s functionality but also boosts your home’s resale value.

  1. Enhance Lighting to Create a Welcoming Atmosphere

Lighting plays a crucial role in the kitchen, both for practical use and ambiance. A well-lit kitchen is safer and more inviting, making it easier to prepare meals and entertain guests.

  • Layered lighting: Professional kitchen remodeling services can help you incorporate layered lighting into your design. This includes task lighting (for food prep areas), ambient lighting (to create mood), and accent lighting (to highlight certain features like cabinetry or artwork).
  • Energy-efficient options: LED lights are an energy-efficient choice that provides bright, long-lasting illumination. Additionally, under-cabinet lighting can illuminate countertops without taking up valuable space.

By upgrading your kitchen’s lighting, you can enhance its functionality, create a comfortable environment, and improve energy efficiency.

  1. Install New, Energy-Efficient Appliances

Upgrading to energy-efficient appliances can help you save money on utility bills while improving the functionality of your kitchen. Modern appliances are not only more energy-efficient but also feature advanced technologies that make cooking and cleaning more convenient.

  • Types of appliances to upgrade: Consider replacing old refrigerators, dishwashers, ovens, and stovetops with energy-efficient models. Look for appliances that have the ENERGY STAR label, which indicates they meet high energy efficiency standards.
  • Smart kitchen technology: Many modern kitchen appliances come with smart technology features, allowing you to control them remotely, set timers, and monitor energy usage through your smartphone.

By incorporating energy-efficient appliances into your kitchen remodel, you can reduce your environmental impact and lower your energy costs.

  1. Update Your Backsplash for a Fresh Look

The backsplash is an often-overlooked feature of the kitchen, but it can make a huge impact on the overall design. An updated backsplash can add personality, texture, and color to your kitchen, making it feel fresh and modern.

  • Tile options: Subway tiles, mosaic tiles, and patterned tiles are popular choices for backsplashes. Choose a tile that complements the color scheme of your kitchen and adds visual interest without overwhelming the space.
  • Low-maintenance materials: Materials like glass, ceramic, and porcelain tiles are easy to clean and maintain. Professional kitchen remodeling contractors can help you choose the best material that fits your design and lifestyle.

A stylish, updated backsplash is a relatively affordable way to enhance the look of your kitchen and create a focal point that ties the design together.

  1. Focus on Flooring for Durability and Style

The flooring in your kitchen must withstand heavy foot traffic, spills, and regular wear and tear. When remodeling your kitchen, choosing the right flooring is key to both functionality and aesthetics.

  • Flooring materials: Options like hardwood, tile, vinyl, and laminate are common choices for kitchens. Each material has its pros and cons in terms of durability, cost, and maintenance. A professional kitchen remodeling service can guide you in selecting the best flooring option based on your preferences and needs.
  • Water-resistant options: If you’re concerned about spills or moisture, consider water-resistant materials like tile or vinyl. These options are not only durable but also easy to clean, making them ideal for a high-traffic area like the kitchen.

Investing in quality, durable flooring ensures your kitchen remains both functional and visually appealing for years to come.

  1. Add Functional Islands or Breakfast Bars

If you have the space, adding a kitchen island or breakfast bar can greatly enhance both the functionality and style of your kitchen. An island can provide additional prep space, storage, and even seating, while a breakfast bar can create a more casual dining area.

  • Multi-purpose islands: Consider incorporating features such as built-in storage, a sink, or a cooktop into your kitchen island. This makes it even more functional and efficient for meal prep and cooking.
  • Breakfast bars: If you prefer a more casual, family-friendly space, a breakfast bar with stools can create a cozy dining area where family members can gather for meals or snacks.

A well-designed island or breakfast bar can elevate your kitchen’s functionality while adding extra storage and seating options.

  1. Consult with Professional Kitchen Remodeling Contractors

While DIY projects can be fun, kitchen remodeling is best left to the professionals. Hiring experienced kitchen remodeling contractors ensures that your project is completed on time, within budget, and to a high standard.

  • Expert guidance: Professional contractors bring years of experience and can provide valuable insights into design, layout, and materials. They can help you avoid common mistakes and make informed decisions throughout the remodel.
  • Efficient project management: Remodeling a kitchen involves coordinating many tasks, including demolition, plumbing, electrical work, and installation. A professional remodeling contractor will manage all aspects of the project, ensuring everything runs smoothly and stays on track.

Working with a professional contractor allows you to relax and enjoy the process, knowing that your kitchen remodel is in capable hands.

Conclusion: Transform Your Kitchen with Professional Remodeling Services

Upgrading your kitchen is one of the most rewarding home improvement projects you can undertake. Whether you’re looking to enhance your kitchen’s functionality, add style, or improve energy efficiency, professional kitchen remodeling services can help turn your vision into reality. From creating an open layout to selecting high-quality countertops and appliances, the right remodeling contractors will guide you through every step of the process.

By working with experienced professionals, you can ensure that your kitchen remodel is completed to the highest standards, creating a space that is both beautiful and functional for years to come.


Best Home Remodeling Company

How to Choose the Best Home Remodeling Company for Your Renovation Project

Embarking on a home renovation project is an exciting yet challenging experience. Whether you’re looking to update your kitchen, expand your living space, or completely transform your home, choosing the right home remodeling company can make all the difference in achieving your vision. With so many options available, it’s important to take the time to research and select a company that suits your specific needs, budget, and expectations. In this guide, we’ll walk you through the essential steps to help you choose the best home remodeling company for your renovation project.

  1. Define Your Renovation Goals and Budget

Before you begin searching for a home remodeling company, it’s crucial to have a clear understanding of your renovation goals and budget. Whether you’re planning affordable home renovations or more extensive custom home renovations, having a solid plan will help you narrow down your options and choose the right company for the job.

  • Set clear goals: Identify the areas of your home you want to renovate and the type of changes you wish to make. Are you aiming for a simple remodel, or do you have a more complex design in mind?
  • Determine your budget: Setting a budget is essential to ensure you don’t overspend. Be realistic about what you can afford and make sure to account for potential unexpected costs. It’s always a good idea to leave a buffer in your budget for unforeseen expenses.

Having a well-defined plan and budget will allow you to focus on contractors who specialize in the type of renovations you’re interested in and can work within your financial constraints.

  1. Research Home Remodeling Companies Near You

Finding home renovations near you is a great starting point when looking for a remodeling company. Working with a local company offers numerous benefits, including knowledge of local building codes, familiarity with local suppliers, and a better understanding of the area’s design trends.

  • Online reviews and ratings: Start by checking online reviews and ratings on platforms like Google, Yelp, or Angie’s List. Look for companies that have consistently positive feedback and a strong reputation for delivering quality work.
  • Ask for recommendations: Reach out to friends, family, and neighbors who have completed home renovations. Personal referrals can often lead you to trustworthy companies that have a track record of success.
  • Local expertise: A local remodeling company will likely have experience with the specific requirements and preferences of your area, which can be particularly helpful when planning custom home renovations.

Taking the time to research and narrow down companies near you will give you a shortlist of options to consider for your project.

  1. Check for Proper Licensing and Insurance

When hiring a home remodeling company, it’s essential to ensure that they are properly licensed and insured. This is crucial for protecting both you and the contractor throughout the renovation process.

  • Licensing: A reputable home remodeling company should have the appropriate licenses required by your state or local jurisdiction. Check to make sure the company is licensed to perform the work you need, whether it’s electrical, plumbing, or structural.
  • Insurance: A reliable remodeling company should also have adequate insurance coverage, including liability insurance and workers’ compensation. This protects you in case of accidents or damage during the project.

By choosing a licensed and insured company, you can avoid potential legal and financial issues down the road.

  1. Evaluate Their Portfolio and Previous Work

One of the best ways to assess the quality of a home remodeling company’s work is by reviewing their portfolio of completed projects. A reputable contractor will have a gallery of past projects that showcases their expertise and range of capabilities.

  • Review completed projects: Look through the company’s website or request a portfolio of their previous renovations. Pay attention to the type of projects they’ve handled, the quality of their work, and the overall style. This will give you an idea of their capabilities and whether their design approach aligns with your vision.
  • Request references: Ask the company for references from past clients who had similar renovation needs. Speaking directly to previous clients can give you insights into the contractor’s work ethic, communication, and ability to meet deadlines.
  • Custom home renovations: If you’re planning a custom home renovation, make sure the company has experience with tailored projects. Custom work requires a higher level of expertise, and you want to ensure the contractor has the skills to deliver exactly what you’re envisioning.

Evaluating a contractor’s past work and speaking to references can help you gauge the quality and reliability of their services.

  1. Meet with Multiple Contractors for Estimates

Once you’ve narrowed down your options, it’s time to meet with multiple home remodeling companies to discuss your project and get estimates. This step is essential for comparing pricing, services, and timelines.

  • Request detailed estimates: Ask for written estimates that break down the cost of materials, labor, and any other potential charges. A detailed estimate will help you understand what you’re paying for and prevent unexpected costs.
  • Ask about timelines: Inquire about the estimated start and completion dates for the project. Be realistic about the timeline, as renovations can sometimes take longer than expected due to unforeseen circumstances.
  • Communication: Pay attention to how the company communicates with you during the consultation. Are they responsive, clear, and willing to answer your questions? Effective communication is key to a successful renovation project.

Getting multiple estimates will give you a better understanding of the price range for your project and help you make an informed decision.

  1. Consider Their Design and Creativity

Home renovations, especially custom projects, require a level of design creativity and expertise. A good home remodeling company should be able to bring your vision to life while also offering innovative design solutions that enhance your home’s functionality and aesthetics.

  • Collaborative approach: Look for a company that listens to your ideas and offers suggestions for improvement. A good contractor will work with you to refine the design and find practical, creative solutions to your renovation challenges.
  • Design experience: If you’re planning a custom home renovation, it’s important to choose a company that has experience in the specific type of remodeling you’re considering, whether it’s a kitchen remodel, bathroom renovation, or whole-house makeover.

A company with strong design skills will help you achieve a renovation that’s not only functional but also aesthetically pleasing.

  1. Review Their Warranty and Aftercare Services

A reputable home remodeling company should stand behind their work with a warranty and aftercare services. This ensures that you’re protected if any issues arise after the project is completed.

  • Warranty coverage: Ask about the company’s warranty on materials and workmanship. A warranty gives you peace of mind knowing that the company will address any issues that occur after the renovation is completed.
  • Aftercare services: Some remodeling companies offer ongoing maintenance or check-ups after the project is finished. This is particularly important for larger or custom home renovations, as some issues may not become apparent until later.

A solid warranty and aftercare services can save you money in the long run by addressing problems before they become major issues.

Conclusion: Choosing the Right Home Remodeling Company

Selecting the right home remodeling company for your renovation project is an important decision that will affect the outcome of your project. By defining your goals and budget, researching companies near you, and evaluating their experience and expertise, you can find a contractor that meets your needs. Whether you’re looking for affordable home renovations or a custom project, taking the time to choose the right company will save you time, money, and stress in the long run.


kitchen and bathroom remodeling San Diego

Kitchen & Bathroom Remodeling Experts in San Diego and South Orange County

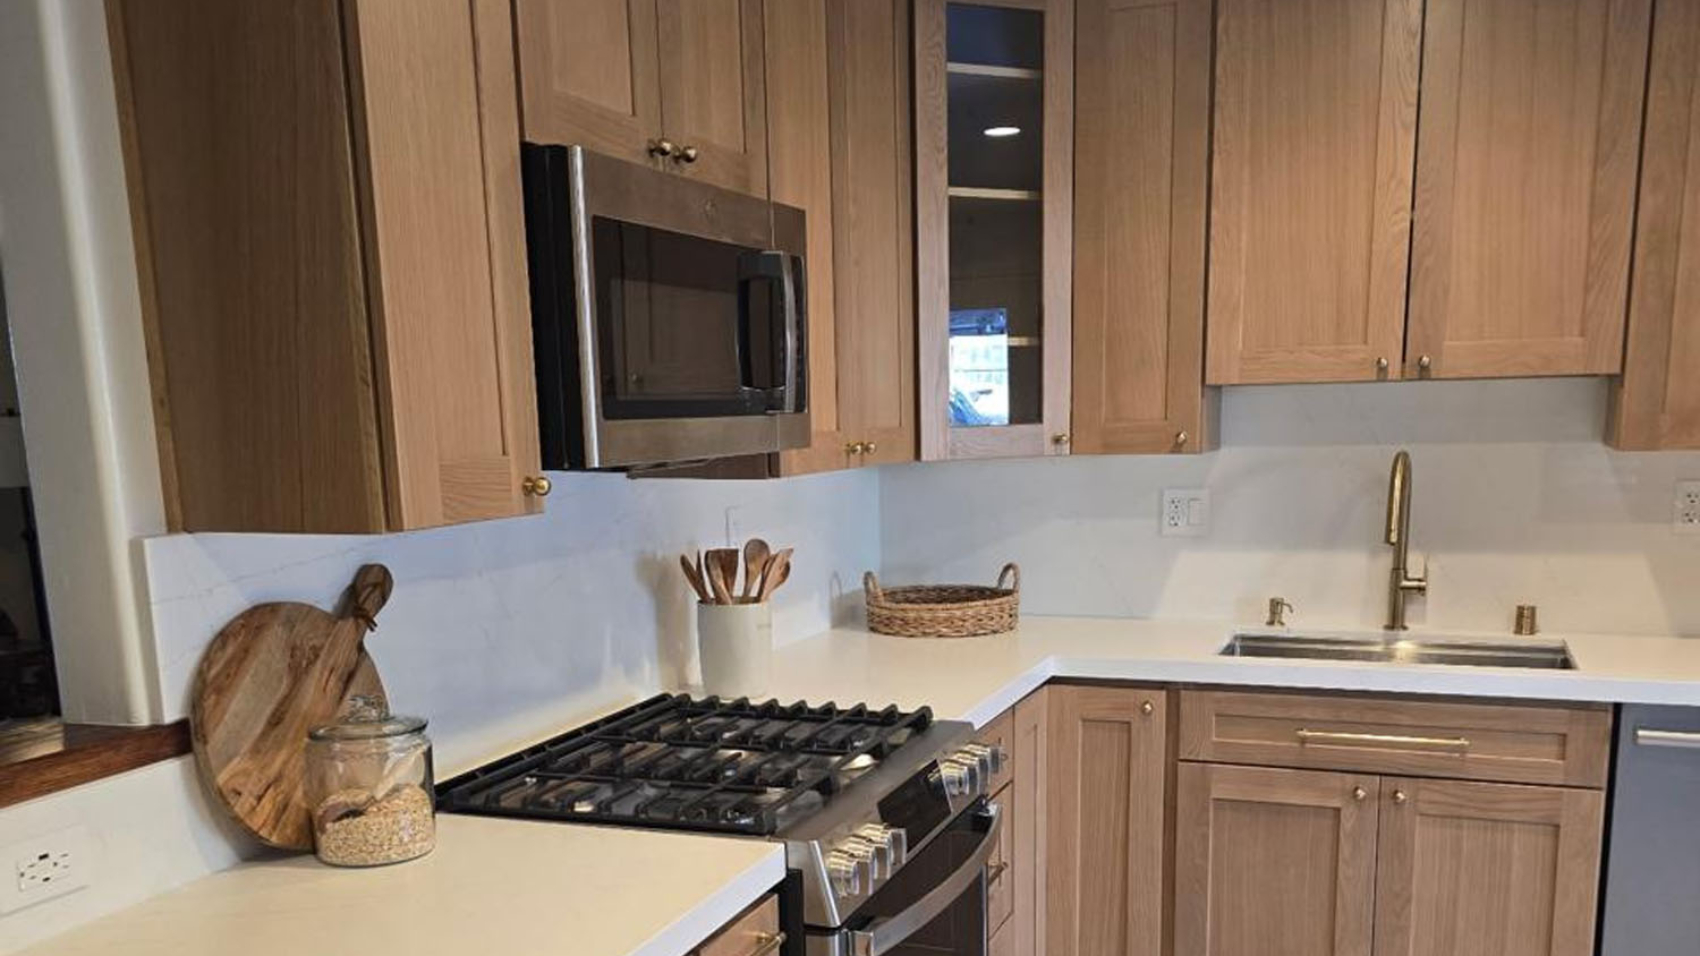
Kitchens and bathrooms are the heart of any home—and the most impactful spaces for comfort and resale value. At Rigid Remodeling and Restoration, we specialize in kitchen remodeling and bathroom remodeling in San Diego and South Orange County, combining modern design with technical precision to deliver results that are both stylish and functional.

From custom cabinetry and tile work to plumbing and lighting upgrades, every detail is handled with expert care. Because our team comes from an engineering background, we don’t just remodel—we build spaces that last.

And if your kitchen or bathroom project is tied to water damage, we’ll coordinate the entire insurance claim process so you don’t pay out of pocket for covered damages. That means less stress, less confusion, and more focus on your dream design.

Turn your kitchen and bathroom into spaces you love. Call Rigid Remodeling and Restoration for a free consultation today.

Litecoin coin and a pile of US dollar banknotes. Blockchain money versus fiat money concept

Home Remodeling Credits & Special Deals in San Diego

Remodeling is more than just an upgrade—it’s an investment in comfort, value, and peace of mind. At Rigid Remodeling and Restoration, we’re proud to offer special remodeling credits and deals in San Diego and South Orange County designed to make your project more affordable without compromising quality.

✅ Restoration Credit – $500 OFF your remodeling or restoration project when you move forward with us.
✅ Competitive pricing without cutting corners.
✅ Professional work backed by years of engineering and restoration expertise.

Whether you’ve just gone through water damage or are simply ready to refresh your space, our credits help you stretch your budget further. Combine these savings with our insurance claim assistance, and you’ll see why homeowners across Southern California trust us with their biggest projects.

Ready to remodel smarter? Contact Rigid Remodeling and Restoration today and claim your remodeling credit before your project begins.