questions to ask water damage company

Questions to Ask a Water Damage Restoration Company Before Hiring

Imagine waking up one morning and finding water all over your home—soaked carpets, damaged walls, and a lingering smell of dampness. Whether it’s from a burst pipe, a leaking roof, or flooding, water damage can quickly turn into a serious problem if not handled correctly. In these stressful moments, choosing the right restoration company becomes one of the most important decisions you’ll make.

Many homeowners rush into hiring the first available company, only to regret it later due to hidden costs, poor workmanship, or incomplete repairs. That’s why understanding the Questions to Ask a Water Damage Restoration Company Before Hiring is essential. The right questions can save you time, money, and a lot of frustration.

Why Asking the Right Questions Matters

Before diving into the specific Questions to Ask a Water Damage Restoration Company Before Hiring, it’s important to understand why this step is so critical. Water damage restoration is not just about removing visible water—it involves detecting hidden moisture, preventing mold growth, and restoring structural integrity.

If you skip this step and hire a company without proper evaluation, you risk ending up with incomplete repairs that lead to bigger problems later. Asking the right questions helps you identify experienced professionals who follow industry standards and deliver long-term solutions rather than temporary fixes.

Is the Company Licensed and Certified?

One of the first and most important Questions to Ask a Water Damage Restoration Company Before Hiring is whether the company holds proper licenses and certifications. These credentials indicate that the company meets professional standards and has undergone the necessary training.

Certified companies are more likely to follow established procedures for water extraction, drying, sanitization, and restoration. This ensures that the job is done correctly the first time, reducing the risk of future damage.

What Certifications Should You Look For?

Industry-recognized certifications such as IICRC (Institute of Inspection Cleaning and Restoration Certification) are strong indicators of professionalism. These certifications demonstrate that technicians are trained in best practices and updated techniques.

Companies with these credentials are also more likely to use advanced equipment and follow safety protocols, which ultimately benefits your property and your peace of mind.

How Much Experience Do They Have?

Another key point among the Questions to Ask a Water Damage Restoration Company Before Hiring is the company’s experience. Not all water damage situations are the same, and each case requires a tailored approach.

An experienced company can quickly assess the situation, identify hidden damage, and implement the most effective solution. This reduces downtime and prevents costly mistakes.

Why Real Experience Matters More Than Marketing

Some companies may have impressive marketing, but lack hands-on experience. Real-world experience allows technicians to handle unexpected complications effectively.

Additionally, experienced companies often have a portfolio of completed projects and positive customer feedback, which can help you make a more informed decision.

What Services Do They Offer?

When considering the Questions to Ask a Water Damage Restoration Company Before Hiring, it’s essential to understand the scope of services provided. Some companies only handle water extraction, while others offer full restoration services.

Choosing a company that provides comprehensive services can save you from the hassle of hiring multiple contractors and coordinating different stages of the project.

What Does a Full-Service Restoration Include?

A full-service company typically handles water removal, drying, dehumidification, mold prevention, cleaning, and structural repairs. This ensures continuity throughout the restoration process.

Having one team manage the entire project also minimizes miscommunication and delays, leading to faster and more efficient results.

How Long Will the Restoration Take?

Time is a crucial factor in water damage situations. The longer moisture remains, the higher the risk of mold growth and structural damage. That’s why this is one of the essential Questions to Ask a Water Damage Restoration Company Before Hiring.

Understanding the timeline helps you plan accordingly and ensures that the company has a clear process in place.

Do They Provide Realistic Timelines?

Reliable companies provide accurate and realistic timelines based on the extent of the damage. They don’t overpromise just to secure the job.

A well-planned timeline reflects the company’s experience and organizational skills, both of which are critical for successful restoration.

Do They Work with Insurance Companies?

Another important item in the list of Questions to Ask a Water Damage Restoration Company Before Hiring is whether the company works with insurance providers. Water damage is often covered by insurance policies, but the claims process can be complex.

A company familiar with insurance procedures can help streamline the process and ensure you receive the compensation you deserve.

Why Insurance Experience Is Valuable

Companies experienced in handling insurance claims know how to document damage properly and communicate with adjusters. This increases the chances of claim approval.

Without this expertise, you might face delays or even claim denials, leading to unexpected out-of-pocket expenses.

What Equipment and Technology Do They Use?

Modern equipment plays a vital role in effective restoration. One of the critical Questions to Ask a Water Damage Restoration Company Before Hiring is about the tools and technology they use.

Outdated equipment may fail to remove moisture completely, leaving hidden damage that can worsen over time.

How Advanced Equipment Improves Results

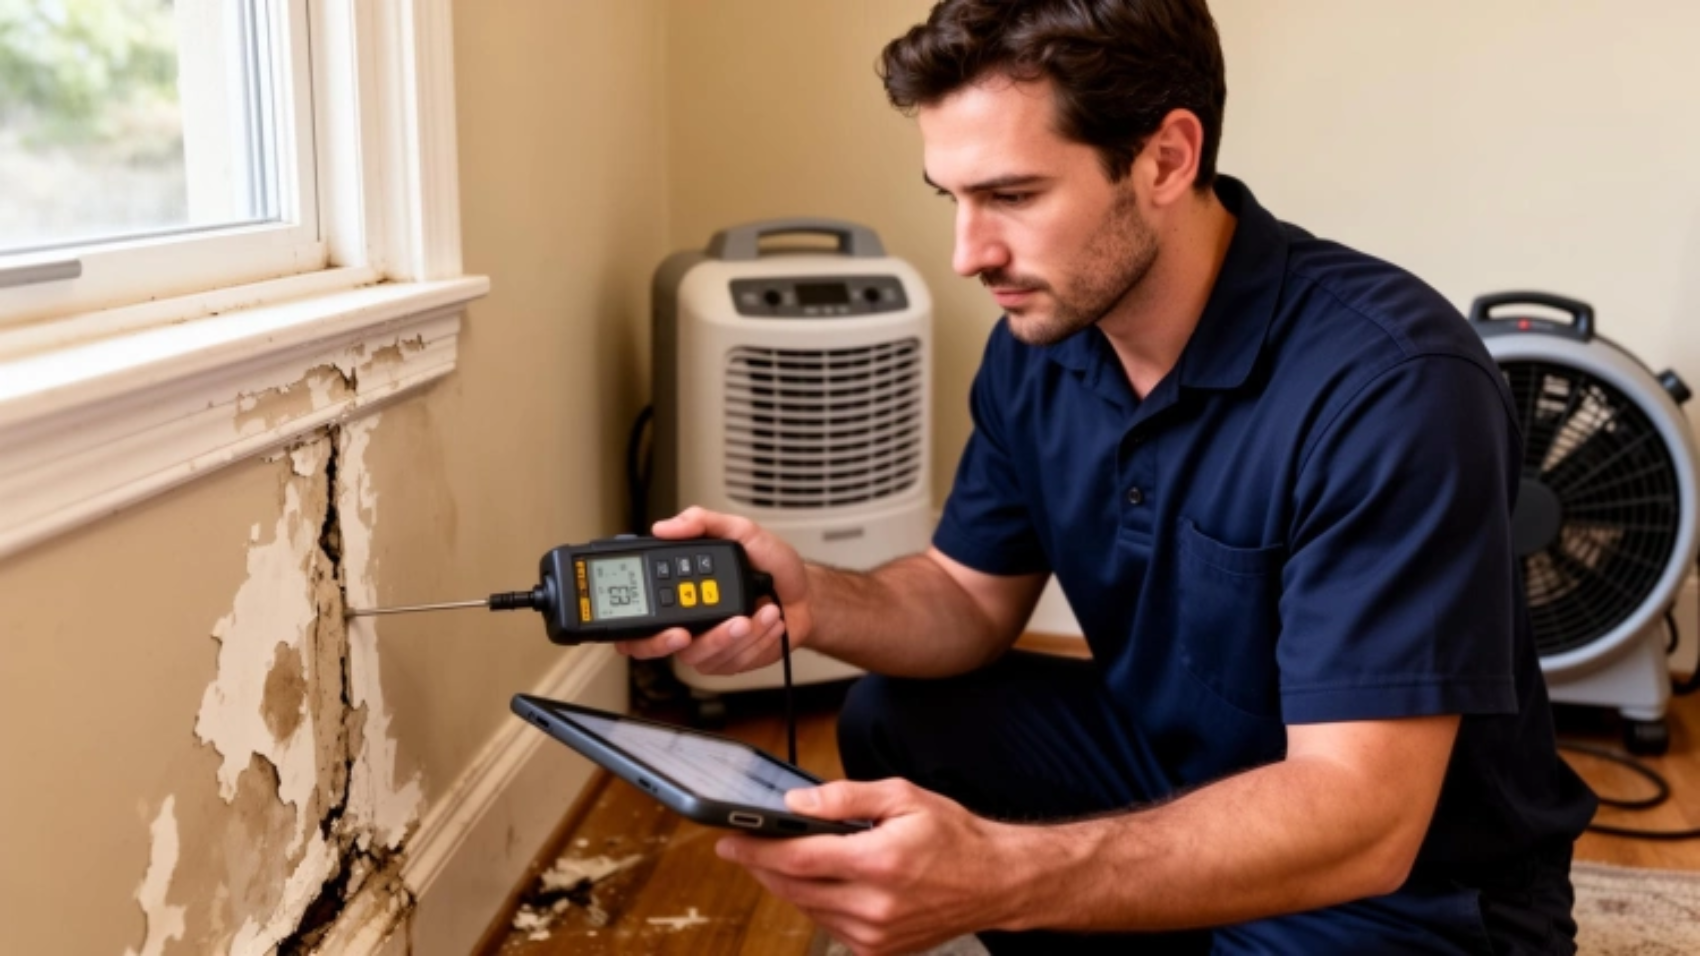
Professional-grade dehumidifiers, air movers, and moisture detection tools ensure thorough drying. These technologies help identify and eliminate moisture even in hard-to-reach areas.

Using advanced equipment not only speeds up the process but also ensures long-lasting results.

How Are Costs Estimated?

Cost transparency is a major concern for most homeowners. Among the essential Questions to Ask a Water Damage Restoration Company Before Hiring, understanding pricing is crucial.

Some companies offer low initial quotes but add hidden fees later, making the project more expensive than expected.

Do They Provide Clear Estimates?

A trustworthy company provides a detailed and transparent estimate before starting the work. This includes labor, materials, and any additional services.

Clear pricing helps you avoid surprises and ensures that you stay within your budget.

Do They Offer 24/7 Emergency Services?

Water damage doesn’t follow a schedule—it can happen anytime. That’s why this is one of the most practical Questions to Ask a Water Damage Restoration Company Before Hiring.

A company that offers emergency services can respond quickly and prevent further damage.

Why Fast Response Is Critical

Every hour counts when dealing with water damage. Quick action reduces the extent of damage and lowers repair costs.

Immediate response also helps prevent mold growth, which can begin within 24 to 48 hours.

Do They Provide a Warranty or Guarantee?

Another important point in the Questions to Ask a Water Damage Restoration Company Before Hiring is whether the company stands behind its work. A warranty indicates confidence in the quality of service provided.

Without a guarantee, you may have no recourse if issues arise after the project is completed.

What Should a Good Warranty Include?

A reliable warranty should cover workmanship and ensure that the problem will not recur within a specified period. Some companies also offer follow-up inspections.

This added layer of protection gives you peace of mind and ensures long-term satisfaction.

Final Thoughts

Choosing the right company for water damage restoration is not a decision to take lightly. By asking the right Questions to Ask a Water Damage Restoration Company Before Hiring, you can avoid costly mistakes and ensure that your property is restored properly.

Take your time, do your research, and don’t hesitate to ask detailed questions. A professional company will always be transparent and willing to provide clear answers. In the end, this careful approach will save you time, money, and stress while protecting your home for the long term.

Frequently Asked Questions

How soon should I call a water damage restoration company?

You should contact a restoration company immediately after discovering water damage. The sooner the process begins, the lower the risk of structural damage and mold growth. Quick action is essential for minimizing repair costs and preventing further issues.

Can I handle water damage restoration myself?

Minor cases might be manageable, but most situations require professional expertise. Without proper equipment and knowledge, you may miss hidden moisture, leading to long-term problems like mold and structural damage.

Does insurance always cover water damage restoration?

Not always. Coverage depends on the cause of the damage and your specific policy. Sudden and accidental damage is usually covered, while gradual issues like leaks may not be. It’s best to consult both your insurance provider and the restoration company.
ow Coastal Salt Air Affects Your Home’s Structure

Can Salt Air Increase Property Damage in Coastal Areas?

Living near the coast comes with many benefits: breathtaking views, fresh ocean air, and a calming lifestyle. However, homeowners in coastal regions often face unique challenges, particularly when it comes to property maintenance. One of the most significant threats is the effect of salt air on buildings and structures. Understanding how salt air contributes to coastal property damage is crucial for homeowners, property managers, and investors looking to protect their real estate investments.

Understanding Salt Air and Its Composition

Salt air, also known as sea air, contains high concentrations of sodium chloride and other minerals carried from the ocean by wind and waves. Unlike regular air, coastal air is laden with tiny salt particles that can settle on buildings, fences, vehicles, and other structures. While it may seem harmless, prolonged exposure can accelerate wear and tear, especially when combined with moisture, humidity, and wind.

The Chemical Impact on Building Materials

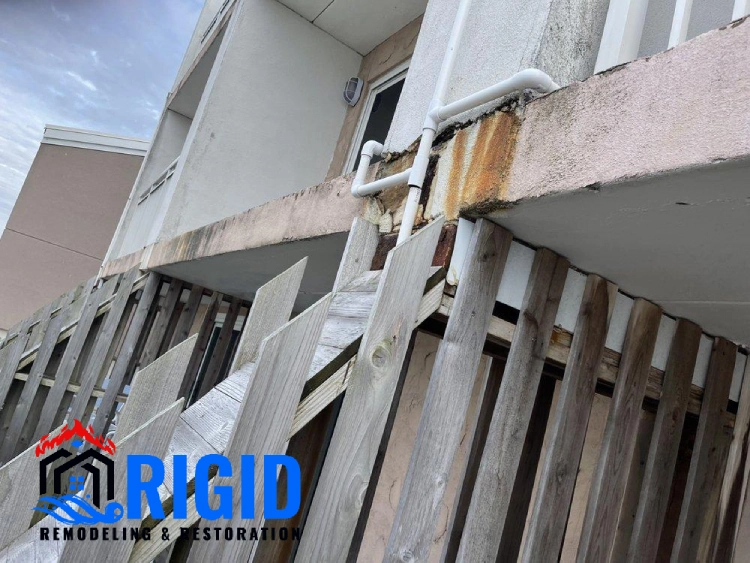
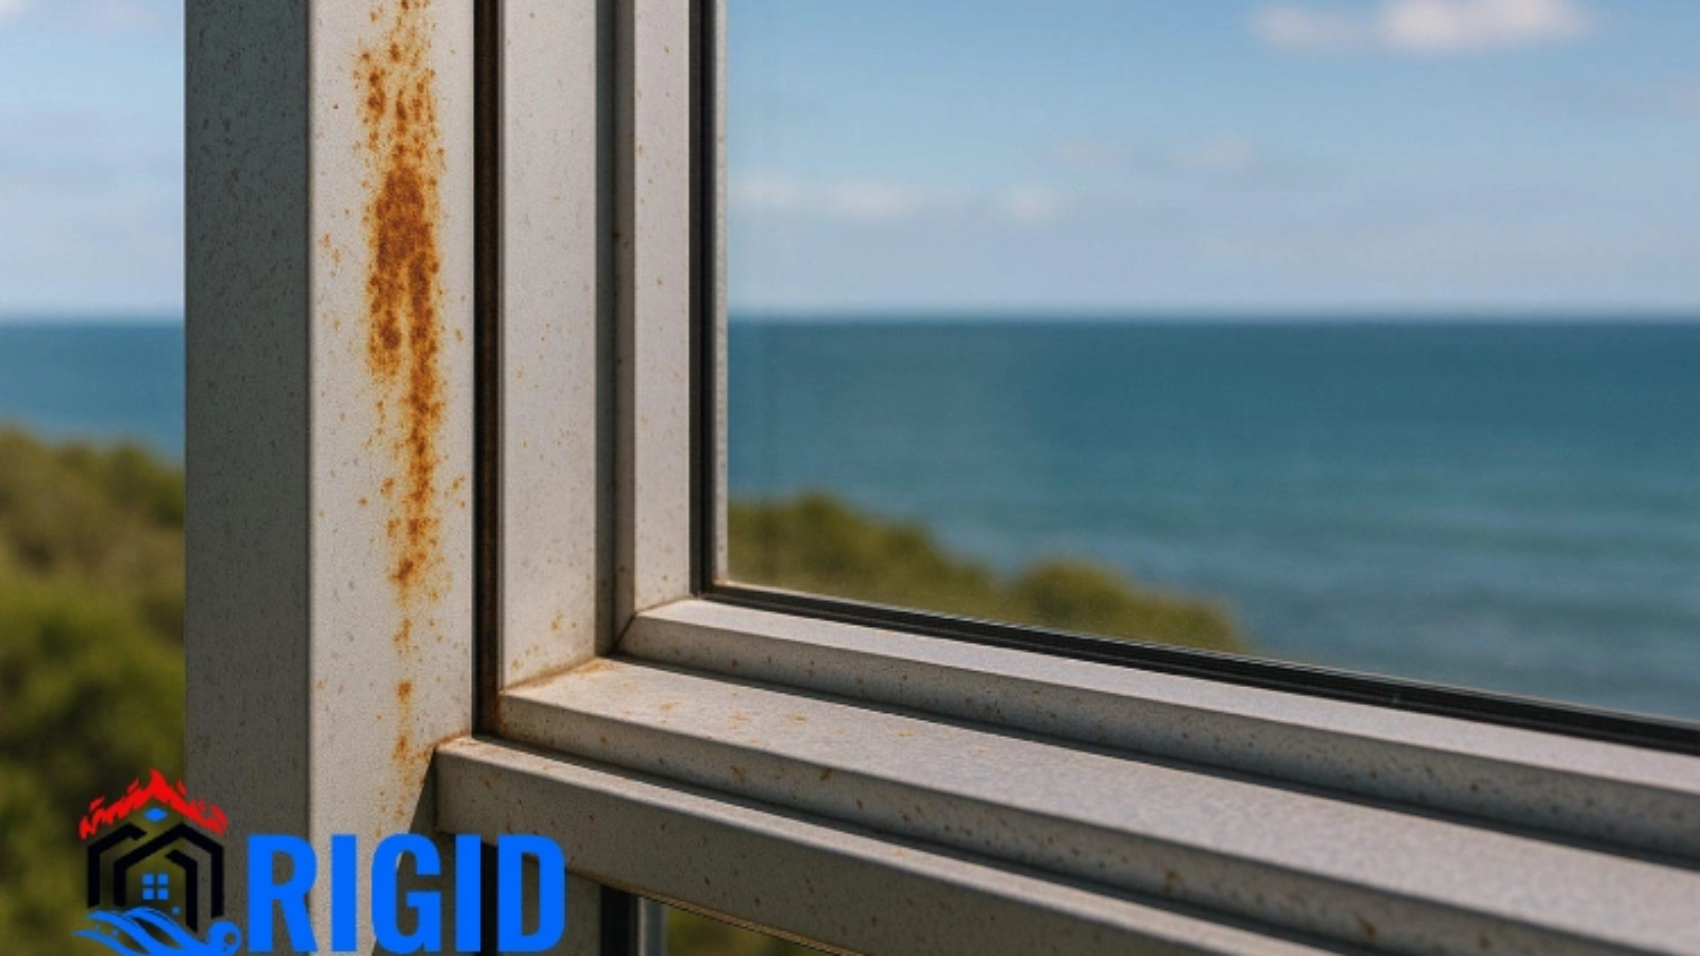
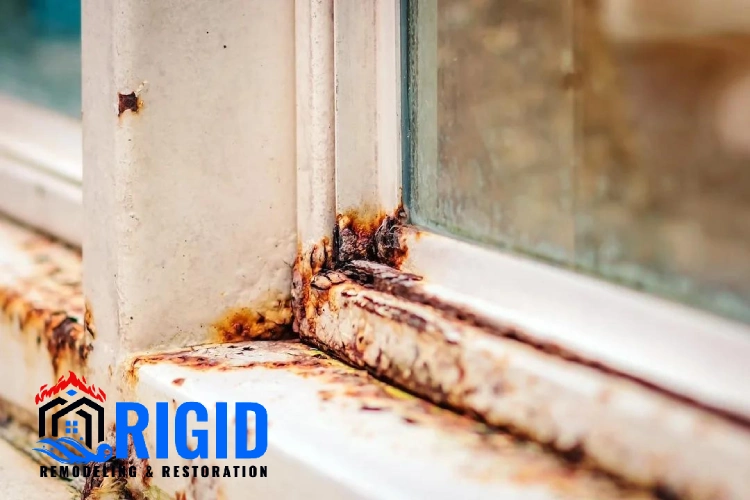
Salt is highly corrosive, particularly when it interacts with metal surfaces. Structures with steel, iron, or aluminum components are particularly vulnerable. When salt deposits accumulate on metal surfaces, they attract moisture from the atmosphere, creating a corrosive environment that accelerates rust and deterioration. Over time, this can compromise the structural integrity of railings, balconies, window frames, and roofing systems.

Even materials like concrete are not immune. Salt particles can penetrate concrete surfaces, causing chemical reactions that lead to cracking, spalling, and overall weakening of the material. Wooden surfaces exposed to salt air may absorb moisture more readily, promoting rot and fungal growth, further contributing to property damage.

Does Salt Air Damage Homes Near the Coast

Impact on Exterior Paint and Finishes

Salt air also takes a toll on paints and exterior finishes. Homes and commercial buildings located near the coast often experience peeling, fading, and blistering of paint over time. Salt particles cling to painted surfaces, making them more susceptible to moisture absorption. Combined with ultraviolet (UV) exposure from the sun, this leads to accelerated fading and degradation. Regular maintenance, including protective coatings and high-quality paint formulations, is essential to mitigate these effects.

How Coastal Winds Exacerbate Damage

In coastal regions, wind plays a significant role in spreading salt particles across surfaces. Strong ocean winds can carry salt spray far inland, reaching areas of the property that might otherwise seem protected. This constant exposure increases the rate of corrosion and surface wear. Properties situated on cliffs, beaches, or elevated terrain are particularly susceptible, as they experience more direct contact with salt-laden winds.

The Role of Humidity in Salt-Induced Damage

Humidity levels near the coast are naturally higher due to the proximity to large bodies of water. Moist, salty air accelerates corrosion and decay processes. Metal surfaces are prone to rusting, wooden structures are at higher risk of rot, and even masonry materials can deteriorate faster under these conditions. Controlling moisture through proper ventilation, dehumidification, and sealing is critical in minimizing damage caused by salt air.

Long-Term Effects on Property Value

Neglecting the impact of salt air can have serious long-term consequences for property value. Corrosion, rot, and structural damage reduce the lifespan of building components, necessitating expensive repairs or replacements. For homeowners, this translates to higher maintenance costs and potential difficulties in selling or insuring the property. Investors and property managers must account for these risks when evaluating coastal real estate investments.

Preventive Measures for Homeowners

Preventing salt-related damage requires proactive planning and maintenance. Here are some key strategies:

  1. Regular Inspections: Conduct frequent inspections of metal, wood, and concrete surfaces. Look for signs of rust, rot, or cracking. Early detection allows for timely repairs before problems worsen.
  2. Protective Coatings: Apply rust-resistant paints and sealants on metal surfaces. For wooden structures, use marine-grade varnishes or sealants that repel moisture and reduce the likelihood of rot.
  3. Quality Materials: Use corrosion-resistant materials such as stainless steel, aluminum, or treated wood for construction in coastal areas. These materials withstand salt exposure better than standard options.
  4. Landscaping Considerations: Plant trees and shrubs strategically to act as windbreaks, reducing direct exposure to salt-laden winds.
  5. Cleaning and Maintenance: Regularly rinse exterior surfaces with fresh water to remove salt deposits. This is particularly effective for vehicles, metal railings, and outdoor furniture.
  6. Roof and Gutter Protection: Inspect roofs and gutters for salt buildup and corrosion. Ensure proper drainage to prevent standing water, which can exacerbate salt-related damage.

The Impact of Salt Air on Coastal Property Damage

Understanding Insurance Implications

Property owners in coastal areas should also consider the insurance implications of salt air damage. Many standard homeowner policies do not cover corrosion or gradual deterioration caused by environmental factors. Reviewing policies carefully and considering additional coverage for coastal property risks can provide financial protection against unforeseen damages.

The Benefits of Professional Assessment

Hiring professional inspectors or restoration experts familiar with coastal property challenges can make a significant difference. These professionals can identify vulnerable areas, recommend appropriate materials, and develop maintenance plans that extend the life of the property. Advanced tools like corrosion mapping and moisture detection can pinpoint hidden issues before they escalate.

Conclusion

Salt air is a silent but powerful factor contributing to coastal property damage. From accelerating metal corrosion to weakening wood and concrete, its effects are pervasive and long-lasting. Homeowners and property managers must adopt preventive measures, choose durable materials, and maintain regular inspections to safeguard their investments. By understanding how salt air affects building materials and acting proactively, it’s possible to enjoy the coastal lifestyle while minimizing costly property damage.

FAQs

1. How does salt air damage properties in coastal areas?
Salt air contains tiny salt particles that can accelerate corrosion and deterioration of building materials. Over time, it can damage metal structures, outdoor equipment, roofing components, windows, and other exposed surfaces by causing rust and weakening materials.

2. What parts of a coastal property are most affected by salt air?
Metal fixtures, fences, balconies, HVAC units, plumbing components, exterior walls, and roofing materials are among the areas most vulnerable to salt air damage. Regular inspections and protective maintenance can help reduce the impact.

3. How can homeowners protect their property from salt air damage?
Homeowners can minimize salt air damage by using corrosion-resistant materials, applying protective coatings, cleaning exterior surfaces regularly, maintaining metal components, and repairing small signs of corrosion before they become major issues.

The Importance of Emergency Preparedness in Commercial Buildings

Why Commercial Buildings Need Emergency Response Plans

Commercial buildings face unique risks that can cause significant financial loss, structural damage, and endanger the safety of occupants. Water damage, fire, natural disasters, and other emergencies require immediate attention to minimize these risks. This is where an emergency response plan becomes critical. By having a structured plan in place, commercial property owners, managers, and tenants can respond effectively to unexpected events, ensuring safety, reducing downtime, and protecting assets.

Understanding Emergency Response Plans

An emergency response plan is a documented strategy outlining procedures to follow during emergencies. For commercial properties, this includes steps for evacuation, asset protection, communication, and damage mitigation. Unlike residential buildings, commercial structures have complex systems, multiple tenants, high-value equipment, and business operations that must be maintained. A comprehensive plan ensures a coordinated response that minimizes risk and accelerates recovery.

Importance of Emergency Response Planning in Commercial Buildings

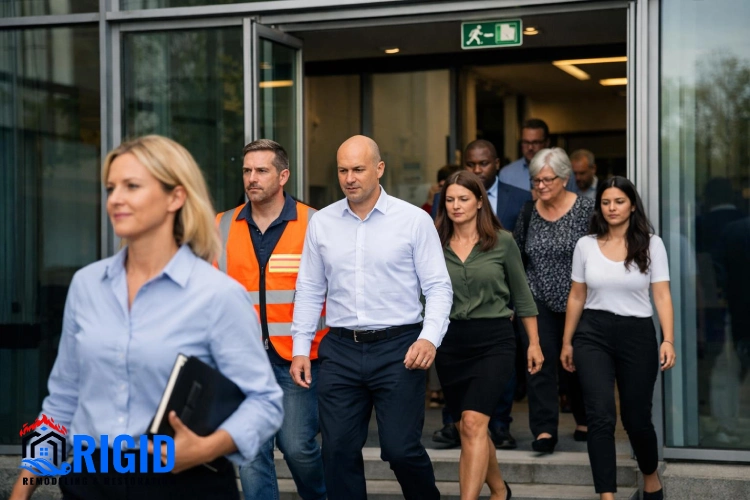
  1. Protection of Occupants: Safety is the top priority. A well-designed plan ensures employees, customers, and visitors know how to evacuate safely, access emergency exits, and locate safety equipment such as fire extinguishers or first aid kits.
  2. Reducing Property Damage: Rapid response can prevent minor incidents from escalating into severe damage. For instance, immediate action during water intrusion or flooding can reduce structural damage, protect electrical systems, and minimize content loss.
  3. Business Continuity: Downtime in commercial operations can result in lost revenue and reputational harm. Emergency response plans help maintain continuity by outlining backup systems, temporary relocation options, and communication protocols for stakeholders.
  4. Regulatory Compliance: Many commercial buildings are required by law to have emergency response procedures, fire safety protocols, and disaster preparedness measures. Having a plan ensures compliance with occupational safety and building regulations.

Key Components of a Commercial Emergency Response Plan

  • Risk Assessment: Identify potential hazards specific to the building, including flooding, fire, chemical spills, or power outages. Evaluating the likelihood and impact of each hazard informs the response strategies.
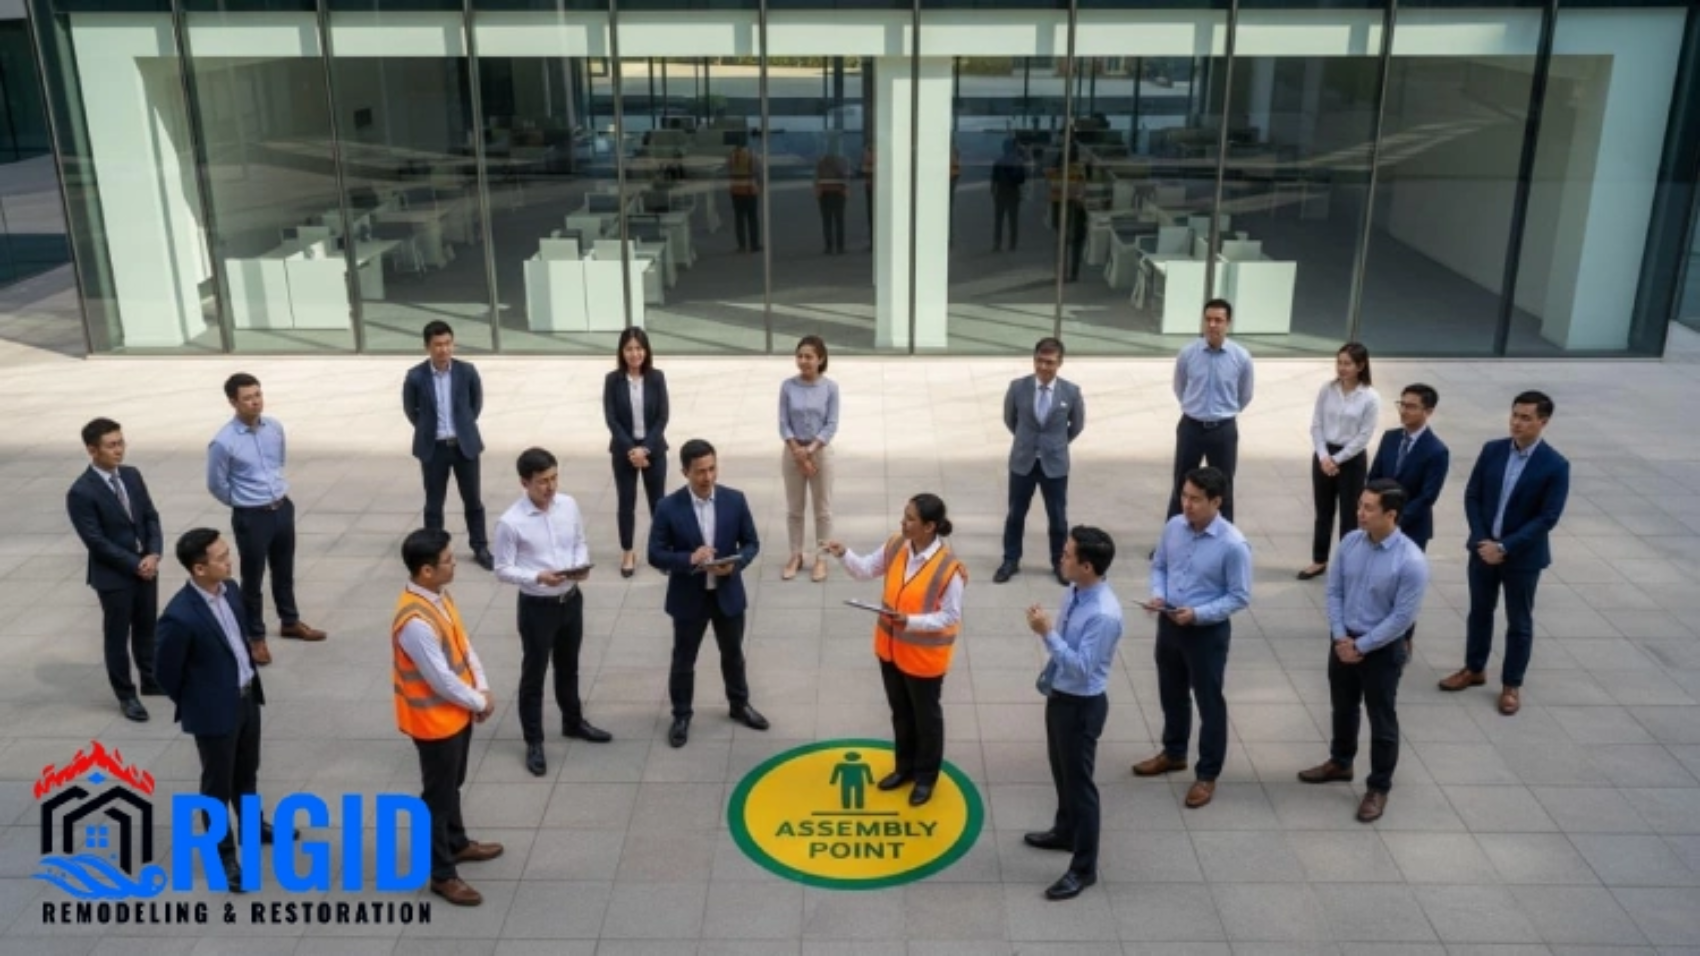
  • Evacuation Procedures: Clearly mark exits, define escape routes, and assign responsibilities to staff. Regular evacuation drills ensure that everyone understands their role.
  • Communication Protocols: Establish a chain of command and communication channels for emergencies. This includes alerts, notifications, and coordination with local emergency services.
  • Resource Allocation: Ensure that emergency supplies, such as first aid kits, fire extinguishers, and backup power systems, are available and accessible.
  • Mitigation Measures: Outline actions to reduce property damage, such as shutting off water or gas lines, moving equipment to safe zones, and initiating immediate mitigation services for water or fire damage.
  • Recovery Plan: Include post-incident procedures, such as assessment, repairs, insurance claims, and restoration efforts. Early planning reduces downtime and financial loss.

Water Damage and Emergency Response

Water damage is a common risk for commercial properties, caused by burst pipes, storms, flooding, or HVAC system failures. Without a prompt response, water can compromise structural integrity, promote mold growth, and damage critical equipment. Emergency response plans include immediate water extraction, professional mitigation, and drying procedures to minimize damage. Having a relationship with a certified restoration company ensures that commercial buildings receive rapid, professional assistance when water damage occurs.

Fire Safety and Response

Fire emergencies require clear and practiced response plans. Commercial buildings often house flammable materials, electrical equipment, and multiple tenants, making fire containment complex. Emergency response plans designate fire wardens, establish evacuation routes, and include coordination with local fire departments. They also outline steps to protect critical assets, secure important documents, and minimize operational disruptions.

Why Every Commercial Building Must Have an Emergency Plan

Benefits of Pre-Planning

  1. Faster Response Times: Having a plan ensures that staff can act immediately, reducing the severity of property damage and protecting occupants.
  2. Cost Savings: Timely intervention during water or fire emergencies minimizes repair and restoration costs. Early mitigation prevents secondary damage such as mold or structural decay.
  3. Insurance Compliance: Insurers often require documented emergency procedures to validate claims. A prepared building demonstrates proactive risk management, potentially lowering premiums.
  4. Staff Confidence: Employees trained in emergency procedures are less likely to panic during an actual event, promoting safety and order.

Implementing an Emergency Response Plan

  • Conduct a detailed risk assessment for the property
  • Develop written procedures and assign responsibilities
  • Train staff and tenants on emergency protocols
  • Conduct regular drills to practice evacuation and mitigation procedures
  • Establish relationships with local emergency services and professional restoration companies
  • Review and update the plan periodically to address new risks or changes in building operations

Conclusion

Commercial buildings face unique challenges that require careful planning for emergencies. From water damage and fire to natural disasters, having a structured emergency response plan ensures the safety of occupants, minimizes property damage, and supports business continuity. Rapid response reduces financial losses, preserves valuable assets, and helps maintain regulatory compliance.

Frequently Asked Questions (FAQ)

1. Why are emergency response plans essential for commercial buildings?
Emergency response plans are crucial because they help protect lives, reduce property damage, and ensure a fast, organized reaction during unexpected events like fires, earthquakes, or security threats. Without a clear plan, confusion and delays can increase risks and worsen the situation.

2. What should be included in a commercial building emergency response plan?
A comprehensive plan should include evacuation procedures, emergency contact information, roles and responsibilities for staff, communication strategies, and protocols for different types of emergencies. Regular training and drills should also be part of the plan to ensure preparedness.

3. How often should emergency response plans be updated and practiced?
Emergency response plans should be reviewed and updated at least once a year or whenever there are major changes in the building or staff. Drills should be conducted regularly to ensure everyone knows what to do in real emergency situations.

Chicago-United-States-At-Night-420x420-1-640x640

Why Apartment Buildings Face Unique Water Damage Challenges

Apartment buildings are inherently complex structures, and water damage in these properties presents unique challenges compared to single-family homes. Multiple units, shared plumbing systems, common areas, and high occupant density all contribute to the complexity of water damage management. Understanding these challenges is crucial for property managers, building owners, and residents to prevent extensive damage and ensure timely restoration.

Shared Plumbing Systems and Multi-Unit Risks

Apartment buildings typically have interconnected plumbing systems, which means a single pipe failure or leak can affect multiple units. A burst pipe in one apartment can lead to ceiling or wall damage in neighboring units. Shared drainage systems can also result in overflow issues during heavy usage or blockages, compounding water damage problems.

Managing these risks requires building-wide inspections, routine maintenance of plumbing infrastructure, and prompt mitigation whenever a leak occurs. Preventive measures such as pressure testing, pipe insulation, and regular cleaning of drains can reduce the likelihood of widespread damage.

Multiple Occupants and Varying Water Use

High occupant density increases the risk of water damage due to varying water usage patterns. Overloaded plumbing systems, frequent appliance use, and improper maintenance can all contribute to leaks or system failures. Apartment managers must account for these variables and ensure that plumbing systems are robust enough to handle daily demand.

Education for residents on proper water usage, immediate reporting of leaks, and timely repairs are essential for minimizing damage. Early intervention prevents small leaks from escalating into multi-unit emergencies.

Complex Structural Design

Apartment buildings often feature multiple stories, shared walls, and complex layouts. Water can travel along beams, walls, and floors, making it difficult to detect and contain. Hidden water behind walls or ceilings can compromise structural integrity and spread mold quickly across units.

Professional water damage assessments often involve infrared cameras and moisture meters to locate hidden water. Early detection is critical to prevent structural deterioration and mold proliferation, particularly in multi-story buildings where water can migrate vertically.

Common Water Damage Sources in Apartments

  • Appliance Failures: Washing machines, dishwashers, and water heaters are common sources of leaks.
  • Roof and Window Leaks: Multi-story buildings are particularly vulnerable to roof leaks and water intrusion through windows during storms.
  • Sewer and Drain Backups: Shared drainage systems increase the risk of backups affecting multiple units.
  • HVAC Condensation: Improperly maintained HVAC systems can leak moisture into walls and ceilings.

Challenges in Mitigation and Restoration

Restoring water damage in apartment buildings presents logistical challenges:

  1. Access Restrictions: Coordinating entry to multiple units requires communication with residents and property managers.
  2. Cross-Unit Contamination: Water can migrate to adjacent units, complicating mitigation and requiring multiple treatment areas.
  3. Mold Risk: Shared ventilation systems and hidden moisture can accelerate mold growth across units, increasing health hazards.
  4. Tenant Safety and Comfort: Restoration work must minimize disruption while ensuring the building remains safe for occupants.

Professional restoration teams bring specialized equipment and experience to handle multi-unit water damage efficiently. Industrial-grade water extraction tools, drying equipment, and containment measures ensure that damage is addressed quickly and comprehensively.

Preventive Strategies for Apartment Buildings

  • Routine Plumbing Maintenance: Inspect pipes, drains, and appliances regularly to prevent leaks.
  • Moisture Monitoring: Install sensors in high-risk areas such as basements, laundry rooms, and utility spaces.
  • Roof and Window Inspections: Check for damage and seal potential entry points before storm seasons.
  • Resident Education: Encourage tenants to report leaks immediately and follow water usage guidelines.
  • Emergency Response Plan: Develop a clear protocol for handling water damage incidents, including mitigation steps and professional restoration contacts.

Insurance Considerations

Water damage in apartment buildings often involves multiple units, which can complicate insurance claims. Property managers should understand the scope of coverage, including structural, common areas, and tenant belongings. Prompt reporting and documentation of water damage events are critical to ensuring proper reimbursement and mitigating liability.

Conclusion

Apartment buildings face unique water damage challenges due to shared plumbing, multiple occupants, complex structures, and hidden water migration. Proper maintenance, early detection, and professional restoration are essential for preventing extensive damage and protecting both property and residents.


defeated-woman-sitting-desk-looking-computer

Why Drying Equipment Matters More Than Most Homeowners Think

Water damage in homes and commercial buildings can have devastating effects if not properly addressed. While removing standing water is the first step, effective drying is equally critical. Many homeowners underestimate the importance of professional drying equipment, yet it plays a vital role in preventing secondary damage, mold growth, and long-term structural problems. Understanding why drying equipment matters can save property owners thousands of dollars and protect the health of occupants.

The Role of Drying Equipment in Water Damage Restoration

After water intrusion, moisture can seep into walls, floors, ceilings, and structural components. Even when visible water is removed, residual moisture can linger, creating ideal conditions for mold, mildew, and wood rot. Drying equipment is designed to accelerate the evaporation of this hidden moisture, restoring affected areas to safe, dry conditions.

Key Types of Drying Equipment

  1. Industrial Dehumidifiers: These machines remove excess moisture from the air, lowering relative humidity and preventing condensation. Dehumidifiers are essential for large spaces and high-moisture environments.
  2. High-Volume Air Movers: Powerful fans circulate air across wet surfaces, speeding up the drying process. Proper placement ensures even airflow and prevents pockets of trapped moisture.
  3. Heaters and Warm Air Devices: Controlled heat can enhance drying efficiency, especially in colder areas where evaporation is slower.
  4. Moisture Meters and Sensors: These tools monitor humidity and moisture levels in real time, allowing restoration professionals to track drying progress and target problem areas.

Preventing Secondary Damage

One of the most significant reasons drying equipment is critical is the prevention of secondary damage. Without thorough drying, water can:

  • Weaken Structural Materials: Wood swells and warps, drywall deteriorates, and metal corrodes.
  • Promote Mold Growth: Mold can develop within 24–48 hours, spreading quickly through porous materials.
  • Damage Personal Property: Furniture, electronics, and textiles may become irreparably damaged.

Using professional drying equipment ensures that all areas are properly dried, mitigating these risks and reducing the likelihood of costly repairs.

Health Benefits of Proper Drying

Excess moisture promotes mold and bacteria growth, which can cause respiratory problems, allergic reactions, and other health hazards. Proper drying using industrial-grade equipment reduces moisture levels quickly, creating a safer environment for occupants and preventing health complications associated with prolonged damp conditions.

Efficiency and Speed

Professional drying equipment works faster and more efficiently than standard household fans or dehumidifiers. Large-scale water damage, such as flooding or major leaks, requires high-capacity machinery to restore the property effectively. Rapid drying prevents further damage and reduces downtime for homeowners or commercial operations.

Insurance Considerations

Insurance claims often require proof that water damage was addressed promptly and professionally. Using certified drying equipment, along with proper documentation, demonstrates proactive mitigation. This can support claims, reduce disputes, and potentially increase reimbursement for damage repairs.

DIY vs. Professional Equipment

Many homeowners attempt to dry affected areas with household fans or portable dehumidifiers, but these are often insufficient. Professional drying equipment provides higher airflow, greater moisture removal capacity, and more precise monitoring. Attempting DIY drying can leave residual moisture, leading to mold growth, structural weakening, and long-term damage.

Integrating Drying Into Restoration Plans

Professional restoration companies incorporate drying equipment into comprehensive water damage management plans. After water extraction, specialized air movers and dehumidifiers are deployed strategically to target affected areas. Continuous monitoring ensures that moisture levels are reduced to safe thresholds, and final inspections confirm that the property is fully restored.

Conclusion

Drying equipment is a crucial component of water damage restoration, often underestimated by homeowners. Its role extends beyond simple water removal, preventing mold growth, structural deterioration, and secondary damage. Industrial dehumidifiers, air movers, and moisture monitoring tools provide efficiency, precision, and health protection, ensuring properties are fully restored after water intrusion.

images (4)_11zon (2)

How Mold Can Affect Indoor Air Quality

Mold growth in homes and commercial buildings is more than a cosmetic problem—it has a significant impact on indoor air quality and occupant health. Moist environments, water damage, and poor ventilation create ideal conditions for mold, which releases spores and volatile organic compounds (VOCs) into the air. Understanding how mold affects indoor air quality is essential for homeowners, property managers, and restoration professionals seeking to maintain a safe and healthy environment.

The Relationship Between Mold and Air Quality

Mold reproduces by releasing spores into the air. While spores are naturally present in the environment, high concentrations indoors can compromise air quality. These spores are lightweight and easily inhaled, allowing them to travel through ventilation systems, carpets, and upholstery. Prolonged exposure can irritate the respiratory system, trigger allergies, and exacerbate asthma.

Mold also produces VOCs, which contribute to musty odors and can further degrade indoor air quality. Even small amounts of mold growth in hidden areas, such as behind walls or under flooring, can release enough spores and VOCs to impact occupants’ health.

Common Health Effects of Mold Exposure

Exposure to mold can result in a range of health issues, depending on the individual’s sensitivity and the type of mold present:

  • Allergic Reactions: Sneezing, runny nose, itchy eyes, and skin rashes are common responses.
  • Respiratory Problems: Individuals with asthma or chronic respiratory conditions may experience wheezing, shortness of breath, or asthma attacks.
  • Sinus and Throat Irritation: Mold spores can irritate mucous membranes, causing congestion, coughing, and sore throats.
  • Headaches and Fatigue: VOCs produced by mold may contribute to headaches, dizziness, and general fatigue.
  • Serious Health Risks: Certain molds, such as Stachybotrys chartarum (black mold), produce mycotoxins that can cause more severe respiratory and neurological effects, particularly in vulnerable populations such as children, the elderly, or immunocompromised individuals.

How Mold Develops Indoors

Mold requires moisture, a food source, and suitable temperatures to thrive. Common causes of indoor mold include:

  1. Water Intrusion: Leaks from roofs, plumbing failures, or flooding introduce moisture into building materials.
  2. High Humidity: Indoor relative humidity above 60% creates favorable conditions for mold growth.
  3. Condensation: Poor insulation or inadequate ventilation can cause moisture accumulation on walls, ceilings, and windows.
  4. Organic Materials: Drywall, wood, carpeting, and fabrics provide nutrients for mold spores to grow.

The Importance of Early Detection

Early detection of mold is critical to maintaining healthy indoor air quality. Signs of mold growth include musty odors, visible discoloration or black spots, and persistent dampness. Professional mold inspections use moisture meters, thermal imaging, and air sampling to detect hidden mold and assess the severity of contamination.

Mitigation and Air Quality Improvement

Proper mold remediation not only removes visible mold but also improves indoor air quality by eliminating spores and VOCs. Key steps include:

  • Containment: Preventing spores from spreading to unaffected areas during cleanup.
  • Removal: Cleaning or replacing contaminated materials, such as drywall, insulation, and carpets.
  • Air Filtration: Using HEPA filters and air purifiers to capture spores and reduce airborne contaminants.
  • Moisture Control: Drying wet areas, repairing leaks, and maintaining humidity below 50% to prevent mold recurrence.
  • Ventilation: Ensuring adequate airflow and ventilation throughout the building to reduce moisture buildup.

Preventing Mold-Related Air Quality Issues

Prevention is always preferable to remediation. Homeowners and property managers can take several steps to protect indoor air quality:

  1. Regular Inspections: Monitor areas prone to moisture, such as basements, attics, and bathrooms.
  2. Prompt Water Damage Response: Address leaks and flooding immediately to prevent mold development.
  3. Humidity Monitoring: Use hygrometers to track indoor humidity and operate dehumidifiers as needed.
  4. Proper Ventilation: Ensure that HVAC systems are maintained, and exhaust fans are used in moisture-prone areas.
  5. Cleaning and Maintenance: Regular cleaning and removal of organic debris reduce nutrients available for mold growth.

The Role of Restoration Professionals

Certified mold remediation specialists play a crucial role in protecting indoor air quality. They have the expertise, equipment, and protocols to identify hidden mold, remove contamination, and restore safe air quality. Professional restoration ensures that remediation is effective, reduces health risks, and helps comply with insurance and building standards.

Conclusion

Mold growth has a profound impact on indoor air quality, affecting health, comfort, and property value. From respiratory irritation to structural damage, the consequences of untreated mold are significant. Early detection, prompt remediation, and ongoing moisture control are essential for maintaining a safe indoor environment.

Mold growth in an overlooked area behind a home appliance

The Most Overlooked Areas for Mold Growth in Homes

When people think of mold, they picture a black patch on a bathroom ceiling. But the most troublesome mold usually grows where no one is looking. It thrives in the quiet, damp, poorly ventilated corners of a home that rarely get a second glance, and by the time it shows up in plain sight, it has often been growing for weeks.

The reason comes down to what mold needs: moisture, a food source, and still air. Plenty of spots in a typical home offer all three, and the EPA notes that mold can begin growing within 24 to 48 hours wherever those conditions exist. Knowing where to look is half the battle.

This guide covers the most overlooked mold hot spots, the warning signs for each, and how to keep them dry. If you suspect hidden mold, Rigid Restorations offers professional assessment across San Diego County. Call 760-500-1818.

TL;DR

  • Mold favors damp, dark, poorly ventilated spots that homeowners rarely inspect.
  • The most overlooked areas include under sinks, behind appliances, HVAC systems, window frames, and attics.
  • Front-loading washer door gaskets and bathroom exhaust areas are common but frequently missed sources.
  • A musty smell with no visible cause is often the first sign of mold in an overlooked area.
  • Controlling moisture and improving ventilation in these spots is the most effective prevention.
  • Mold in the HVAC system needs professional attention because it can spread spores throughout the home.

The Overlooked Mold Hot Spots

Each of these areas offers mold what it needs and rarely gets inspected. Run through them a few times a year, especially if you notice a musty smell.

Location Why Mold Grows There What to Watch For
Under sinks Slow leaks and condensation in a dark, closed cabinet Musty smell, warped cabinet base, staining
Behind appliances Fridge, dishwasher, and washer leaks against the wall Discoloration, odor, warped flooring
Washer door gasket Trapped moisture and residue in the rubber seal Black spotting on the gasket, musty laundry
HVAC and ducts Condensation on coils and in ductwork Musty air when the system runs, allergy symptoms
Window frames and sills Condensation where warm air meets cold glass Damp sills, mold on caulk and frame
Attic Roof leaks and poor ventilation Damp insulation, discolored sheathing, musty air
Crawl space Ground moisture and plumbing leaks High indoor humidity, wood rot, musty odor
Bathroom exhaust area Steam with inadequate ventilation Ceiling spotting near the fan, peeling paint

The Common Thread: Moisture Plus Still Air

Notice what links every location above. Each one collects moisture and lacks airflow. A closed cabinet under a sink traps humidity around a slow drip. An attic with poor ventilation holds roof moisture against the wood. A washer gasket seals dampness inside a rubber fold. Mold does not need much, and these spots quietly provide all of it. That is why the two best defenses everywhere are the same: keep it dry and keep air moving.

Warning Signs You Have Overlooked Mold

Because these areas are out of sight, the signs are often indirect. Pay attention to what you smell and how you feel, not just what you see.

  • A persistent musty odor in a room, closet, or near an appliance, with no visible source.
  • Allergy-like symptoms such as sneezing, congestion, or irritated eyes that ease when you leave the house.
  • Condensation on windows or a room that feels unusually humid or clammy.
  • Peeling paint or warped materials near sinks, appliances, or windows.
  • Musty-smelling laundry even after washing, a classic sign of washer gasket mold.

How to Keep These Areas Mold-Free

Prevention in overlooked areas is mostly about moisture and airflow, plus a habit of checking the spots you normally ignore.

  1. Fix leaks quickly. A slow drip under a sink or behind an appliance is a mold source waiting to grow. Repair it within the 24 to 48 hour window.
  2. Run exhaust fans. Use bathroom and kitchen fans during and after moisture-producing activities to clear humidity.
  3. Keep humidity below 60%. Use a dehumidifier in damp areas and monitor with a simple hygrometer.
  4. Dry the washer. Wipe the gasket and leave the door open between loads on front-loaders.
  5. Inspect hidden spots seasonally. Look under sinks, behind appliances, and in the attic a few times a year.
  6. Call a professional for HVAC mold. Never ignore mold in the HVAC system; it can spread through the whole home.

Real-World Example

The Musty Laundry Mystery

A homeowner could not shake a musty smell that clung to freshly washed clothes. The culprit was mold hidden in the folds of the front-loading washer’s door gasket, fed by trapped moisture and residue. Cleaning the gasket and leaving the door open to dry between loads solved it. Left alone, that same overlooked moisture can spread to the surrounding wall and flooring, turning a small nuisance into a real repair.

Glossary

Condensation: Moisture that forms when warm, humid air meets a cooler surface, such as a window frame or a cold water pipe. It is a common, overlooked mold trigger.

Washer Gasket: The rubber door seal on a front-loading washing machine. It traps moisture and detergent residue and is one of the most common overlooked mold sites.

HVAC System: The heating, ventilation, and air conditioning system. Mold here is serious because the system can distribute spores throughout the whole house.

Efflorescence: A white mineral residue on concrete or masonry that signals moisture movement, often found in overlooked basements and crawl spaces.

Ventilation: The exchange of air that removes humidity. Poor ventilation is a common thread linking nearly all overlooked mold locations.

Relative Humidity: The moisture level of the air. Keeping indoor humidity below 60% is a key defense against mold in hidden areas.

Frequently Asked Questions

Where does mold hide most often in a home?

In overlooked, poorly ventilated damp spots: under kitchen and bathroom sinks, behind and beneath appliances, inside HVAC systems and ducts, around window frames where condensation forms, in attics and crawl spaces, and in front-loading washer door gaskets. These areas combine moisture, a food source, and still air.

What is the first sign of hidden mold?

Usually a persistent musty or earthy odor with no visible source. Other clues include allergy-like symptoms that improve when you leave the house, condensation on windows, and unexplained humidity in one area. A professional assessment can confirm and locate it.

Why does mold grow around my windows?

Window frames and sills are prime spots for condensation, where warm indoor air meets cold glass. That moisture collects on the frame and sill, and if it is not wiped away, mold grows on the frame, caulk, and nearby wall. Improving ventilation and managing indoor humidity reduces it.

Is mold in a washing machine dangerous?

Mold in a front-loading washer’s door gasket is common and can cause musty odors on clothes and in the laundry area. It is usually manageable with regular cleaning and leaving the door open to dry, but heavy or recurring growth may signal a larger moisture or ventilation issue.

Should I be worried about mold in my HVAC system?

Yes. Mold in the HVAC system is a priority because the system can distribute spores throughout the entire home every time it runs. The EPA specifically flags HVAC mold as a situation that calls for professional remediation rather than DIY cleaning.

How do I prevent mold in these hidden areas?

Control moisture and improve airflow. Fix leaks promptly, run exhaust fans in bathrooms and kitchens, keep indoor humidity below 60%, wipe condensation from windows, leave the washer door open to dry, and inspect under sinks and behind appliances periodically.

Final Thoughts

Mold is rarely a surprise to the home; it is only a surprise to the homeowner who was not looking in the right places. The under-sink cabinet, the washer gasket, the attic, the window frame, these are where it quietly starts. A few minutes of attention to these overlooked spots, plus good ventilation and quick leak repairs, prevents the vast majority of hidden mold problems.

If a musty smell has you suspecting mold you cannot find, get it checked before it spreads. Rigid Restorations provides professional mold assessment and remediation across San Diego County. Call 760-500-1818.

confused-man-woman-looking-company-results

Water Damage Risks During California Storm Season

California is renowned for its sunny weather, but the state also faces seasonal storms that can lead to significant water damage in both residential and commercial properties. Heavy rainfall, flash floods, and wind-driven water intrusion create challenges for homeowners, property managers, and restoration professionals. Understanding the risks associated with California’s storm season is crucial for protecting property, reducing repair costs, and ensuring safety.

The Impact of Storms on California Properties

Storm season in California, typically occurring during winter and early spring, brings periods of heavy rainfall, strong winds, and occasionally hail. These storms can overwhelm drainage systems, damage roofs, and cause leaks in walls and foundations. Even properties that appear well-maintained are vulnerable, particularly in areas prone to flooding or with aging infrastructure.

Common Water Damage Risks

  1. Roof Leaks and Damage: Intense storms can dislodge shingles, damage flashing, and create gaps where water can enter the home. Even minor roof damage can lead to significant interior leaks if left unchecked.
  2. Foundation and Basement Flooding: Heavy rainfall can saturate soil around foundations, causing water to seep into basements and crawl spaces. Older properties or those with poor drainage are particularly at risk.
  3. Clogged Gutters and Downspouts: Storm debris can block gutters and downspouts, preventing proper drainage. Water may overflow and seep into walls, ceilings, or foundations.
  4. Wind-Driven Water Intrusion: High winds can drive rainwater into cracks around windows, doors, and vents, bypassing normal building protections.
  5. Flash Flooding: Certain regions in California, especially low-lying areas or those near rivers, are susceptible to sudden flash floods, which can cause extensive property damage in a short period.

Secondary Damage Risks

Water damage from storms doesn’t stop at visible leaks. Secondary effects include:

  • Mold Growth: Moist environments created by stormwater can lead to rapid mold proliferation within 24–48 hours. Mold can cause health problems and require professional remediation.
  • Structural Deterioration: Prolonged water exposure weakens wood, drywall, and concrete, potentially compromising the building’s structural integrity.
  • Electrical Hazards: Water intrusion can reach electrical wiring, outlets, and appliances, increasing the risk of fire or electrocution.
  • Damage to Personal Property: Furniture, electronics, and important documents are often damaged during storms if not properly protected.

Preventive Measures for California Properties

Effective preparation and mitigation are essential for reducing storm-related water damage:

  1. Roof Inspections and Maintenance: Ensure that roofing materials, flashing, and gutters are in good condition before storm season begins. Replace worn shingles and seal potential leaks.
  2. Foundation and Drainage Solutions: Maintain proper grading around the property to direct water away from foundations. Install sump pumps in basements or low-lying areas to handle excess water.
  3. Gutter Cleaning: Clear debris from gutters and downspouts regularly to prevent water overflow. Consider gutter guards to reduce future blockages.
  4. Weatherproofing Windows and Doors: Seal gaps and cracks around windows, doors, and vents. Installing storm windows can add additional protection.
  5. Emergency Response Planning: Develop a plan for quick action during storms, including water extraction, contacting restoration professionals, and protecting valuables.

The Role of Professional Restoration Services

Professional water damage restoration companies play a critical role in mitigating storm damage. Their services include:

  • Water Extraction and Drying: Rapid removal of standing water and thorough drying of affected areas to prevent structural damage and mold growth.
  • Moisture Detection: Using advanced tools like moisture meters and thermal imaging cameras to identify hidden water behind walls, ceilings, and floors.
  • Mold Remediation: Addressing early mold growth before it spreads, ensuring a safe indoor environment.
  • Structural Repairs: Repairing or replacing damaged building materials to restore the property to its pre-storm condition.

Insurance Considerations

California homeowners and commercial property policies often cover storm-related water damage, but coverage may vary based on the type of damage and the presence of preventive measures. Documenting property conditions before and after storms, as well as taking immediate action during flooding, strengthens insurance claims and ensures proper reimbursement.

Conclusion

California storm season presents serious risks for water damage in homes and commercial properties. From roof leaks and foundation flooding to secondary mold growth and structural deterioration, the potential for costly damage is high. Property owners and managers who prepare proactively, maintain building systems, and have an emergency response plan in place can minimize these risks.


Roof leak causing water stains and mold on a home ceiling

The Relationship Between Roof Leaks and Mold Problems

A roof leak and a mold problem are usually the same story told at two different times. The leak comes first, quietly letting water into the attic, ceiling, and walls. The mold comes second, growing in the dark, damp spaces the water leaves behind. By the time a homeowner sees a ceiling stain, mold has often already begun its work overhead.

The connection is direct and fast. The EPA warns that mold can begin growing on damp materials within 24 to 48 hours, and a roof leak delivers exactly the slow, hidden moisture mold loves. Because attics and wall cavities are poorly ventilated and rarely inspected, roof-related mold can spread widely before it is discovered.

This guide explains how roof leaks lead to mold, the warning signs, and how to break the cycle. If a roof leak has led to moisture or mold in your home, Rigid Restorations can help across San Diego County. Call 760-500-1818.

TL;DR

  • Roof leaks are a leading hidden cause of home mold because they feed moisture into attics, ceilings, and walls.
  • Mold can begin within 24 to 48 hours of the roof leak wetting materials (EPA guidance).
  • Attics are high-risk because they combine roof moisture with poor ventilation and rare inspection.
  • Ceiling stains, sagging, musty attic air, and damp insulation are the main warning signs.
  • Fixing the leak is only half the job; the moisture and any mold must also be removed.
  • In San Diego, winter atmospheric river storms are a common trigger for roof leaks and the mold that follows.

How a Roof Leak Becomes a Mold Problem

The path from roof to mold is short and predictable. Water enters through a failure point, spreads into hidden materials, and mold follows in the damp aftermath.

Stage What Happens
1. Entry Water enters through worn shingles, failed flashing, or storm damage
2. Spread It soaks into roof decking, insulation, ceilings, and wall cavities
3. Incubation Dark, still, damp conditions let mold germinate within 24 to 48 hours
4. Growth Mold colonizes attic wood and drywall, often out of sight
5. Discovery A ceiling stain or musty smell finally reveals a problem that started earlier

Why Attics Are the Perfect Mold Environment

Attics combine every condition mold needs. They receive the roof leak’s moisture first, they are packed with organic materials like wood decking and paper-faced insulation, and they are typically poorly ventilated and rarely visited. Add San Diego’s coastal humidity and a roof leak can keep an attic damp long enough for mold to spread across the sheathing before anyone climbs up to look. This is why attic inspection after heavy storms is one of the most valuable habits a homeowner can build.

Warning Signs to Watch For

Roof-leak mold announces itself indirectly, usually from below or through smell. Take any of these seriously, especially after a storm.

  • Ceiling stains or discoloration, often yellow or brown rings, sometimes with more than one ring indicating a recurring leak.
  • Sagging or cracking ceilings, a sign of significant water accumulation above.
  • A musty smell in upstairs rooms or when you open the attic hatch.
  • Damp, matted, or discolored insulation visible in the attic.
  • Dark patches on attic wood or roof decking, a direct sign of mold growth.

Breaking the Cycle: Repair Plus Remediation

The most common mistake is fixing the roof and assuming the problem is solved. Repairing the leak stops new water, but it does nothing about the moisture already in the materials or the mold that has grown. A complete solution has two parts: repair the roof to stop the source, then dry the affected area and remediate any mold under the IICRC S520 standard, replacing saturated insulation and drywall as needed. Only when both are done is the cycle truly broken.

Prevention: Stop the Leak Before It Starts

  1. Inspect the roof twice a year and after major storms, looking for missing shingles and damaged flashing.
  2. Keep gutters and downspouts clear so water drains away instead of backing up under roofing.
  3. Check the attic after heavy rain for damp spots, stains, or a musty smell.
  4. Ensure the attic is well ventilated to remove moisture and discourage mold.
  5. Address ceiling stains immediately rather than repainting over them, which hides an active problem.

Real-World Example

The Storm That Left More Than a Stain

After a winter storm, a homeowner noticed a small brown ring on an upstairs ceiling. Assuming it was minor, they waited. Weeks later the musty smell in the room grew stronger. An assessment found a failed roof flashing had been leaking with each rain, and mold had spread across a section of attic decking and the insulation below. The fix required roof repair, removal of the affected insulation and drywall, mold remediation, and drying. Acting on the first stain would have caught it before the mold ever started.

Glossary

Roof Flashing: The metal used to seal roof joints and transitions, such as around chimneys and vents. Failed flashing is one of the most common sources of roof leaks.

Roof Decking (Sheathing): The wood layer beneath the roofing material. When a leak wets it, it can rot and grow mold on the attic side, out of sight.

Attic Ventilation: The airflow that removes heat and moisture from an attic. Poor ventilation lets roof-leak moisture linger and feed mold.

Ceiling Stain: A yellow or brown mark on a ceiling, usually the first visible evidence of a roof leak above.

Condensation: Moisture that forms in an attic when warm, humid air meets cold surfaces. It can mimic or compound a roof leak.

IICRC S520: The industry standard for professional mold remediation, used when roof-leak moisture has already led to mold growth.

Frequently Asked Questions

How does a roof leak cause mold?

A roof leak lets water into the attic, roof decking, insulation, ceilings, and wall cavities. These are dark, poorly ventilated spaces where moisture lingers, and the EPA notes mold can begin within 24 to 48 hours. Because the growth is hidden overhead, it often spreads before a homeowner notices.

How fast can mold grow after a roof leak?

Mold can begin growing within 24 to 48 hours of materials getting wet. A roof leak often provides a slow, steady moisture supply, which can keep materials damp for long periods and support ongoing growth until the leak is fixed and the area is dried.

What are the signs of roof-leak mold?

Watch for ceiling stains, sagging or cracked ceilings, a musty smell in upstairs rooms or the attic, damp or discolored insulation, and dark patches on attic wood. Allergy-like symptoms that worsen indoors can also signal hidden mold from a roof leak.

Do I need to replace insulation after a roof leak?

Often, yes. Wet insulation loses effectiveness and holds moisture against the structure, making it a mold reservoir. Saturated insulation is typically removed and replaced as part of addressing roof-leak moisture and any resulting mold.

If I fix the roof, will the mold go away?

Fixing the leak stops new moisture, but it does not remove mold that has already grown or dry out materials that are still wet. Existing mold must be remediated and the affected area dried. Repair and remediation together are what actually solve the problem.

Are roof leaks a bigger risk in San Diego winters?

Yes. San Diego’s winter atmospheric river storms deliver heavy, sustained rain that finds weak points in roofs and flashing. Combined with coastal humidity that slows drying, these storms are a common trigger for roof leaks and the mold that follows. Pre-winter roof maintenance is especially valuable here.

Final Thoughts

Roof leaks and mold are cause and effect. The water sneaks in through worn flashing or damaged roofing, settles into the attic and ceiling, and within a day or two mold begins to grow in the dark. Break the chain early, catch the leak and dry the moisture before mold establishes, and you avoid a much larger problem overhead.

If a roof leak has left moisture or mold in your home, address both the leak and its aftermath. Rigid Restorations provides moisture assessment, drying, and mold remediation across San Diego County. Call 760-500-1818.

Flood Damage Restoration

Why Fast Response Time Matters After a Flood

Flooding is one of the most destructive natural events that can affect homes and commercial properties. While the initial water intrusion is harmful, the response time following a flood significantly influences the extent of damage, health risks, and restoration costs. Understanding why fast response is critical allows property owners, managers, and restoration professionals to act decisively, minimizing losses and ensuring safety.

The Importance of Immediate Action

Water begins causing damage the moment it enters a property. Within minutes, it can soak flooring, walls, furniture, and personal belongings. The longer water remains, the greater the risk of structural compromise, mold growth, and contamination. A fast response ensures that water is removed quickly and drying begins immediately, preventing secondary damage that is far more expensive to repair.

Preventing Structural Damage

Floodwater weakens structural components, including wood framing, drywall, and concrete. Prolonged exposure can cause:

  • Warping or swelling of wood
  • Delamination of flooring materials
  • Cracking or spalling of concrete
  • Softening of drywall and ceilings

Rapid response teams use specialized equipment to extract water and dry affected areas, reducing structural degradation and preserving the integrity of the building.

Mold Prevention

Mold can begin to grow within 24 to 48 hours in damp conditions. A delayed response increases the likelihood of mold spreading throughout walls, ceilings, floors, and insulation. Mold not only damages building materials but also poses significant health risks, including respiratory issues and allergic reactions. Quick intervention prevents mold from establishing colonies and mitigates future remediation costs.

Protection of Personal Property

Floodwater can ruin furniture, electronics, documents, and sentimental items. Fast water extraction and content relocation limit exposure and reduce permanent losses. Restoration professionals often provide temporary storage solutions and protective measures to salvage as much property as possible.

Health and Safety Considerations

Standing water from floods can contain contaminants, including bacteria, chemicals, and sewage. Delayed cleanup increases the risk of health hazards for occupants and restoration personnel. Prompt response includes:

  • Removing contaminated water safely
  • Using personal protective equipment (PPE)
  • Treating surfaces with disinfectants to reduce pathogens

Minimizing Restoration Costs

Delays in flood response often result in higher repair costs. Secondary damage, such as mold remediation, structural repairs, and content replacement, can multiply expenses. Fast response reduces the scope of restoration, saving time and money while limiting insurance claims disputes.

Role of Professional Restoration Services

Certified restoration companies provide immediate response services following a flood. Their interventions include:

  • 24/7 water extraction and pumping
  • Industrial drying and dehumidification
  • Moisture detection using advanced tools such as infrared cameras
  • Mold prevention and remediation
  • Documentation for insurance claims

Professional teams can often prevent long-term damage that a homeowner might overlook, ensuring the property is restored safely and efficiently.

Insurance Implications

Insurance companies often emphasize timely mitigation in flood claims. Prompt reporting and restoration demonstrate proactive management, which can facilitate claims approval and maximize coverage. Delays can result in partial denial of claims if secondary damage is attributed to negligence.

Preventive Tips for Property Owners

  • Act Immediately: Contact restoration professionals as soon as flooding occurs.
  • Document the Damage: Take photos and videos to support insurance claims.
  • Relocate Valuables: Move furniture, electronics, and personal items to safe areas.
  • Avoid DIY Cleanup for Contaminated Water: Professional equipment and protocols are necessary for health and safety.
  • Monitor Moisture Levels: Use hygrometers or consult restoration experts to ensure complete drying.

Conclusion

Fast response time after a flood is critical to limiting structural damage, preventing mold, protecting personal property, and reducing health risks. Immediate intervention by certified restoration professionals ensures efficient water extraction, thorough drying, and mitigation of secondary damage. Homeowners and property managers who prioritize rapid response can save significant repair costs, maintain building integrity, and safeguard the well-being of occupants.