Kitchen Remodel Costs_ A Complete Breakdown

Kitchen Remodel Cost Breakdown

A kitchen remodel can transform the way you cook, entertain, and use your home every day. However, once you start collecting quotes, comparing materials, and choosing appliances, it can quickly become difficult to understand why one renovation costs $15,000 while another exceeds $60,000.

The truth is that your kitchen remodeling budget depends on much more than the size of the room. Cabinetry, labor, countertops, plumbing, electrical work, and unexpected repairs can all affect the final price. Understanding how these expenses fit together helps you make informed decisions before construction begins.

In this guide, we provide a detailed kitchen remodel cost breakdown, explain where the largest portions of your budget typically go, and share practical ways to control expenses without sacrificing quality. Whether you are planning a small kitchen update or a complete renovation, you will learn how to build a realistic budget and avoid common financial surprises.

How Much Does a Kitchen Remodel Cost?

Before deciding which materials to purchase or which features to upgrade, it is important to establish a realistic overall budget. Kitchen remodeling costs vary considerably depending on the scope of the project, the condition of the existing space, the quality of materials, and local labor rates.

For planning purposes, many homeowners can use the following broad estimates for a typical residential kitchen remodel in the United States. These figures are illustrative ranges rather than fixed prices, and actual contractor quotes may differ significantly by location and project requirements.

Kitchen Remodel Type Estimated Cost Typical Scope
Minor kitchen update $5,000–$15,000 Painting, hardware, lighting, and limited fixture replacements
Budget-friendly remodel $15,000–$30,000 Stock cabinets or cabinet refinishing, affordable countertops, and selected upgrades
Midrange kitchen remodel $30,000–$60,000 New cabinetry, countertops, flooring, appliances, and some layout adjustments
High-end kitchen remodel $60,000–$100,000+ Premium materials, custom cabinetry, upgraded appliances, and extensive improvements
Major or luxury renovation $100,000–$150,000+ Structural changes, high-end finishes, custom features, and extensive plumbing or electrical work

Read more: DIY vs. Professional Water Damage Restoration

These categories can overlap, and a smaller kitchen is not always cheaper to renovate than a larger one. A compact kitchen with custom cabinets, expensive stone countertops, and relocated plumbing may cost more than a larger kitchen that retains its existing layout.
Kitchen Remodeling Costs_ Where Your Money Goes

Kitchen Remodel Cost Breakdown: Where Your Budget Goes

A kitchen renovation involves several interconnected expenses. Some costs are easy to see, such as cabinets and countertops, while others, including demolition, installation, permits, and electrical upgrades, may be less obvious when you first begin planning.

The following sections explain the major cost categories, what affects their prices, and where it makes sense to invest more of your budget.

1. Cabinets and Cabinet Installation

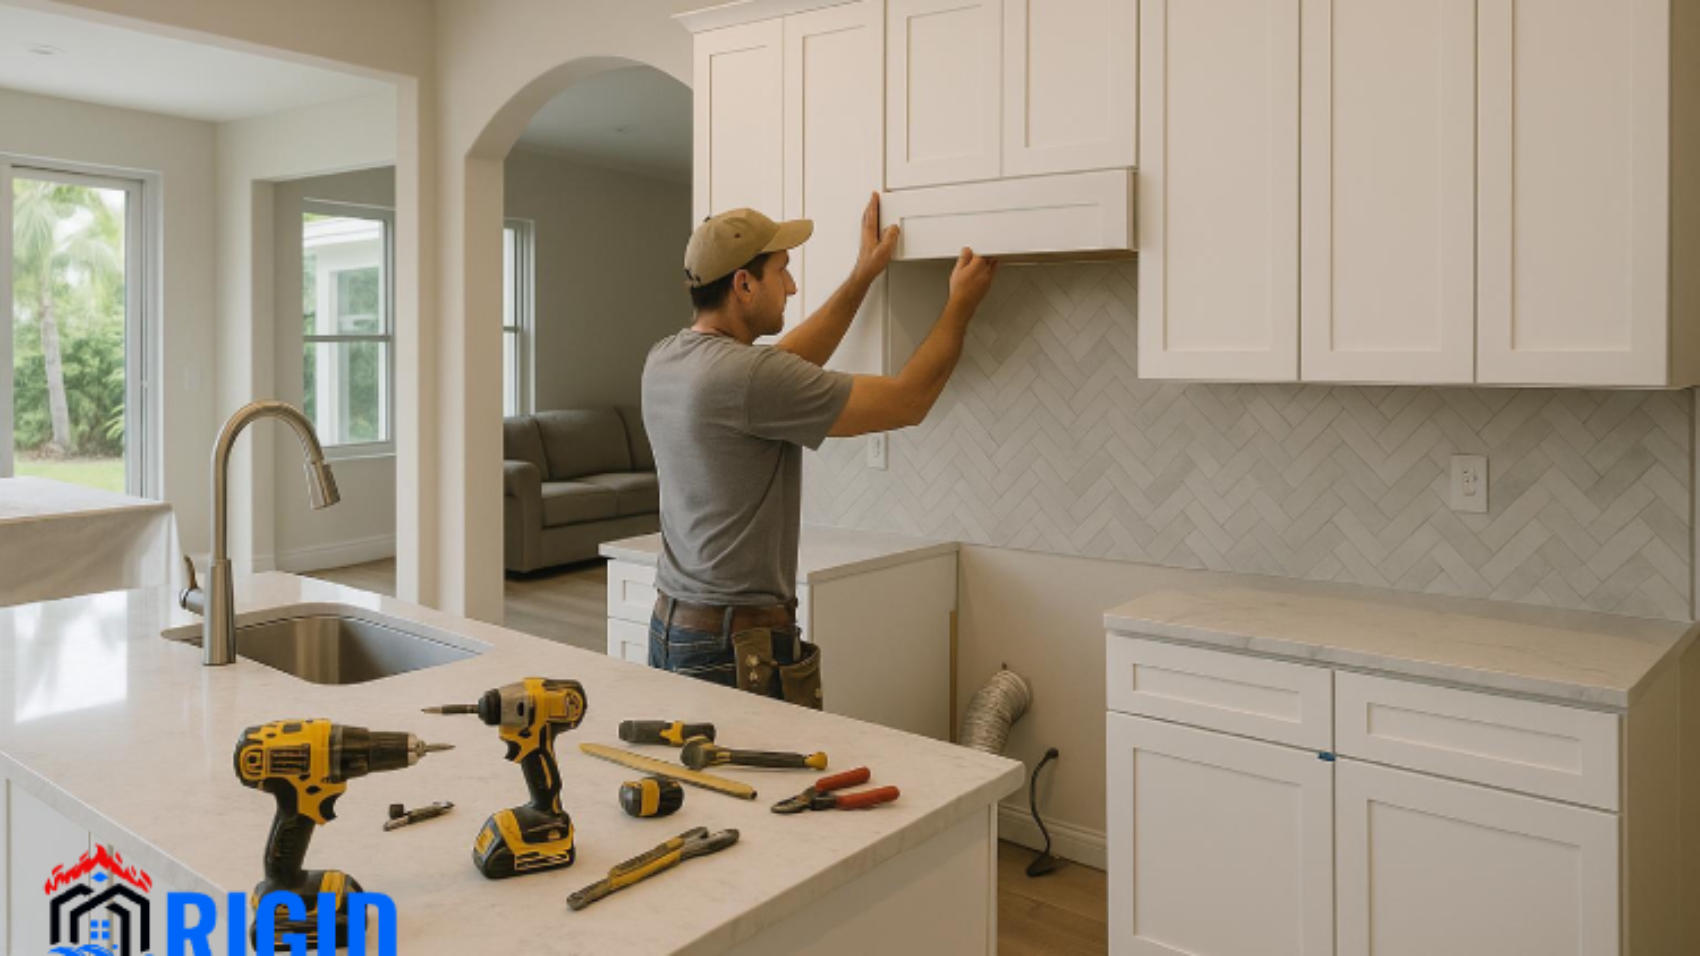
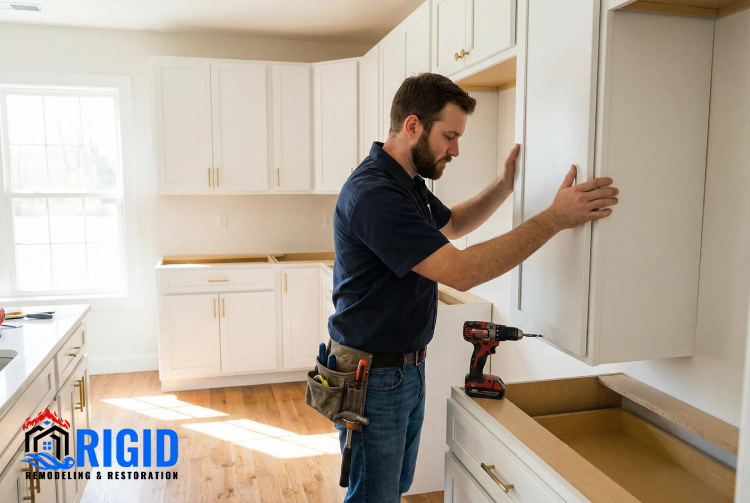
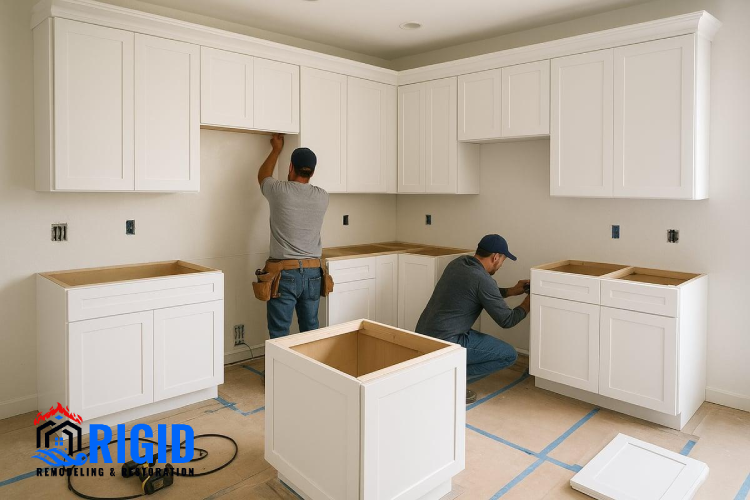
Cabinetry is often one of the largest expenses in a kitchen renovation, particularly when homeowners replace every cabinet instead of updating the existing ones. Cabinets influence the appearance of the room, determine how much storage is available, and affect the functionality of the entire kitchen.

The final cost depends on cabinet material, construction quality, finish, storage accessories, and installation requirements. Stock cabinets are typically the most affordable option because they are manufactured in standard sizes. Semi-custom cabinets offer more choices in dimensions and finishes, while fully custom cabinets are designed for a particular kitchen and generally cost more.

Cabinet Type Typical Cost Range
Stock cabinets $3,000–$8,000
Semi-custom cabinets $8,000–$18,000
Custom cabinets $15,000–$30,000+
Cabinet painting or refinishing $1,500–$5,000


2. Countertops and Backsplash

Countertops are another major part of the kitchen remodeling budget because they combine everyday functionality with a highly visible design feature. Their price depends on the material, total surface area, edge profile, thickness, cutouts, and installation complexity.


Countertop Material General Cost Level
Laminate Budget-friendly
Butcher block Budget to midrange
Granite Midrange to high-end
Quartz Midrange to high-end
Marble High-end


3. Kitchen Appliances

Appliances can represent a significant portion of the renovation budget, especially when homeowners replace the refrigerator, range, oven, microwave, and dishwasher at the same time. Prices depend on brand, size, energy efficiency, finish, and features such as smart controls or professional-style cooking performance.

A basic appliance package may cost several thousand dollars, while premium models can push the total much higher. Built-in refrigerators, induction cooktops, wall ovens, and integrated dishwashers may also require additional cabinetry or installation work.

Before purchasing appliances, decide which features you genuinely need. A household that cooks occasionally may not benefit from the same expensive equipment as a family that prepares meals every day. Spending more on reliability, useful capacity, and energy efficiency can be more valuable than paying for features you rarely use.

It is also important to choose appliances before finalizing cabinet dimensions and electrical plans. Their specifications can affect opening sizes, ventilation clearances, outlet locations, and plumbing connections. Coordinating these decisions early helps prevent expensive adjustments during installation.

Read more: How to Tell If Your Home Still Has Moisture After Cleanup?

4. Labor and Contractor Fees

Labor is a substantial part of most kitchen renovation budgets. Even relatively affordable materials require skilled installation, and a kitchen typically involves several trades working in a carefully coordinated sequence.

General contractors may oversee the project, schedule subcontractors, order materials, manage inspections, and coordinate the work. Their fees may be structured as a percentage of project costs, a fixed price, or another arrangement specified in the contract.

Cabinet installers, electricians, plumbers, tile setters, painters, and flooring professionals may each charge separately. The total labor cost depends on local wage rates, project duration, access to the property, and the complexity of the work.

A detailed estimate should explain what labor includes, how subcontractors are paid, and which tasks are excluded. It should also identify responsibility for debris removal, site protection, material handling, and final cleanup.

Choosing the lowest quote is not always the most economical decision. An unusually low estimate may exclude necessary tasks or rely on assumptions that later become additional charges. Compare the scope of work, insurance coverage, references, payment schedule, and warranty terms before selecting a contractor.

5. Flooring Installation

Kitchen flooring must withstand foot traffic, spills, dropped utensils, cleaning products, and regular changes in temperature and moisture. Material selection therefore affects both the initial renovation cost and the long-term maintenance budget.

Luxury vinyl flooring is often attractive to homeowners seeking a practical and relatively affordable option. Ceramic and porcelain tile provide durability and a wide range of styles, while hardwood can create a warm, continuous appearance when appropriate for the home and installation conditions.

6. Plumbing and Electrical Work

Plumbing and electrical improvements are easy to underestimate because much of the work happens behind walls, under cabinets, or inside the ceiling. Nevertheless, these systems are essential to a safe and functional kitchen.

Replacing a faucet or installing a new light fixture is generally less involved than moving a sink, relocating a dishwasher, or installing a new circuit for an electric range. When appliances or fixtures change locations, contractors may need to reroute supply lines, drainage pipes, wiring, and ventilation.

Older homes may require additional work to bring parts of their electrical or plumbing systems into compliance with applicable building codes. The need for such upgrades depends on the property’s existing condition, the renovation scope, and local requirements.

7. Demolition and Debris Removal

Demolition is often treated as a minor preliminary task, but it can involve considerable labor and disposal costs. Removing cabinets, countertops, flooring, appliances, and wall finishes requires careful handling to protect the parts of the home that will remain.

The price depends on how much material must be removed, whether the property is occupied, how easily workers can access the kitchen, and local disposal fees. Removing heavy stone countertops or multiple layers of old flooring may require more time and equipment than a straightforward cabinet replacement.

8. Lighting and Ventilation

Lighting has a major influence on how comfortable and practical a kitchen feels. A well-designed plan combines general illumination with task lighting for preparation areas and accent lighting for features such as open shelving or a backsplash.

Recessed ceiling lights, pendant fixtures, under-cabinet lighting, and decorative fixtures all come with different material and installation costs. The total depends on the number of fixtures, wiring requirements, ceiling access, and whether the existing electrical layout can be reused.

9. Permits, Inspections, and Design Services

Depending on the location and project scope, a kitchen remodel may require permits and inspections. Cosmetic changes such as painting or replacing cabinet hardware may not require the same approvals as structural alterations, new circuits, relocated plumbing, or changes to ventilation.

Permit fees vary by municipality and by the type and value of the work. Design services can also affect the budget, especially when the project involves a new layout, custom cabinetry, detailed construction drawings, or coordination between multiple trades.
Kitchen Renovation Cost Breakdown_ What to Expect

What Percentage of Your Budget Should Go to Each Category?

Once you understand the individual expenses, it becomes easier to see how they fit into the overall project. The following table provides a sample allocation for a conventional kitchen remodel that includes new cabinets, countertops, appliances, flooring, and professional installation.

These percentages are planning guidelines, not universal industry standards. A project involving custom cabinetry may spend more on cabinets, while a kitchen requiring substantial electrical or structural work may allocate more to labor and infrastructure.


Expense Category Illustrative Budget Share
Cabinets and installation 25%–35%
Labor and contractor services 15%–25%
Appliances 10%–15%
Countertops and backsplash 10%–15%
Flooring 5%–10%
Plumbing and electrical 5%–10%
Lighting, ventilation, and fixtures 3%–7%
Demolition, permits, and miscellaneous costs 3%–8%


The percentages should not be added by selecting the highest figure in every row because the ranges overlap and the actual allocation depends on the project. Instead, use them to identify the categories that deserve closer attention when reviewing a contractor’s proposal.

Hidden Costs That Can Increase Your Kitchen Remodel Budget

Even a carefully planned renovation can uncover expenses that were difficult to identify before construction. Hidden costs are especially common in older homes, where previous repairs or outdated systems may be concealed behind cabinets, flooring, and walls.

A realistic budget should account for these possibilities rather than assuming that every part of the existing kitchen is in good condition.

Water Damage and Mold Remediation

Leaks around sinks, dishwashers, refrigerators, and plumbing connections can damage cabinet bases, subfloors, and nearby wall materials. Once the old fixtures are removed, the extent of the damage may become visible for the first time.

Structural Changes and Wall Removal

Opening a kitchen to an adjoining living or dining area can make the home feel brighter and more spacious. However, removing a wall may involve structural engineering, temporary supports, new beams, electrical relocation, and additional inspections.

The cost can increase substantially if the wall is load-bearing or contains important mechanical systems. A project that appears to involve simple demolition may therefore require a more extensive construction plan.

Material Price Changes and Project Delays

Renovation materials may become more expensive between the initial estimate and the final purchase, particularly when products are custom-made or have long lead times. Delayed deliveries can also extend labor schedules or create temporary storage needs.

You can reduce these risks by confirming prices, ordering critical materials early, and keeping written records of approved selections. Make sure the contract explains how price changes, substitutions, and schedule delays will be handled.

Temporary Kitchen and Living Expenses

A major renovation can make the kitchen unusable for days or weeks, depending on the scope of the work. During this time, homeowners may spend more on restaurant meals, prepared food, disposable supplies, or temporary cooking equipment.

These expenses are often excluded from contractor estimates, but they still affect the household budget. Planning a temporary food-preparation area and setting aside money for additional meals can make the renovation period easier to manage.

How to Reduce Kitchen Remodeling Costs Without Sacrificing Quality

Controlling expenses does not necessarily mean choosing the cheapest materials or cutting corners on installation. The most effective approach is to identify which parts of the renovation deliver meaningful improvements and which expenses can be reduced without affecting safety, durability, or everyday use.

Keep the Existing Kitchen Layout

Moving sinks, dishwashers, gas lines, and major appliances can increase plumbing, electrical, and construction expenses. If the existing layout works reasonably well, retaining the main service locations may be one of the most effective ways to control costs.

You can still make meaningful improvements by changing cabinet storage, upgrading countertops, adding task lighting, or replacing inefficient appliances. This approach allows you to modernize the kitchen without paying for extensive infrastructure changes.

Refinish Cabinets Instead of Replacing Them

Cabinet replacement is not always necessary when the existing boxes are structurally sound and the storage arrangement is practical. Repainting the doors, replacing hardware, or installing new drawer fronts can refresh the appearance of the room for less than a complete replacement.

However, refinishing is not the right solution for cabinets with serious water damage, failing construction, or a layout that no longer meets your needs. Compare the cost of restoration with the price of new cabinets before making the final decision.

Compare Materials Based on Long-Term Value

The initial purchase price is only one part of a material’s overall value. Cleaning requirements, repair costs, expected lifespan, and resistance to wear all influence how much you may spend over time.

For example, an inexpensive countertop may be suitable for a household that uses the kitchen lightly, while a busy family may prefer a surface that better matches its daily needs. The right choice depends on how the kitchen is used rather than on which material is most expensive.

Prioritize Functional Improvements

Storage, lighting, ventilation, durable work surfaces, and a practical layout can improve daily kitchen use more than purely decorative upgrades. If your budget is limited, direct more of it toward features that solve existing problems.

You can always replace decorative pendants, install a premium backsplash, or upgrade cabinet handles later. By contrast, correcting a poorly planned electrical layout or replacing damaged flooring after the kitchen is finished may be disruptive and expensive.

Obtain Detailed Quotes From Multiple Contractors

Requesting estimates from several qualified contractors can help you understand local pricing and identify differences in the proposed scope. For a meaningful comparison, each contractor should assess the same project requirements and use clearly defined allowances for materials and fixtures.

A lower quote may exclude permits, cleanup, subfloor repairs, or certain installation tasks. Ask questions whenever the estimates differ significantly, and make sure every major expense is documented before signing a contract.

Final Thoughts

A successful kitchen renovation depends on more than selecting attractive cabinets, countertops, and appliances. Understanding where the money goes helps you balance design preferences with construction requirements, long-term durability, and the realities of your household budget.

Cabinetry, labor, and appliances can consume a substantial share of the total cost, but plumbing, electrical work, flooring, demolition, and permits also deserve careful attention. Hidden damage and project delays may increase expenses, which is why a contingency fund is an important part of responsible planning.

Frequently Asked Questions

  1. What Is the Most Expensive Part of a Kitchen Remodel?

Cabinets and their installation are often among the most expensive parts of a kitchen remodel. Their cost depends on the cabinet type, construction quality, finish, storage accessories, and the complexity of installation. Custom cabinetry can be particularly expensive because it is designed for the specific dimensions and requirements of the kitchen.

  1. How Much Should I Budget for a Kitchen Remodel?

The amount you should budget depends on the size of the kitchen, the condition of the existing space, your material choices, and whether you plan to change the layout. A cosmetic update may cost several thousand dollars, while a comprehensive midrange renovation may require tens of thousands of dollars. High-end projects can cost considerably more.

  1. How Can I Remodel My Kitchen on a Tight Budget?

The most effective way to reduce costs is to retain the existing layout when practical. Keeping sinks, appliances, and major utility connections in their current locations can limit plumbing, electrical, and construction work. If your cabinets remain in good condition, refinishing them instead of replacing them may also provide meaningful savings.
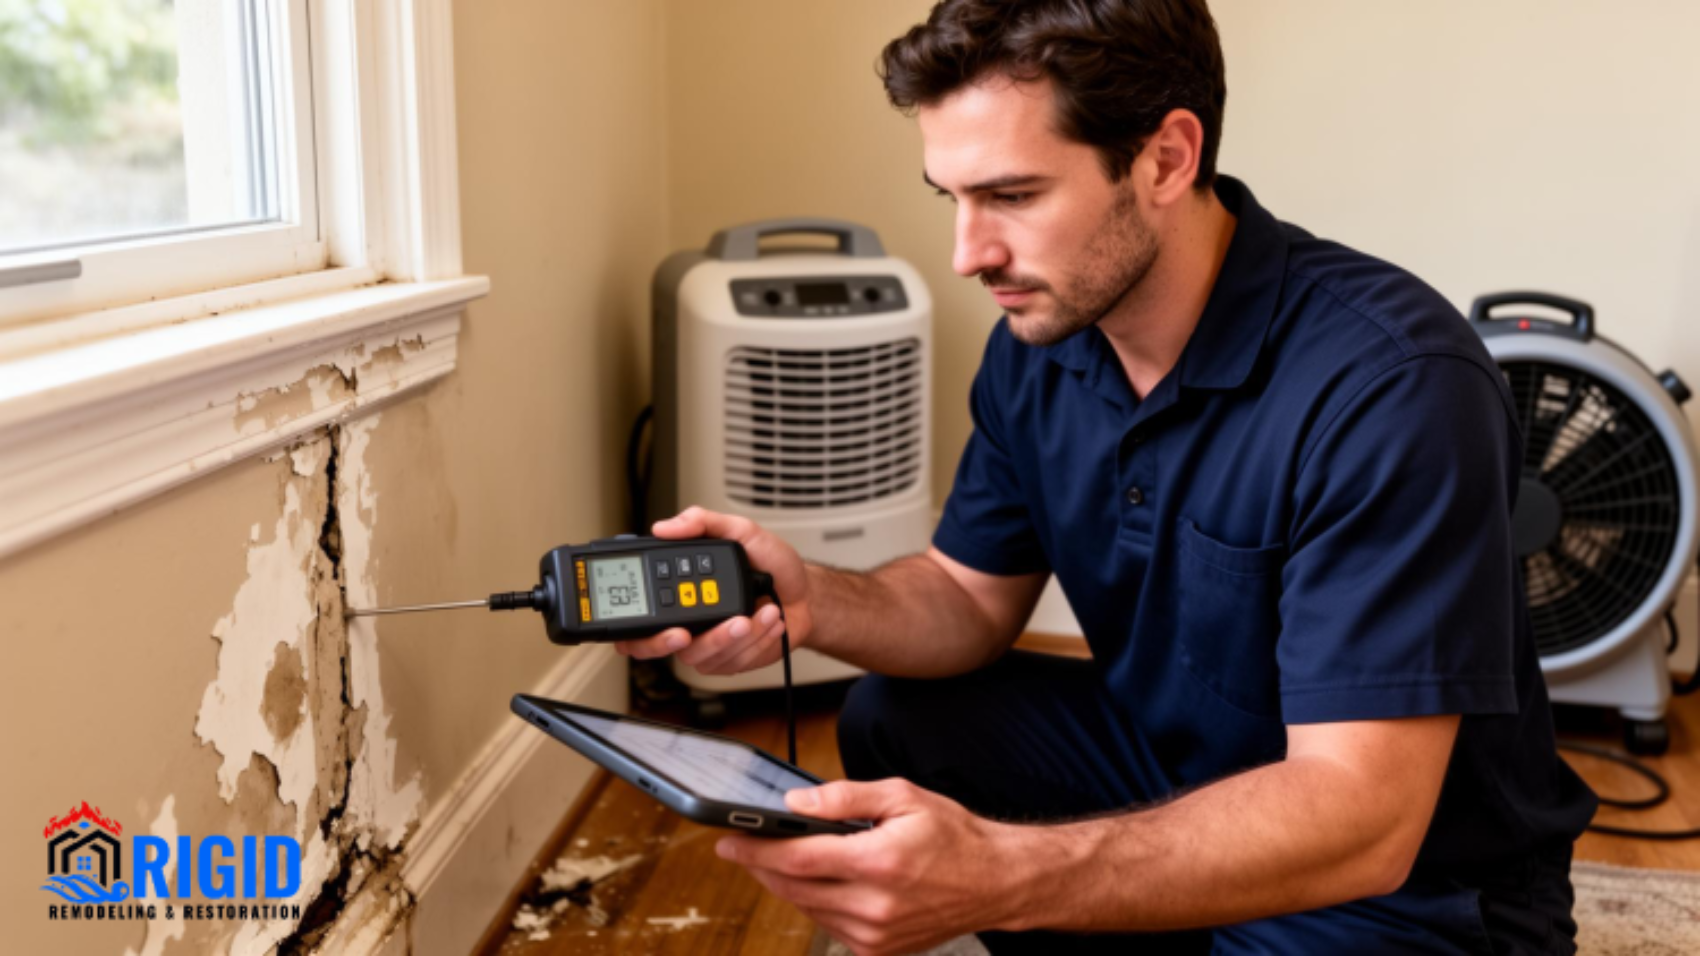
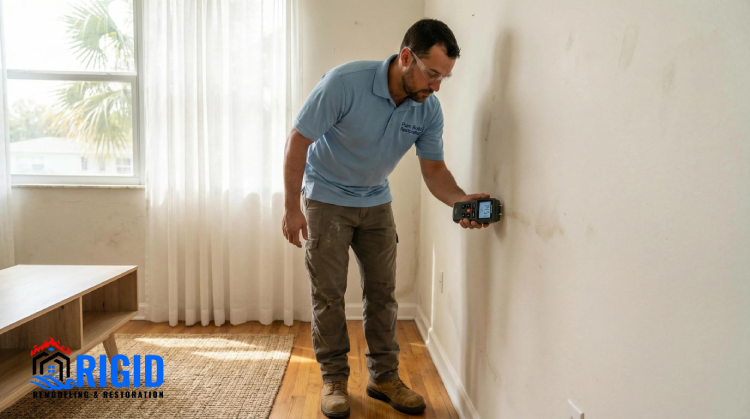
How to Detect Lingering Moisture in Your Home

How to Tell If Your Home Still Has Moisture After Cleanup?

After a water leak, flood, or plumbing failure, cleaning up visible water can feel like the end of the problem. The floors may look dry, the carpets may feel normal, and the smell of dampness may have disappeared. However, moisture can remain hidden inside walls, beneath flooring, behind cabinets, and within insulation long after the surface appears clean.

Knowing how to tell if your home still has moisture after cleanup is essential for protecting your property and preventing mold growth, material deterioration, and recurring water damage. Even a small amount of trapped moisture can create problems if it remains undetected for too long.

In this guide, we explain the warning signs of hidden moisture, how to check different areas of your home, which moisture detection tools are useful, and when professional water damage restoration services may be necessary.

Read more: DIY vs. Professional Water Damage Restoration

Why Moisture Can Remain After Water Damage Cleanup

Water damage cleanup involves more than removing standing water and drying visible surfaces. When water enters a home, it can travel through porous materials, seep into narrow gaps, and collect in places that are difficult to reach without specialized equipment. This is why a room may look completely dry while moisture remains inside its building materials.

The time required for a home to dry depends on several factors, including the amount of water involved, the type of materials affected, indoor temperature, humidity, airflow, and the drying equipment used. A small spill on tile may dry quickly, while a flooded room with wet drywall, carpet padding, and wood subflooring can require much more extensive drying.

Water Can Travel Beyond the Original Leak

Water does not always remain in the area where the leak or flood occurred. It can move downward through floors, travel along framing, spread behind baseboards, and enter wall cavities. In some cases, water can also move upward through porous materials through capillary action.

This means the visible damage may represent only a small portion of the affected area. For example, a washing machine leak in a laundry room may leave moisture beneath adjacent flooring or inside the wall behind the appliance. Without checking surrounding materials, these hidden areas can remain wet even after the original leak has been repaired.

Different Building Materials Dry at Different Rates

Not every material releases moisture at the same speed. Ceramic tile and other nonporous surfaces may appear dry relatively quickly, while drywall, insulation, carpet padding, and unfinished wood can retain water for much longer.

Wood may absorb moisture and swell, while drywall can soften or deteriorate when exposed to prolonged wet conditions. Carpet padding can hold water beneath the visible carpet fibers, making it difficult to judge the true condition of the floor by touch alone.

Understanding these differences helps explain why a home should not be considered fully dry simply because its surfaces no longer feel damp.

Is Your Home Completely Dry After Water Damage_

10 Signs Your Home May Still Have Moisture After Cleanup

After water damage restoration, it is important to look for changes that suggest moisture has not been completely removed. Some warning signs are easy to notice, while others may require closer inspection or professional testing.

The following indicators can help you identify areas that deserve further attention. Although one sign does not always confirm a moisture problem, several signs appearing together should not be ignored.

1. A Persistent Musty or Damp Smell

One of the most common signs of lingering moisture is a musty smell that continues after cleanup. This odor may be noticeable when entering a room, opening a closet, or turning on the HVAC system.

The smell can come from damp building materials, wet carpet padding, moisture inside wall cavities, or microbial growth associated with prolonged dampness. Sometimes, the odor becomes stronger when the room has been closed for several hours because air circulation is limited.

However, smell alone cannot confirm the presence or absence of mold. If the odor persists without an obvious source, a moisture inspection can help identify whether hidden materials are still wet.

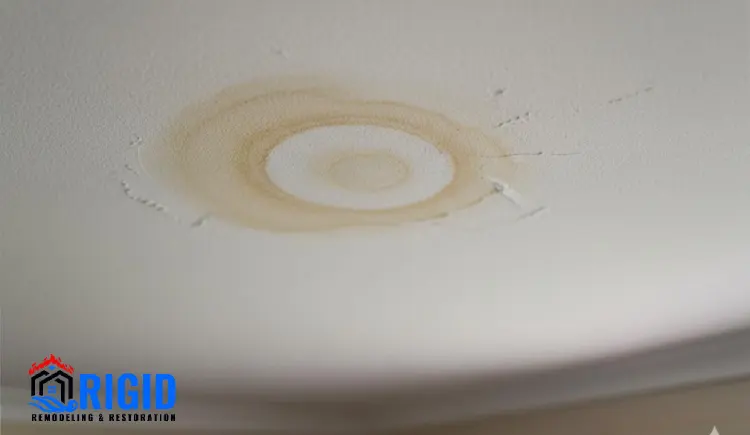
2. Water Stains on Walls or Ceilings

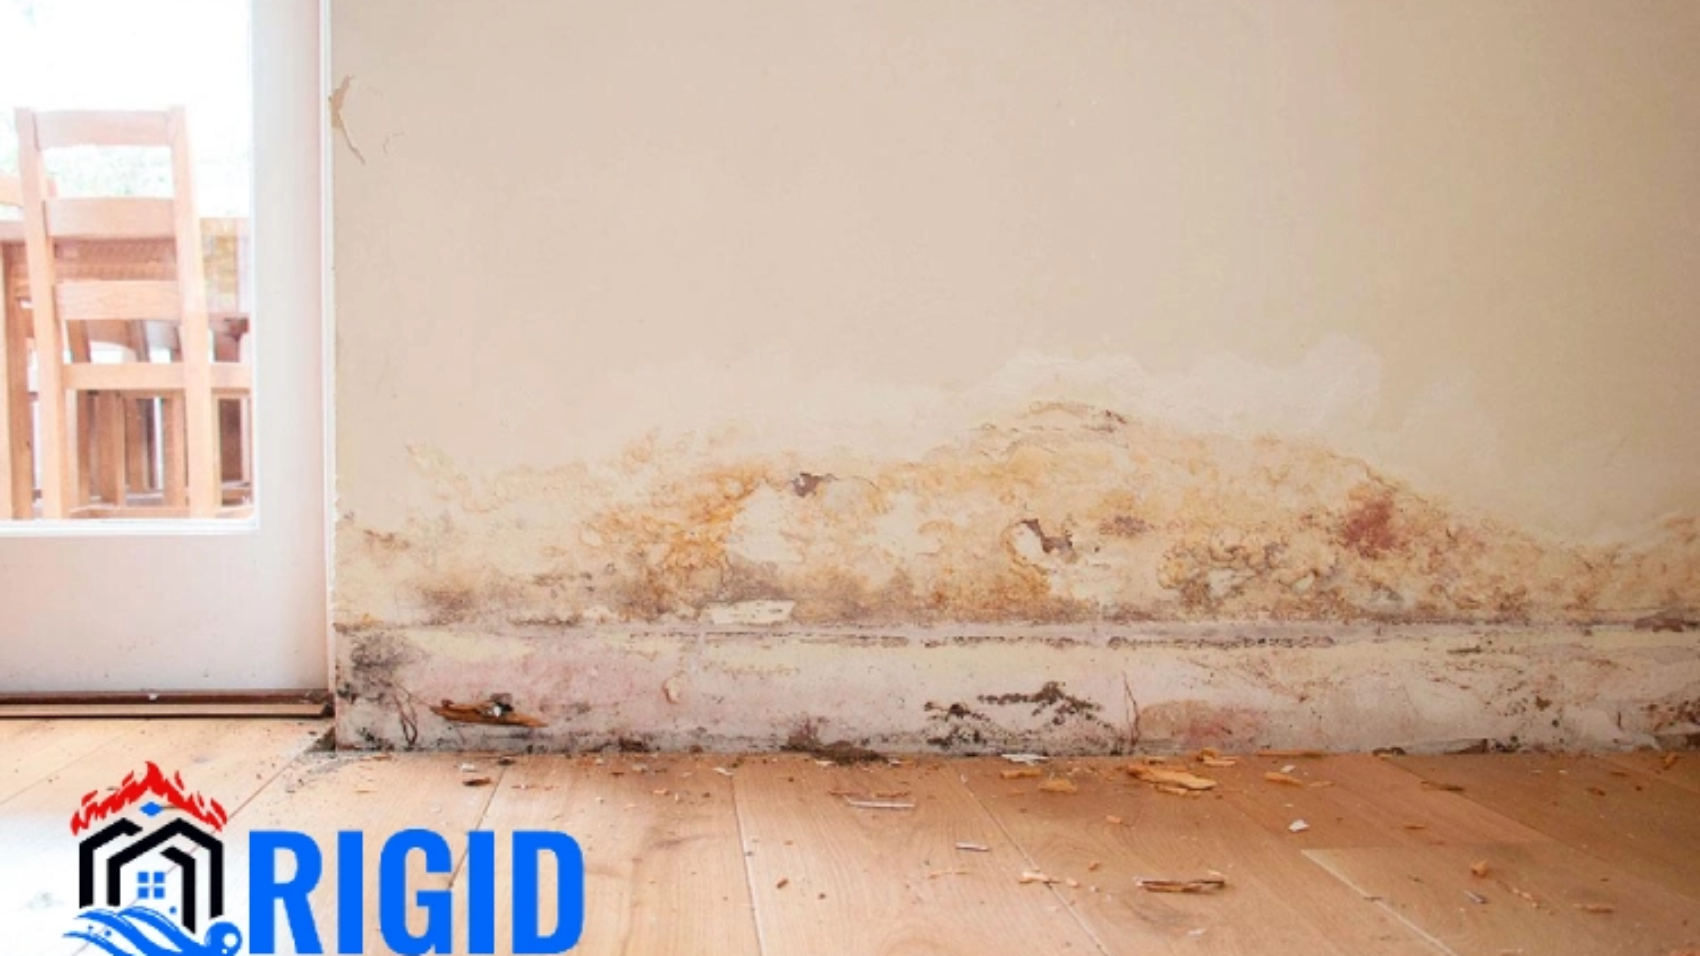
Discoloration on walls and ceilings can indicate previous water exposure or an ongoing moisture problem. Yellow, brown, or irregularly shaped marks may remain after a leak, particularly if water has traveled through drywall, plaster, or ceiling materials.

A stain does not necessarily mean the material is still wet. Older water marks can remain after successful drying. The important question is whether the stain is growing, changing color, becoming soft, or reappearing after repairs.

If a previously repaired area develops fresh discoloration, bubbling paint, or new streaks, investigate the possibility of an active leak or moisture trapped behind the surface.

3. Peeling Paint or Bubbling Wallpaper

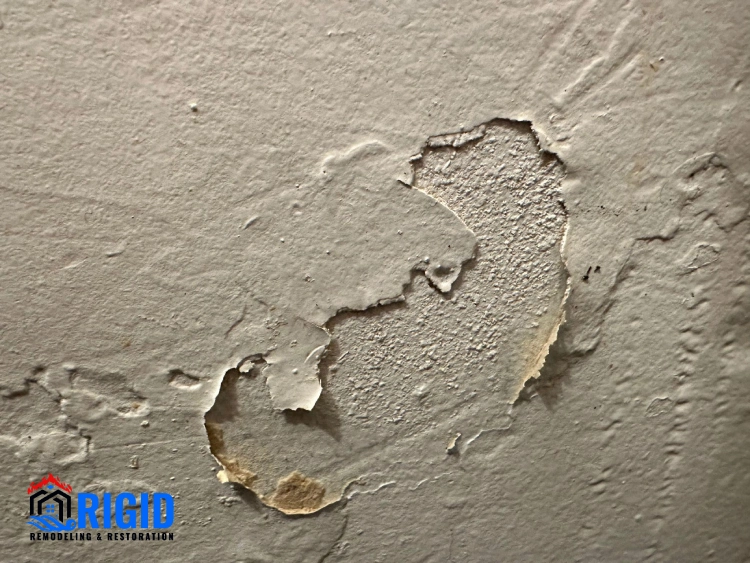
Paint and wallpaper can react to moisture trapped beneath the surface. Paint may bubble, crack, peel, or separate from drywall, while wallpaper may lift at the edges or develop wrinkles.

These changes can appear days or weeks after the original water event, particularly when moisture remains inside the wall or the affected materials were covered before drying was complete.

Although poor surface preparation and normal material aging can cause similar problems, peeling or bubbling in an area recently affected by water damage deserves closer inspection. Repainting the surface without identifying the moisture source may only hide the problem temporarily.

Read more: Kitchen Remodel Cost Breakdown

4. Warped Floors or Swollen Baseboards

Flooring provides important clues about moisture below the surface. Hardwood planks may cup, buckle, or separate, while laminate flooring can swell at the edges or develop raised seams. Baseboards may also expand, warp, or pull away from the wall.

These changes occur because many building materials absorb water and change shape as their moisture content increases. Even after standing water has been removed, moisture trapped beneath the flooring can continue affecting the material.

If flooring changes shape after a flood or plumbing leak, avoid assuming that the problem is purely cosmetic. A moisture meter and inspection of the subfloor may be needed to determine whether the affected materials have dried sufficiently.

5. Condensation on Windows or Other Surfaces

Condensation occurs when humid indoor air comes into contact with a surface that is cool enough for water vapor to turn into liquid. After a water damage event, persistent condensation may indicate that indoor humidity remains elevated.

Look for recurring water droplets on windows, damp window frames, or condensation around cold pipes. These signs can be especially noticeable in rooms with limited ventilation.

Condensation is not proof that a wall or floor is wet, and it can occur for reasons unrelated to a recent leak. However, when it appears alongside musty odors or visible water damage, it is worth checking indoor humidity and investigating possible moisture sources.

6. New Mold Spots or Discoloration

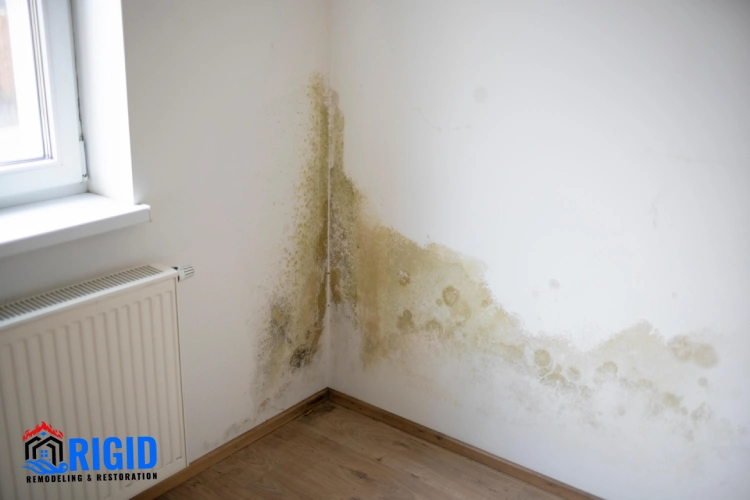
Mold can develop when moisture remains available on suitable surfaces. Growth may appear as small dark, greenish, gray, or other colored spots on drywall, wood, grout, fabric, or other materials.

It may first become visible near baseboards, behind furniture, around window frames, or inside closets where airflow is limited. Mold can also develop in concealed areas, meaning visible growth may represent only part of the affected area.

Not every dark stain is mold, and appearance alone cannot reliably identify a specific type. Avoid disturbing suspicious growth unnecessarily. If it is widespread, repeatedly returns, or is associated with extensive water damage, professional assessment may be appropriate.

7. Soft or Damp Drywall

Drywall that has absorbed water may feel soft, swollen, or unusually fragile. You may also notice crumbling edges, distorted corners, or areas that no longer feel firm when lightly touched.

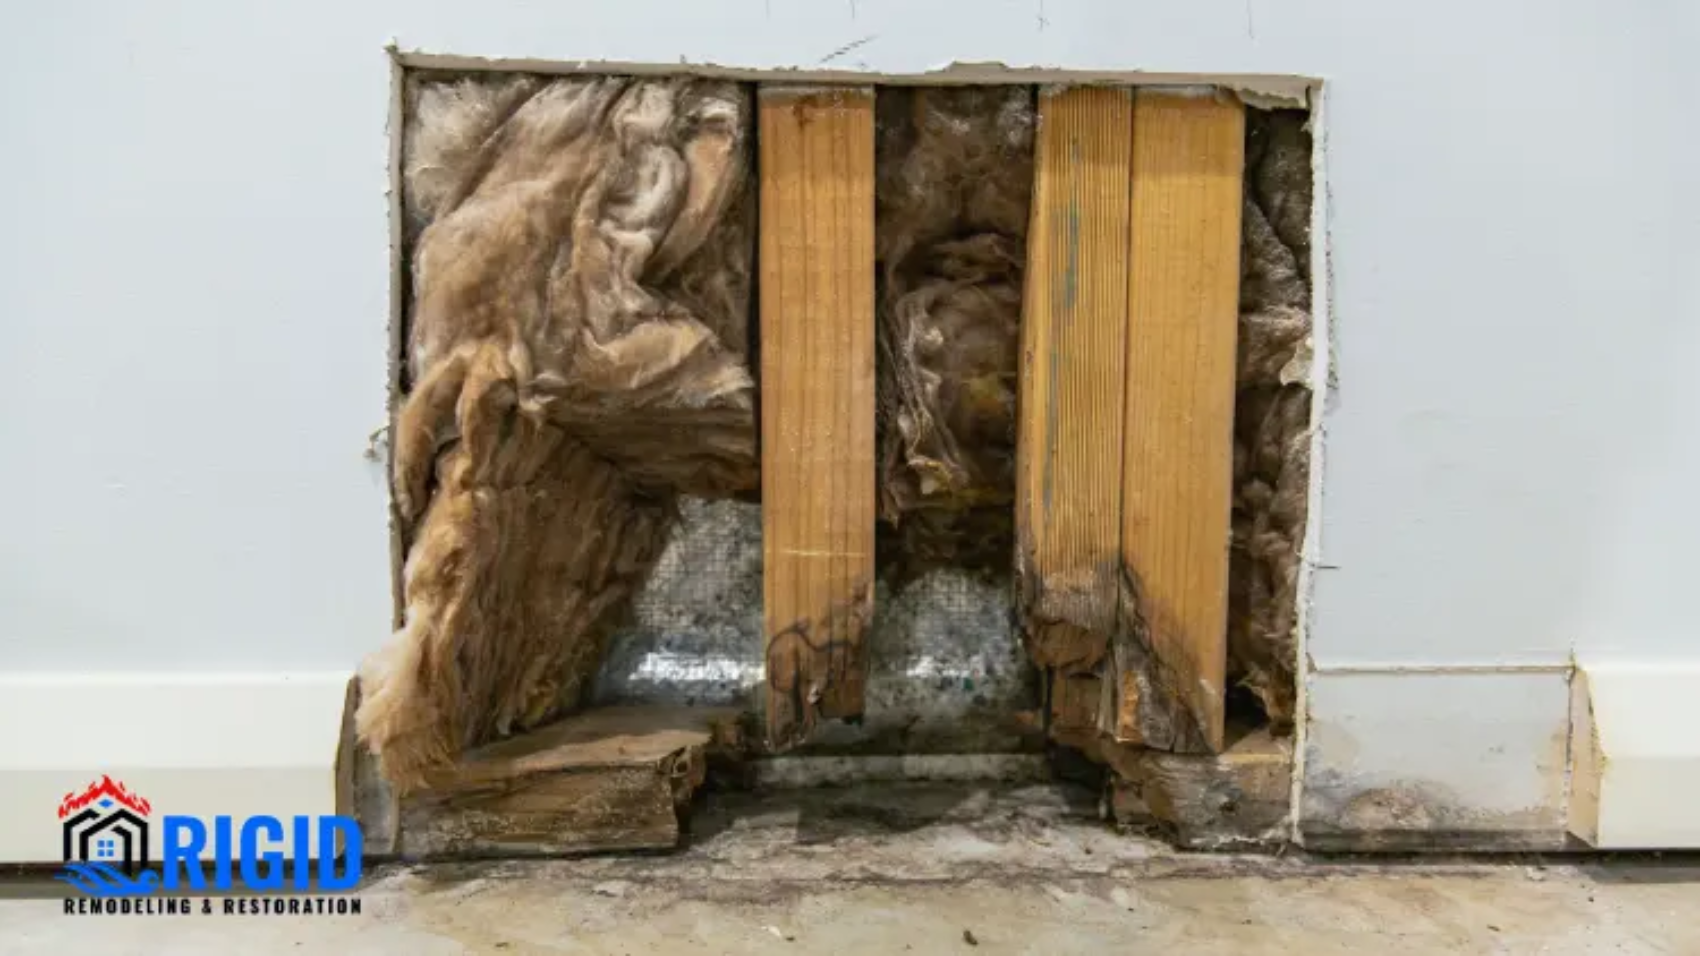
These changes can indicate that the material has been exposed to significant moisture. Even if the surface feels dry, the interior of the drywall or the cavity behind it may still contain moisture.

Do not press hard on damaged drywall or attempt to open walls without considering electrical wiring, plumbing, and other hazards. If the material is visibly deteriorating, a qualified restoration professional can determine whether drying is sufficient or whether removal is necessary.

8. A Sudden Increase in Indoor Humidity

Indoor humidity can remain elevated after a water leak or flood, especially when wet materials release moisture into the air. You may notice that rooms feel stuffy, towels take longer to dry, or windows develop condensation more frequently than before.

A digital hygrometer can help measure relative humidity. As a general indoor comfort and moisture-control target, many homes aim for relative humidity between 30% and 50%, while the U.S. Environmental Protection Agency recommends keeping indoor humidity below 60%, ideally between 30% and 50%, when possible.

A high reading does not automatically mean that hidden building materials are wet. Cooking, showering, outdoor humidity, and inadequate ventilation can also raise indoor moisture levels. Still, persistent high humidity after water damage is a reason to investigate further.

9. A Damp Carpet or Unusual Feeling Underfoot

Carpets can conceal moisture because their upper fibers may feel dry while the padding underneath remains wet. Walking across the room may reveal areas that feel unusually cool, spongy, or slightly damp.

Moisture can also remain between the carpet padding and the subfloor, where normal room airflow cannot reach it effectively. This is particularly important after flooding or a substantial plumbing leak.

If carpet was exposed to contaminated floodwater or sewage, ordinary drying may not be sufficient to make it safe. The appropriate response depends on the contamination, the materials involved, and the extent of exposure. A qualified restoration professional can assess whether cleaning, removal, or replacement is needed.

10. Water Damage That Keeps Returning

One of the clearest warning signs is damage that repeatedly appears after the area has been cleaned or repaired. Paint may bubble again, a musty smell may return, or new discoloration may develop in the same location.

Recurring symptoms often suggest that the original moisture source has not been fully addressed. The cause could be a hidden plumbing leak, water entering through the building envelope, moisture trapped in materials, or condensation associated with poor ventilation.

Repeatedly cleaning or repainting the same area will not solve the problem if water continues entering the structure. The source must be identified, and affected materials must be evaluated to determine whether additional drying or repairs are required.

Signs of Hidden Moisture After Water Damage

How to Check for Hidden Moisture in Your Home

Recognizing warning signs is the first step, but a more systematic inspection can help you determine whether additional drying is necessary. Begin with the areas most likely to have been affected by the original water event, then expand your inspection to nearby rooms and building materials.

A home inspection should combine visual observations, indoor humidity measurements, and moisture readings where appropriate. No single test provides a complete picture of every wall, floor, and concealed space.

Inspect the Original Water Damage Area

Start by examining the location where the leak, flood, or plumbing failure occurred. Look at the floor, baseboards, nearby walls, cabinets, and any materials that were previously wet.

Pay attention to changes that may have developed since cleanup, including discoloration, swelling, peeling finishes, loose flooring, or persistent odors. Check nearby rooms as well, because water can travel beneath floor coverings or through wall cavities.

Keep a record of the areas you inspect and any changes you notice. Photographs and dated notes can help you compare conditions over time and communicate the problem to a restoration contractor or insurance representative.

Check Areas Where Moisture Commonly Hides

Some parts of a home are more likely to retain moisture because they have limited airflow or contain materials that absorb water. Closets, spaces beneath sinks, areas behind refrigerators and washing machines, and the bottoms of cabinets deserve particular attention after a water event.

You should also consider wall cavities, subfloors, crawl spaces, basements, and areas around plumbing penetrations. If water reached an upper floor, inspect the ceiling and walls below the original leak as well.

Do not enter a flooded crawl space, a structurally damaged area, or a space with possible electrical hazards. Concealed areas may require professional inspection, especially if accessing them would involve removing building materials.

Measure Indoor Relative Humidity

A hygrometer is a simple device that measures the amount of moisture in the air relative to the maximum amount the air can hold at that temperature. It can help you understand whether indoor humidity remains unusually high after cleanup.

Place the device in the affected room and allow it to stabilize according to the manufacturer’s instructions. Compare readings over time and, if possible, check several rooms to identify areas with consistently higher humidity.

Remember that relative humidity measures moisture in the air, not the moisture content of a wall or floor. A room can have normal humidity while a section of drywall remains wet. For this reason, humidity readings should be considered alongside visual inspection and material moisture measurements.

Use a Moisture Meter on Suitable Materials

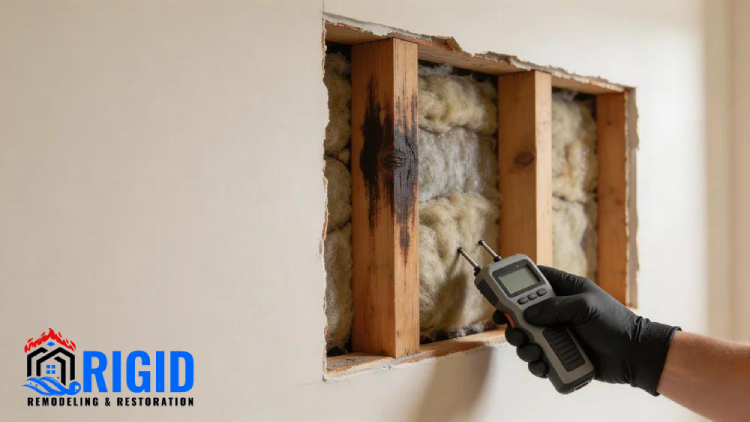
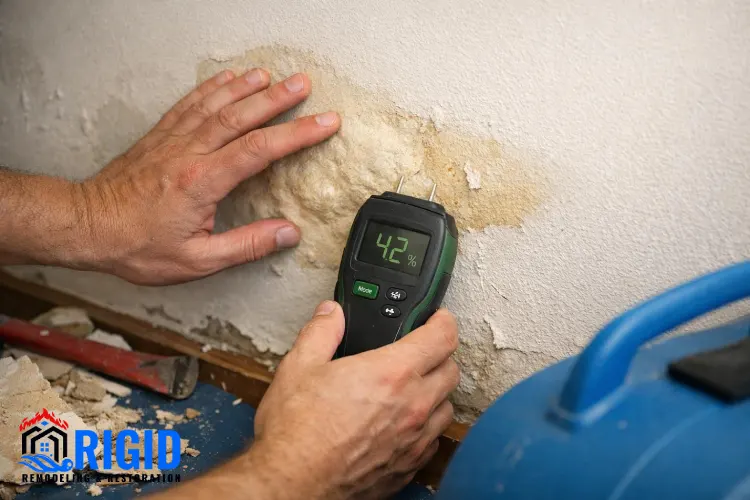
A moisture meter can help identify elevated moisture levels in materials such as wood and, with appropriate instruments, drywall or other building materials. Some meters use pins that contact the material, while others use non-invasive sensors to estimate moisture beneath the surface.

Take readings in several locations, including the affected area and comparable areas that were not exposed to water. Comparing similar materials can help identify unusual readings, although differences in material type, temperature, salts, and construction can affect results.

Follow the manufacturer’s instructions and use the correct settings for the material being tested. A moisture meter is a useful screening tool, but it does not automatically establish that a building is safe or fully dry. If readings remain elevated or the affected area is extensive, professional assessment may be needed.

Factors That Affect Drying Time

The amount of water involved is one of the most important factors. A minor plumbing leak that is discovered immediately is generally easier to address than a flood that saturates several rooms.

Material type also matters. Porous materials can absorb and retain water, while dense or nonporous surfaces may dry more quickly. Temperature, airflow, dehumidification, and the ability to access wet areas all influence how effectively moisture can be removed.

If the original leak remains active, drying will be difficult or impossible to complete. Before attempting to dry affected materials, the source of the water must be identified and repaired.

Why Waiting for Surfaces to Feel Dry Is Not Enough

A surface can feel dry even when moisture remains underneath it. For example, the top of a carpet may dry while the padding beneath it stays wet, and the painted side of a wall may feel normal while moisture remains inside the drywall or wall cavity.

This difference is important because trapped moisture can support mold growth and damage materials over time. Covering a damp surface with new flooring, paint, or trim can make the remaining moisture harder to detect and may slow the drying process.

Use appropriate moisture measurements and inspection results to confirm that affected materials have reached suitable drying levels before completing repairs.

What to Do If You Discover Moisture After Cleanup

Finding moisture after a cleanup does not always mean that the entire restoration process has failed. However, it does mean that the source and extent of the moisture should be evaluated before the area is closed up or repaired.

Your response should depend on whether the moisture comes from an active leak, residual water in building materials, or elevated indoor humidity. Addressing the cause first helps prevent repeated damage.

Stop Any Ongoing Water Intrusion

If you find an active plumbing leak, arrange for the water supply to be shut off when safe and have the problem repaired. If water is entering through the roof, windows, foundation, or exterior walls, the source of intrusion must also be addressed.

Never touch wet electrical equipment or enter an area where standing water may have reached electrical outlets, wiring, or appliances. If you suspect an electrical hazard, keep away and contact a qualified professional.

Drying equipment cannot solve an ongoing water intrusion problem. The affected materials may continue absorbing moisture until the source has been corrected.

Improve Air Circulation and Control Humidity

When the area is safe and the water source has been addressed, appropriate air circulation and dehumidification can help remove moisture from the indoor environment. Fans can support evaporation, while a dehumidifier removes water vapor from the air.

However, equipment must be selected and positioned appropriately for the size of the affected area and the materials involved. In some circumstances, moving air may spread contaminants or disturb mold growth, so professional guidance is important when contaminated water or significant microbial growth is suspected.

Simply opening windows is not always effective. If outdoor air is humid, bringing it inside may slow drying rather than improve it. Indoor and outdoor conditions should be considered before relying on natural ventilation.

Determine Whether Materials Need to Be Removed

Not every wet building material must be replaced. Some materials can be dried successfully when the water is clean, the damage is limited, and drying begins promptly. Others may be too damaged, contaminated, or difficult to dry safely.

Wet insulation, severely deteriorated drywall, swollen composite wood, and materials exposed to sewage or contaminated floodwater may require removal. The decision depends on the material, the duration of exposure, the type of water, and the extent of the damage.

Before removing materials, consider the possibility of hidden wiring, plumbing, structural components, and hazardous substances in older buildings. A qualified restoration professional can help determine the safest and most effective approach.

When Should You Call a Professional for Moisture Detection?

Some moisture problems are relatively easy to identify and resolve, while others require specialized equipment and experience. If you have persistent musty odors, recurring stains, elevated moisture readings, or visible damage that continues after cleanup, a professional inspection may be the best next step.

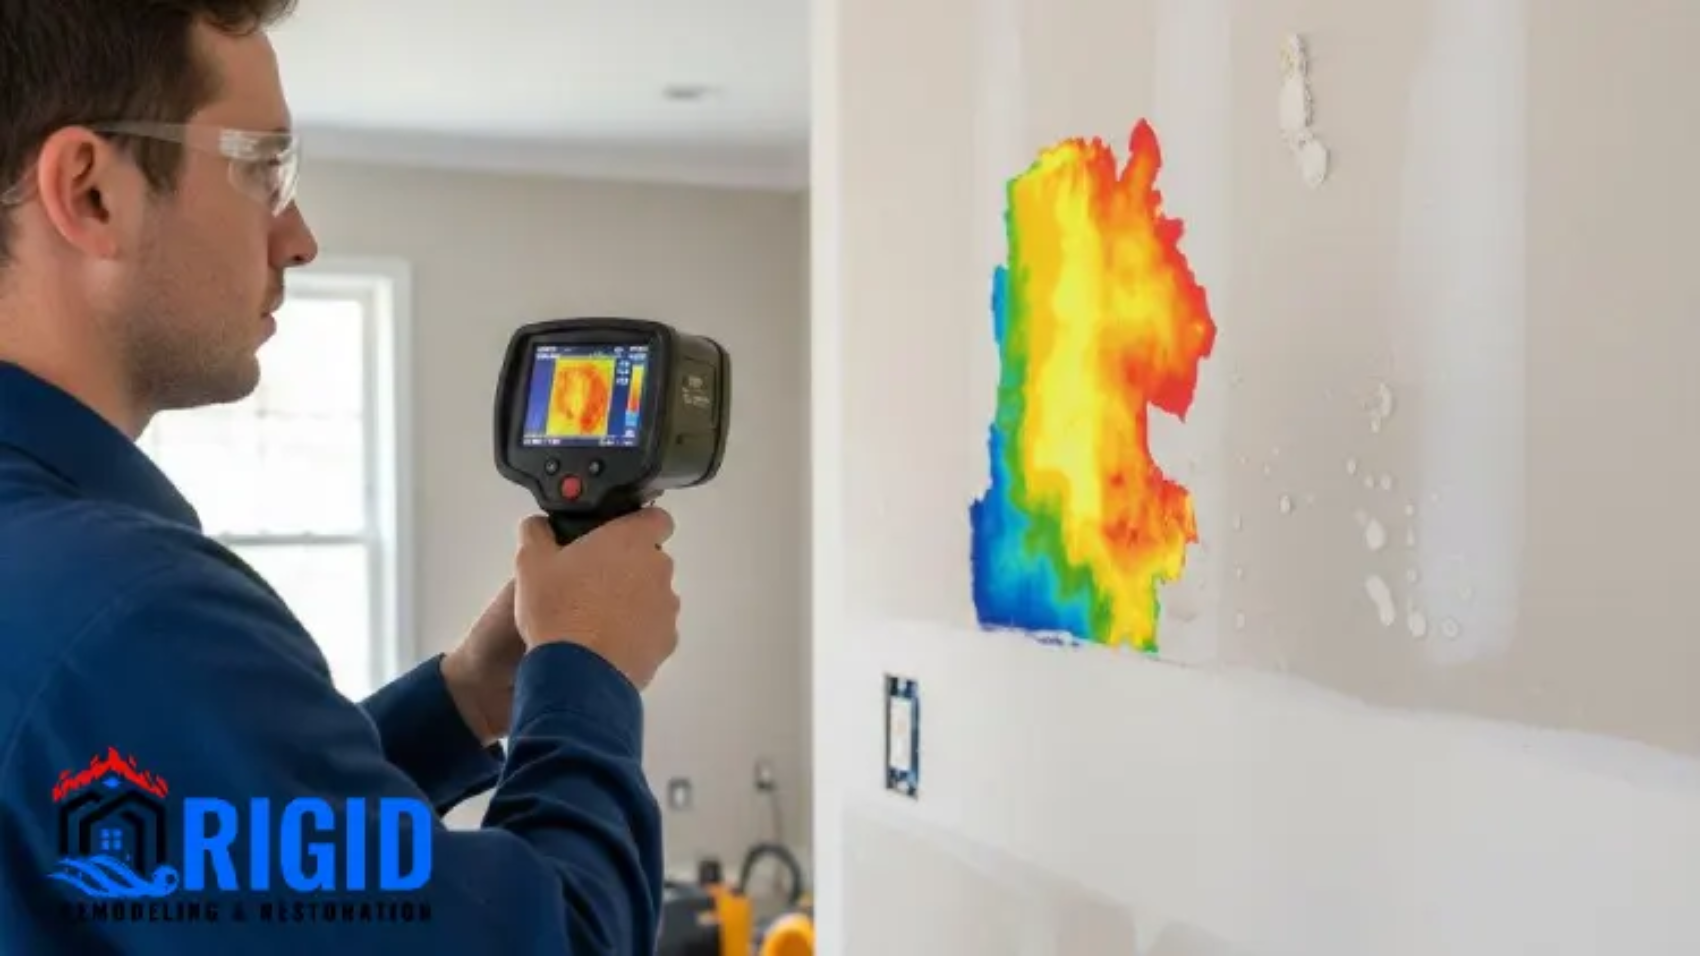
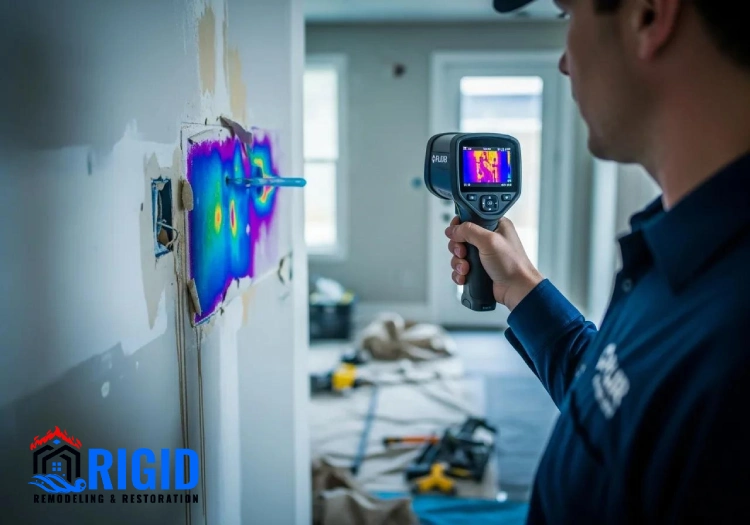
Professional water damage restoration companies can assess affected areas, measure moisture in building materials, and determine whether additional drying or removal is needed. Depending on the situation, they may use moisture meters, thermal imaging cameras, humidity monitoring equipment, and other inspection methods to identify areas that are not visible from the surface.

Situations That Require Professional Attention

Professional help is especially important when water has affected multiple rooms, entered wall cavities, reached insulation, or remained inside materials for an extended period. It is also advisable when there is significant mold growth, sewage contamination, structural deterioration, or uncertainty about whether the property is safe to occupy.

If moisture keeps returning after repeated drying attempts, the problem may involve an unresolved leak or another source of water intrusion. A professional can investigate the cause rather than simply treating the visible symptoms.

What Happens During a Professional Moisture Inspection?

A restoration professional typically begins by reviewing the water event, the cleanup already completed, and any signs of recurring damage. They then inspect affected materials and take measurements to understand where moisture remains.

Depending on the findings, the inspection may include moisture mapping, comparative readings, thermal imaging, or targeted access to concealed spaces. Thermal imaging can reveal temperature patterns that may suggest moisture-related concerns, but it does not directly measure water content and should be interpreted alongside other findings.

Final Thoughts

Knowing how to tell if your home still has moisture after cleanup can help you catch hidden problems before they lead to more extensive damage. Persistent musty odors, recurring water stains, peeling paint, warped flooring, elevated humidity, and soft drywall are all signs that deserve attention, particularly when they appear in areas recently affected by a leak or flood.

Visual inspection is a useful starting point, but it cannot always reveal moisture trapped inside walls, beneath flooring, or within insulation. Using a hygrometer and an appropriate moisture meter can provide additional information, while professional moisture detection may be necessary when damage is extensive or the source remains unclear.

Frequently Asked Questions

  1. How can I tell if my walls are still wet after water damage cleanup?

Look for discoloration, bubbling paint, peeling wallpaper, soft drywall, and persistent musty odors. However, these signs may not appear even when moisture remains inside a wall. A suitable moisture meter can help assess the material, and a restoration professional may use additional tools to investigate concealed areas.

  1. How long does it take for a house to dry completely after water damage?

Drying time depends on the amount of water, the materials affected, indoor humidity, temperature, and the equipment used. Some minor incidents may dry within hours, while significant water damage can require several days or longer. Moisture readings are more reliable than a fixed timeline for confirming that drying is complete.

  1. Can mold grow after a home looks completely dry?

Yes. Visible surfaces can dry while moisture remains inside drywall, insulation, carpet padding, or other porous materials. If those materials remain damp, mold may develop under suitable conditions. Hidden moisture should be investigated when musty odors, recurring stains, or other warning signs appear.

Kitchen Layout Design Ideas

6 Kitchen Layouts Explained: Which One Fits Your Space?

Here is a fact that surprises most homeowners: professional designers often spend more time deciding where the fridge, sink, and stove go than choosing cabinet colors or countertops. The reason is simple. A pretty kitchen that makes you walk in circles every time you cook will annoy you every single day, while a smart plan makes even a modest room feel effortless.

That is exactly why understanding kitchen layouts is the best first step in any remodel or new build. Whether you live in a small apartment or a big family house, the shape of your kitchen decides how you move, cook, clean, and even socialize.

In this guide, we will walk through the six most common kitchen layouts in plain language, look at the pros and cons of each, and help you figure out which one fits your space, your budget, and your cooking style.

Read more: how much does water mitigation cost?

What Makes a Kitchen Layout Work?

Before we jump into the six options, it helps to know what designers look at when they judge a plan. A good layout is not about looks. It is about how smoothly you can move between the places where you store food, wash dishes, prep ingredients, and cook. If those spots are too far apart, you waste energy. If they are too close, you keep bumping into things or into each other.

Two ideas show up in almost every discussion about kitchen design: the work triangle and work zones. Once you understand them, comparing different kitchen layouts becomes much easier.

The Kitchen Work Triangle

The work triangle connects your three busiest spots: the refrigerator, the sink, and the stove. The classic rule says the three sides of that imaginary triangle should add up to somewhere between 13 and 26 feet, and no single side should be shorter than 4 feet or longer than 9 feet. That range keeps everything within easy reach without making the room feel cramped.

This rule was created decades ago for one-cook kitchens, so it is a guide rather than a law. Still, if your plan breaks it badly, you will probably feel it the first time you cook a big dinner.

Work Zones in Modern Kitchens

Today, many designers also think in zones: a prep zone, a cooking zone, a cleaning zone, and a storage zone. This approach fits real life better, especially when two people cook at once or when kids come in to grab snacks. The best kitchen layouts let each zone breathe so that one person washing dishes does not block someone else getting milk from the fridge.

Keep both ideas in mind as you read the next section. Each layout handles the triangle and the zones a little differently, and that is what makes one better for your home than another.

Kitchen Layout Ideas for Every Space

The 6 Kitchen Layouts You Need to Know

Now for the main event. These six shapes cover almost every kitchen you will see in homes today, from tiny studios to large open-plan houses. Some work best when space is tight, others shine when you have room to spread out, and a few can be combined with an island or a breakfast bar for extra function.

1. The One-Wall Kitchen

In a one-wall kitchen, everything sits along a single wall: cabinets, appliances, sink, and counter in one straight line. You will see this layout a lot in studio apartments, lofts, and small homes where the kitchen is part of the living area. It saves space, keeps costs low because plumbing and wiring stay on one wall, and makes the room feel open.

The downside is that you lose the efficient triangle, since everything is in a row. Counter space can also get limited, and walking from the fridge to the stove might mean several steps. If you choose this plan, smart storage, a slim rolling cart, or a movable island can make a big difference.

2. The Galley Kitchen

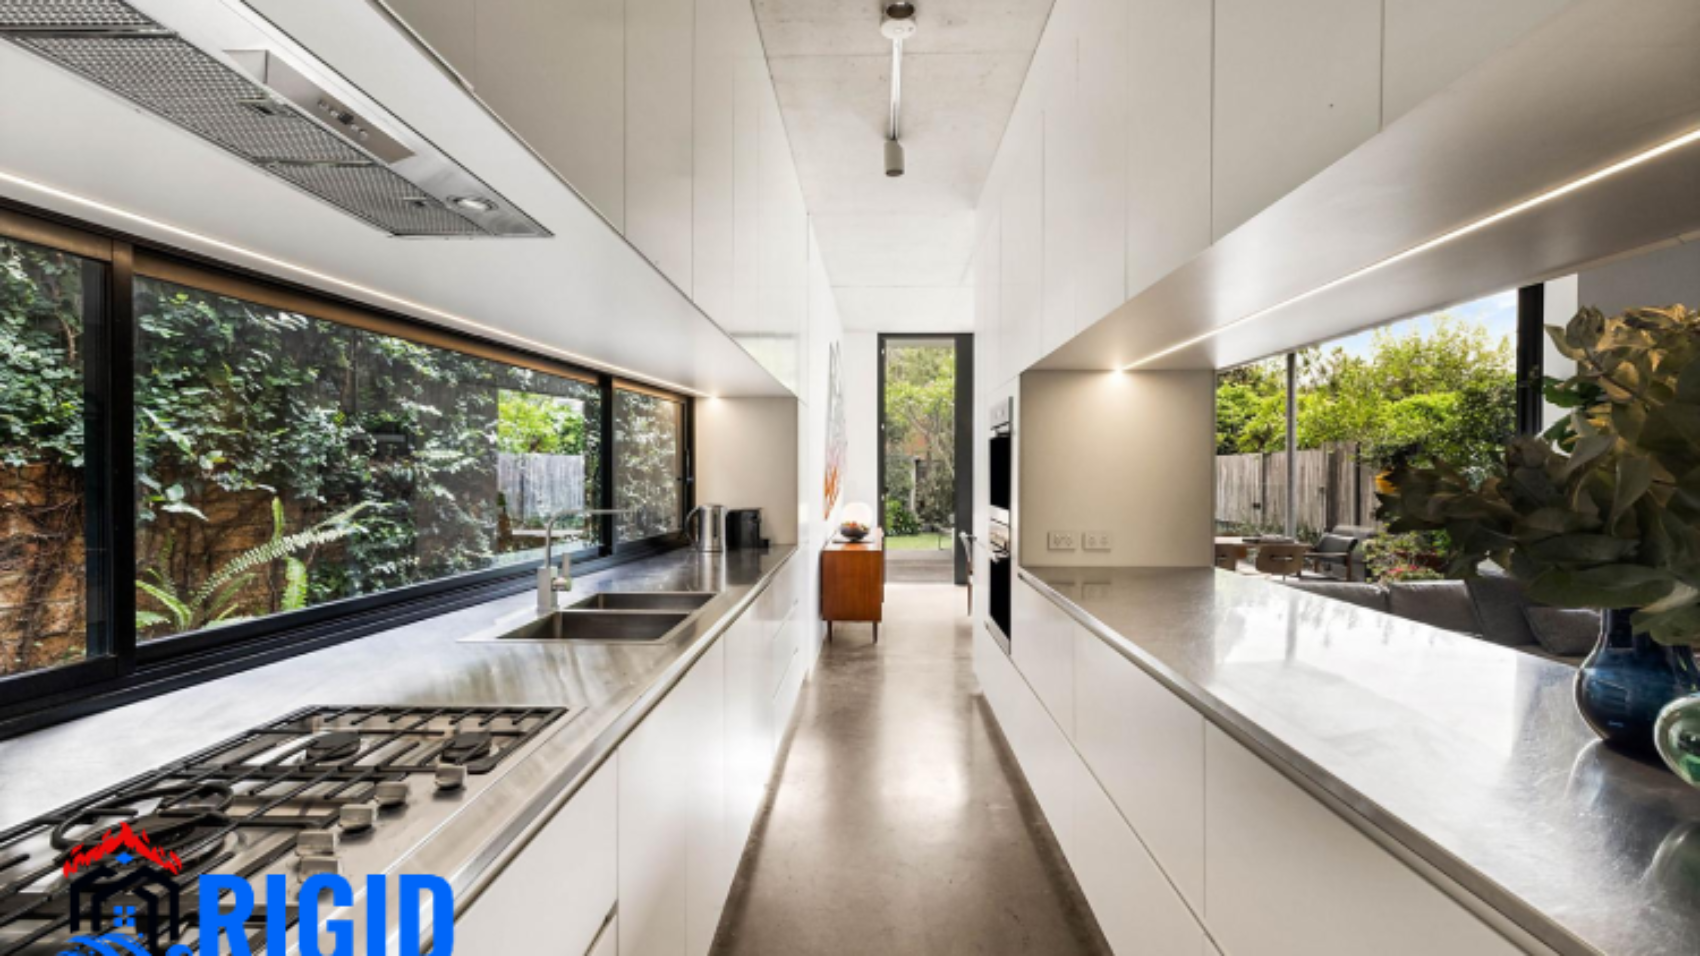
A galley kitchen has two parallel runs of cabinets and appliances with a walkway between them. It is named after the compact kitchens on ships, and that history tells you a lot: every inch is used well. Many professional cooks love this layout because everything is close at hand, and it works great in narrow rooms.

The main concern is traffic. If the galley is a pass-through between two rooms, people will constantly walk through your cooking space. Aim for a walkway of about 4 feet so two people can pass without squeezing, and think about opening one end to a dining area to keep it from feeling like a tunnel.

3. The L-Shaped Kitchen

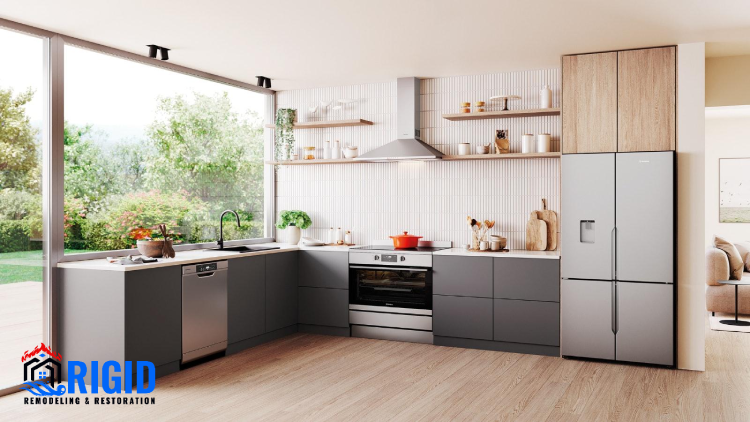
The L-shaped kitchen uses two adjacent walls that meet at a corner. It is one of the most popular kitchen layouts for a reason: it fits small and medium rooms, creates a natural work triangle, and leaves the rest of the room free for a dining table or an island. It also works well in open-plan homes because the kitchen feels connected to the rest of the space.

Its weak point is the corner. Standard corner cabinets can swallow pots and pans, so you will want a lazy Susan or a pull-out system. Also, if both legs of the L are very long, the triangle stretches out and you end up taking more steps than you should.

4. The U-Shaped Kitchen

The U-shaped kitchen wraps cabinets and appliances around three walls, which gives you the most storage and counter space of the smaller layouts. It is a dream for people who cook a lot because you can stand in the middle and reach almost everything by turning around. Two cooks can also work at once without getting in each other’s way.

The catch is size. The room needs to be wide enough, ideally at least 8 to 10 feet across, or the center feels tight and dark. Corners also appear twice, so plan your storage carefully. If the room is large enough, you can open one side to create a peninsula and make the whole space friendlier for guests.

5. The G-Shaped Kitchen

Think of the G-shaped kitchen as a U-shape with an extra peninsula or partial wall added on one side. That extra arm gives you more counters, more storage, and often a spot for bar stools, so it doubles as a prep area and a casual dining place. Families who want a busy kitchen where everyone hangs out often love this layout.

However, the G-shape needs a fairly large room, and the entry opening can become narrow. If you add too many cabinets, the kitchen may feel closed in. Keep the peninsula height and the open sight lines in mind so the space stays inviting rather than boxed in.

6. The Island Kitchen

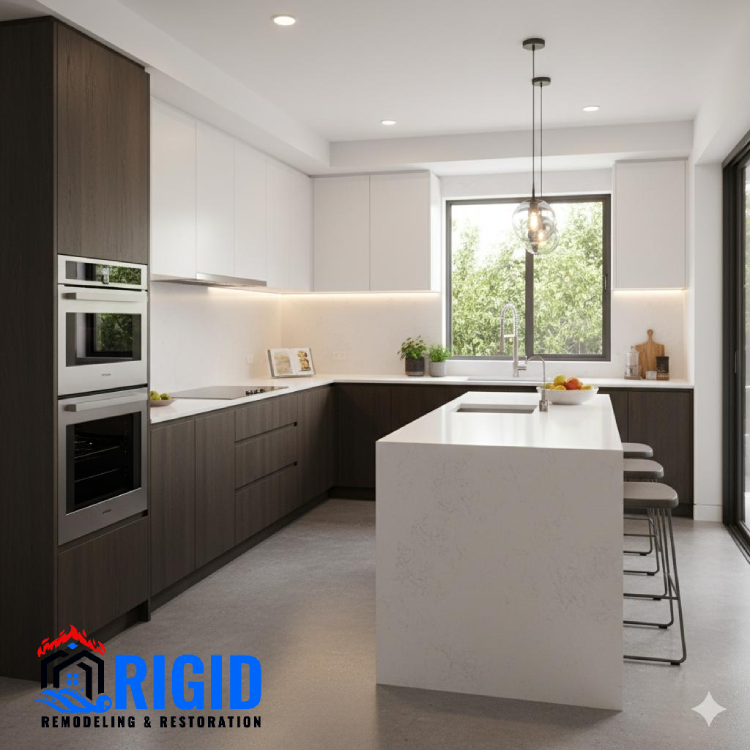
An island kitchen is not really its own shape. It is an L, a U, or a one-wall plan with a freestanding block of cabinets in the middle. Still, designers treat it as its own category because adding an island changes how you use the whole room. It gives you extra prep space, seating, storage, and a natural gathering spot.

To make it work, you need enough room. Leave about 3 to 4 feet of clearance on all sides so you can open appliances and walk around comfortably. If your kitchen is too small, a rolling cart or a narrow table can give you some of the benefits without crowding the room.

Kitchen Layouts Compared at a Glance

It can be hard to keep six options straight in your head, so here is a simple comparison. Use it as a quick reference as you narrow down which one suits your space, and then read the next section to dig into how to decide.

Layout Best For Minimum Space Main Advantage Main Drawback
One-wall Studios, small homes Very small Low cost, open feel Limited counter space
Galley Narrow rooms, serious cooks Small Very efficient Can feel tight, traffic issues
L-shaped Small to medium homes Small to medium Flexible, open Wasted corner space
U-shaped Avid cooks, larger rooms Medium Lots of storage Needs width
G-shaped Busy families Medium to large Extra counter and seating Can feel enclosed
Island Open-plan, entertaining Large Prep space and social hub Needs lots of clearance


How to Choose the Right Layout for Your Space

Picking from the best kitchen layouts is easier when you stop asking which one looks nicest and start asking which one fits your life. A layout that works wonders in your friend’s house might frustrate you if your room is shaped differently or you cook in a different way.

Three practical questions will guide you: how much room you have, how you cook, and what you can realistically spend. Let us look at each one.

Read more: water mitigation vs water d=restoration

Start With Your Room’s Size and Shape

Grab a tape measure and sketch your room, including windows, doors, and the spots where plumbing and gas lines already exist. A long narrow room will almost always suit a galley or one-wall plan, a square room is ideal for an L or U shape, and a large open room is where G-shaped and island kitchens come alive.

Do not forget doors and windows. They can eat up wall space you thought you had, and moving them costs a lot more than rearranging cabinets.

Think About How You Actually Cook

Be honest about your habits. If you cook elaborate meals every night, you will want plenty of counter space and storage, which points toward a U-shaped or G-shaped kitchen. If you mostly reheat food and make quick breakfasts, a compact one-wall or galley plan will serve you fine.

Also think about who else uses the kitchen. If kids do homework at the counter or friends always gather around while you cook, an island or peninsula gives them a place to sit without being in your way.

Consider Your Budget and Plumbing

The cheapest remodels keep the sink and stove where they already are. Moving plumbing, gas lines, and ventilation can quickly double a project’s cost. If your budget is tight, choose a layout that works with your current setup, such as upgrading an existing L-shape with better cabinets instead of rebuilding it completely.

If you do have room to spend, put money into the parts you use most, like the cooking zone and the main prep counter, rather than spreading it evenly across the room.

Best Kitchen Layout Ideas

Common Mistakes to Avoid When Planning Your Kitchen

Even with the right shape, small planning errors can make a kitchen frustrating. The good news is that most of these mistakes are easy to spot before construction starts, and avoiding them can save you a lot of money and regret.

Ignoring Traffic Flow

People often design the kitchen as if only one person will ever use it. In reality, family members walk through, guests wander in, and pets get underfoot. Make sure the path between the fridge, sink, and stove is not also the main route from the back door to the living room.

Forgetting About Storage and Landing Space

A beautiful plan falls apart if you have nowhere to put groceries or hot pans. Leave at least 15 inches of counter beside the fridge, and some free counter next to the stove and sink. It sounds small, but those spots make cooking feel smooth rather than chaotic.

Overcrowding the Room With an Island

An island is wonderful when there is space for it, but squeezing one into a small kitchen makes everything harder. If you cannot leave about 3 feet around it, skip it and choose a smaller table or a cart on wheels instead.

Final Thoughts

There is no single perfect answer among kitchen layouts. The best one is the one that matches your room, your cooking habits, and your budget. A one-wall plan can be just as clever as a big island kitchen when it is designed with care, and an L-shaped or U-shaped design can handle almost anything with the right storage.

Start by measuring your space, think honestly about how you cook, and use the work triangle and zones as your guide. Sketch two or three options on paper, walk through them in your mind, and you will quickly see which one feels right. If you are making big changes, a quick chat with a kitchen designer can help you catch problems early. Get the layout right, and everything else, from cabinets to lighting, falls into place much more easily.

Frequently Asked Questions

What is the most popular kitchen layout?

The L-shaped kitchen is generally the most popular choice because it fits many room sizes, supports a good work triangle, and leaves room for an island or dining table. It also works well in open-plan homes, which is one reason so many new builds use it.

Which kitchen layout is best for a small space?

For small rooms, the galley and one-wall layouts usually work best because they use space efficiently and keep costs down. A small L-shaped kitchen can work too. In any of these, smart storage like tall cabinets, drawer organizers, and open shelving helps you get the most from every inch.

Do I need an island in my kitchen?

No, an island is a nice extra rather than a requirement. It adds prep space and seating, but only if you have enough clearance around it. If your room is small, a peninsula, a rolling cart, or a slim table can give you similar benefits without crowding the space.

How much does it cost to change my kitchen layout?

Costs vary widely, but moving plumbing, gas lines, and electrical work is usually the biggest expense. Keeping the sink, stove, and fridge in roughly the same places and updating cabinets, counters, and finishes is far cheaper than a full reconfiguration. Get a few quotes from local contractors before deciding.

Is the work triangle still important today?

Yes, it is still a helpful guide, especially for smaller kitchens with one cook. In larger or busier homes, designers often combine it with work zones so multiple people can cook, clean, and prep at the same time without getting in each other’s way.

Water Mitigation vs Water Restoration_ What You Need to Know

Water Mitigation vs. Water Restoration: What’s the Difference?

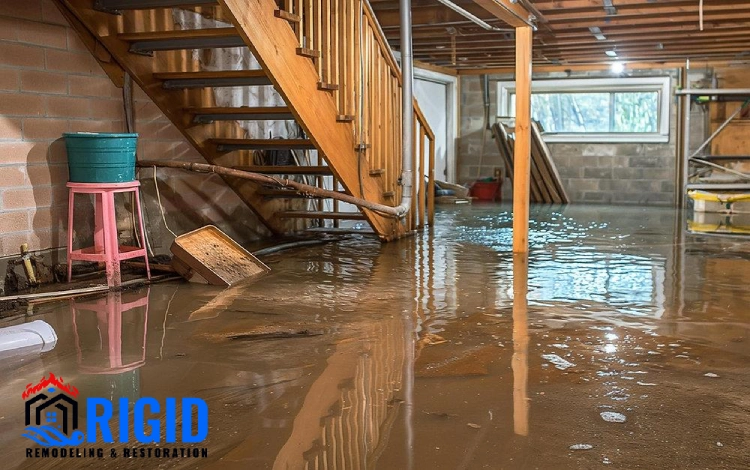
Water damage is one of the most stressful situations a property owner can face. It often starts silently—like a small leak under a sink or a burst pipe behind a wall—and then quickly escalates into a much larger problem involving soaked floors, damaged drywall, and even structural risks. In these moments, most people search for answers, but they quickly run into confusing terminology that makes the situation feel even more overwhelming.

One of the most common points of confusion is understanding Water Mitigation vs. Water Restoration: What’s the Difference? These two terms are often used interchangeably, but they actually represent two completely different stages in the water damage recovery process. Knowing the difference is not just technical knowledge—it directly affects how fast your property is saved, how much damage you prevent, and how much money you may spend in the long run.

To fully understand Water Mitigation vs. Water Restoration: What’s the Difference?, we need to break down each process, look at how professionals handle water damage step by step, and understand where each service fits into the bigger picture of property recovery.

Read more: water mitigation cost

What Is Water Damage Mitigation?

Before diving deeper into Water Mitigation vs. Water Restoration: What’s the Difference?, it is important to first understand what water mitigation actually means. Water mitigation refers to the immediate actions taken to stop water from spreading and to reduce further damage after a leak, flood, or burst pipe.

The main goal of mitigation is not to fix everything permanently, but to control the situation. This stage is urgent and usually begins within hours of the incident. The faster mitigation begins, the less damage the structure suffers over time.

When discussing Water Mitigation vs. Water Restoration: What’s the Difference?, mitigation is essentially the emergency response phase. It is about damage control, not rebuilding.

Key Actions in Water Mitigation

Water mitigation involves several critical steps that professionals follow in a structured way. First, they identify the source of the water and stop it if possible. This could mean shutting off the main water supply or sealing a leak.

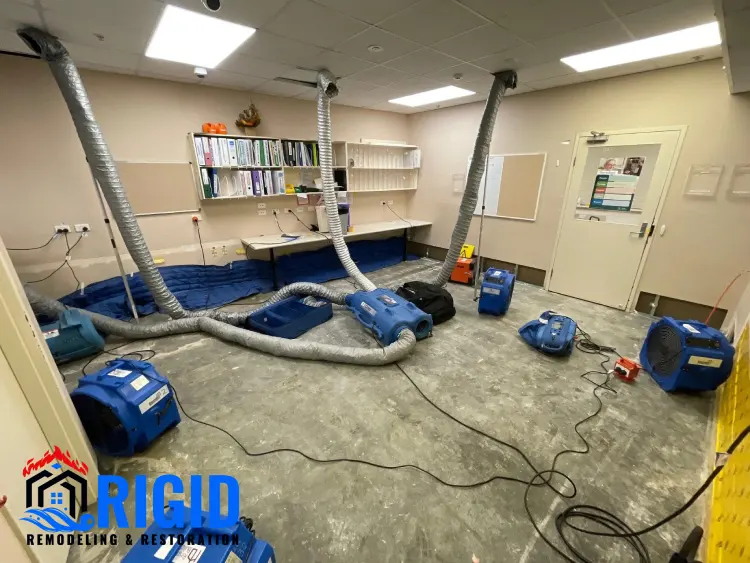
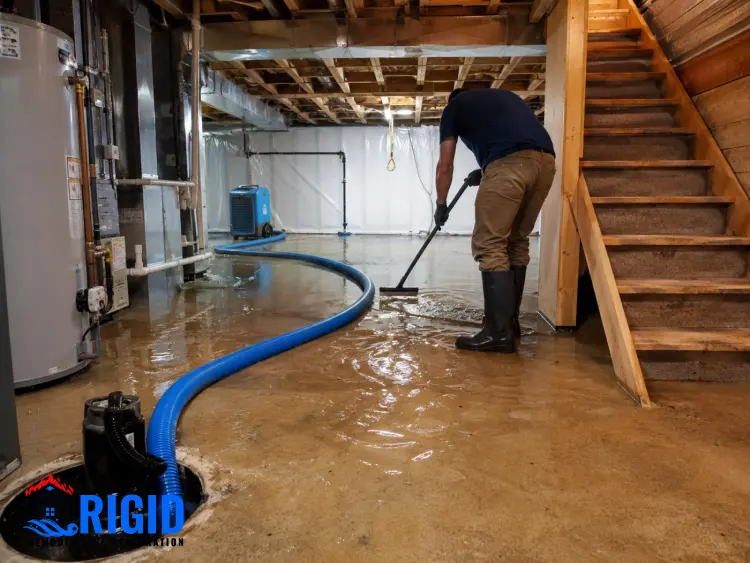
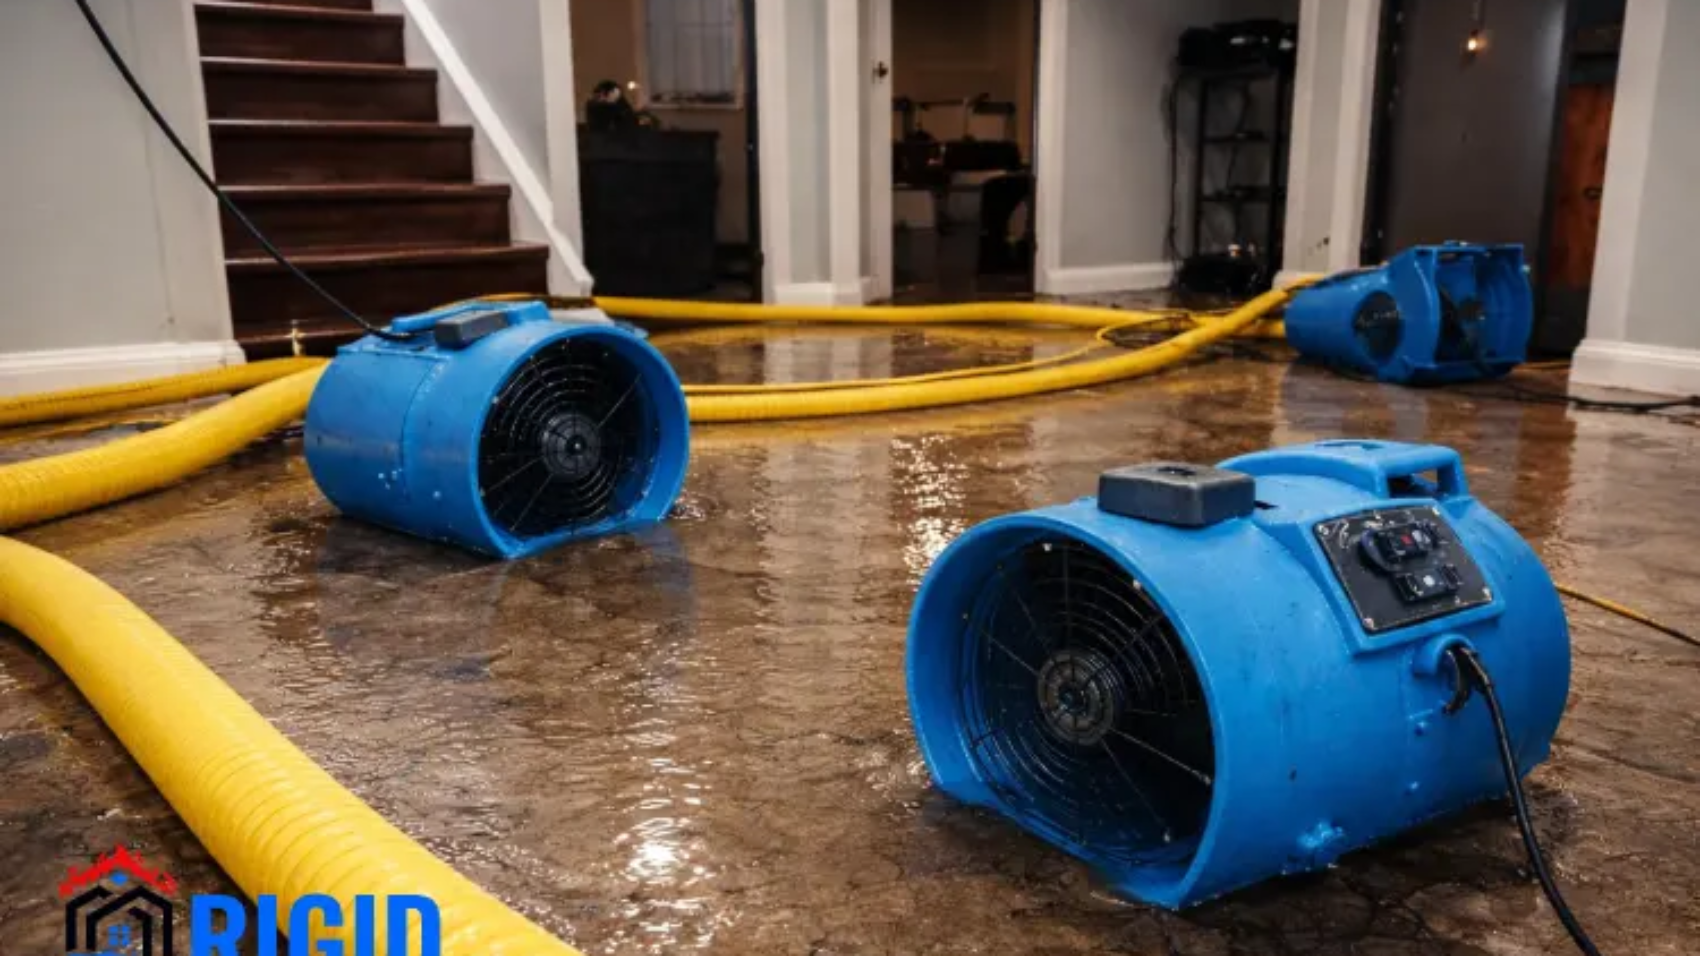
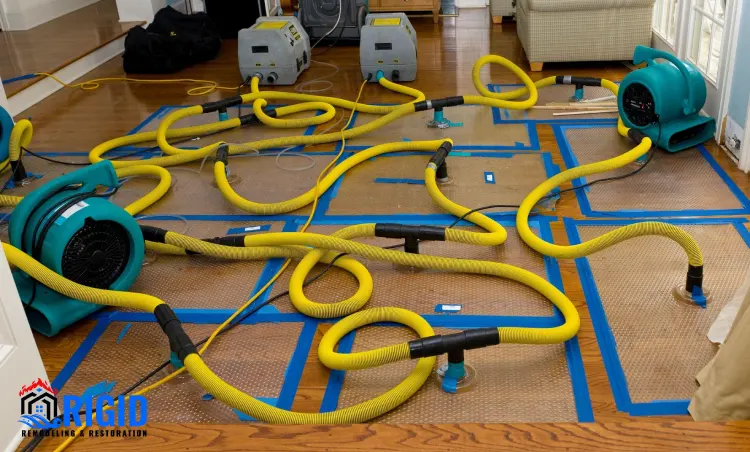
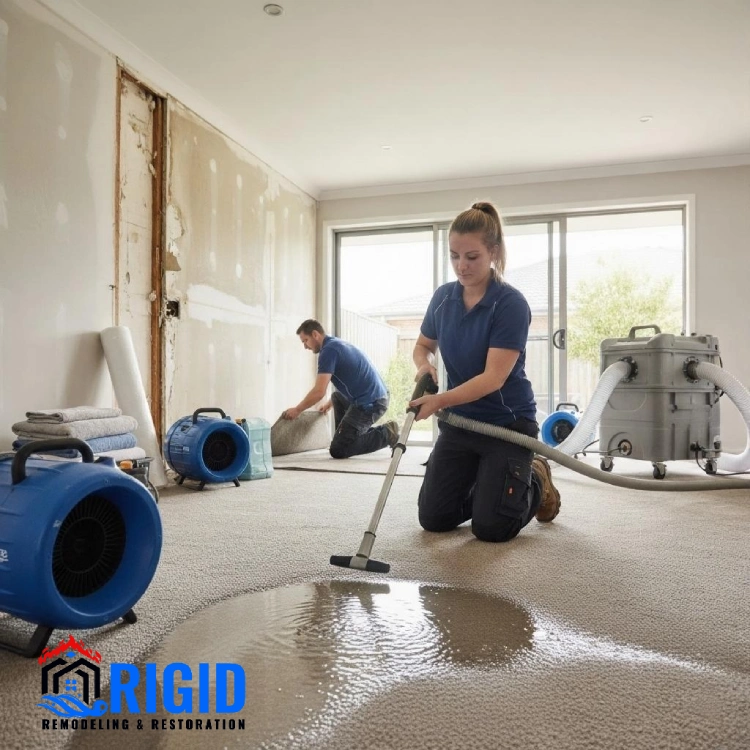
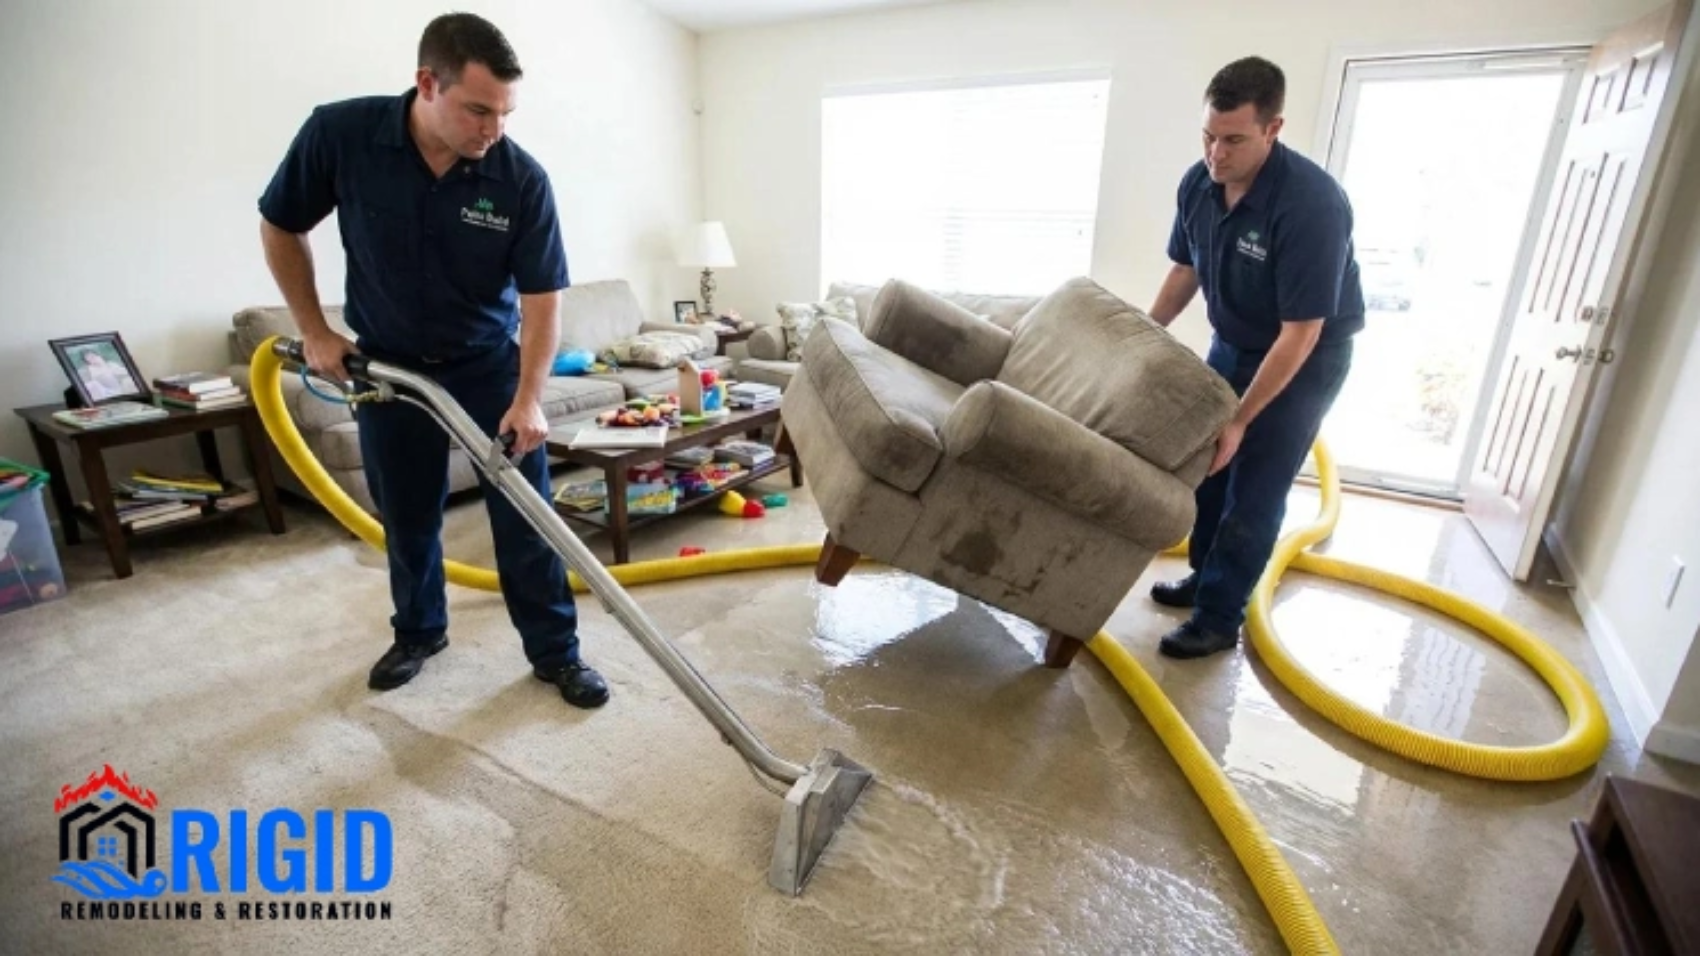
Next, they focus on removing standing water using pumps and industrial vacuums. Once the visible water is removed, the drying process begins using dehumidifiers and air movers to prevent mold growth and further structural weakening.

All of these steps highlight why Water Mitigation vs. Water Restoration: What’s the Difference? is such an important concept—because mitigation happens immediately, while restoration happens later.

Water Mitigation vs Water Restoration_ Complete Guide for Homeowners

What Is Water Restoration?

Once the property has been stabilized through mitigation, the next phase is restoration. Understanding this stage is essential when analyzing Water Mitigation vs. Water Restoration: What’s the Difference?, because restoration focuses on returning the property to its original condition.

Water restoration includes repairing, rebuilding, and replacing damaged materials. This can involve drywall replacement, flooring repair, repainting walls, and restoring electrical systems if needed.

Unlike mitigation, restoration is not urgent in the first hours. Instead, it begins after the property has been fully dried and stabilized.

The Purpose of Restoration

The main goal of restoration is to bring the home or building back to a safe, livable condition. This includes both structural and cosmetic repairs. While mitigation prevents further damage, restoration corrects the damage that has already occurred.

This distinction is the core of Water Mitigation vs. Water Restoration: What’s the Difference?, and understanding it helps property owners avoid delays and confusion when hiring professionals.

Water Mitigation vs. Water Restoration: What’s the Difference?

To clearly understand Water Mitigation vs. Water Restoration: What’s the Difference?, think of it as a two-phase process: first emergency control, then full recovery.

Mitigation is about stopping the damage from getting worse. Restoration is about fixing what has already been damaged. Both are essential, but they serve completely different purposes in the water damage lifecycle.

When professionals arrive at a water-damaged property, they do not jump straight into repairs. Instead, they first perform mitigation to ensure the environment is stable and safe. Only after that do they begin restoration work.

This is why Water Mitigation vs. Water Restoration: What’s the Difference? is not just terminology—it is a workflow that determines how effectively a property is recovered.

Read more: 6 kitchen layout explained

Step-by-Step Water Mitigation Process

To fully grasp Water Mitigation vs. Water Restoration: What’s the Difference?, it helps to look deeper into how mitigation actually works in practice. This phase is highly technical and time-sensitive.

Initial Inspection and Damage Assessment

The first step is always inspection. Professionals evaluate how far the water has spread, what materials are affected, and whether there are any safety risks such as electrical hazards or structural instability.

This assessment determines the entire mitigation strategy and sets the foundation for understanding Water Mitigation vs. Water Restoration: What’s the Difference? in real-world scenarios.

Water Extraction

Once the situation is assessed, the next step is removing standing water. High-powered extraction equipment is used to remove as much water as possible quickly. This step is crucial because the longer water sits, the more damage it causes.

Drying and Dehumidification

After visible water is removed, hidden moisture remains inside walls, floors, and furniture. Industrial air movers and dehumidifiers are used to eliminate this moisture completely.

This step is one of the most important parts of mitigation and clearly separates it from restoration in the context of Water Mitigation vs. Water Restoration: What’s the Difference?

Step-by-Step Water Restoration Process

Now that mitigation has stabilized the situation, restoration begins. This phase is more detailed, time-consuming, and construction-focused.

Structural Repairs

Damaged drywall, flooring, and insulation are replaced. If water has affected the foundation or framing, additional structural repairs may be needed. This stage ensures the property is safe again.

Cosmetic Restoration

Once structural work is complete, cosmetic improvements begin. This includes painting, refinishing floors, and restoring the home’s original appearance.

Final Inspection

Before completing the project, professionals conduct a final inspection to ensure everything is fully restored and safe to use. This final step completes the overall process described in Water Mitigation vs. Water Restoration: What’s the Difference?

Water Mitigation vs Water Restoration_ Key Differences Explained

Timeline Differences Between Mitigation and Restoration

One of the most important aspects of Water Mitigation vs. Water Restoration: What’s the Difference? is timing. Mitigation happens immediately after the water damage incident, usually within the first 24–48 hours.

Restoration, on the other hand, can take days, weeks, or even months depending on the severity of the damage. While mitigation is fast and urgent, restoration is detailed and methodical.

Understanding this timeline helps property owners set realistic expectations and avoid frustration during the recovery process.

Cost Differences Between Mitigation and Restoration

Cost is another major factor when comparing Water Mitigation vs. Water Restoration: What’s the Difference? Mitigation is generally less expensive because it involves emergency cleanup and drying services.

Restoration tends to be more costly because it includes construction, materials, and labor for rebuilding damaged areas. The total cost depends heavily on how quickly mitigation is performed.

Delaying mitigation often increases restoration costs significantly, which is why early response is critical.

Equipment Used in Each Process

The tools used in mitigation and restoration are very different, which further highlights Water Mitigation vs. Water Restoration: What’s the Difference?

Mitigation uses industrial pumps, dehumidifiers, moisture meters, and air movers. Restoration uses construction tools such as saws, paint equipment, flooring tools, and finishing materials.

This difference in equipment clearly shows how each phase serves a unique purpose in the recovery process.

Insurance and Claims Involvement

Insurance companies often require documentation for both mitigation and restoration. Understanding Water Mitigation vs. Water Restoration: What’s the Difference? helps property owners communicate better with insurance adjusters.

Mitigation reports usually include emergency actions taken, while restoration reports include repair costs and rebuilding details. Proper documentation can significantly impact claim approval and reimbursement speed.

DIY vs Professional Services

Some homeowners attempt DIY mitigation, but this can be risky. Without proper equipment, hidden moisture may remain and lead to mold growth. When comparing Water Mitigation vs. Water Restoration: What’s the Difference?, it becomes clear that both processes require professional expertise for best results.

Restoration is even more complex and should almost always be handled by trained contractors to ensure safety and compliance with building standards.

Common Mistakes Property Owners Make

One of the biggest mistakes is delaying mitigation, which leads to more severe damage. Another common issue is confusing mitigation with restoration and assuming repairs can begin immediately.

Understanding Water Mitigation vs. Water Restoration: What’s the Difference? helps avoid these mistakes and ensures a smoother recovery process.

Why Both Processes Are Equally Important

Mitigation and restoration are not competing services—they are complementary stages. Without mitigation, restoration becomes much more expensive and complicated. Without restoration, the property cannot be fully functional again.

This balance is the core idea behind Water Mitigation vs. Water Restoration: What’s the Difference?

Conclusion

Water damage recovery is never just about cleaning up water—it is about controlling time, preventing hidden damage, and rebuilding safely. As we explained throughout this guide on Water Mitigation vs. Water Restoration: What’s the Difference?, mitigation is the urgent first response that stops further damage, while restoration is the detailed process that brings the property back to its original condition.

Understanding this difference helps homeowners make faster decisions, avoid costly mistakes, and protect their property from long-term issues like mold, structural weakening, or recurring moisture problems. When both stages are handled correctly, even serious water damage can be fully reversed and the property can return to a safe, livable state.

If you are currently dealing with water damage and need immediate professional help, it is important not to delay. For fast, reliable, and expert water mitigation and restoration services, you can contact Rigid Restorations. Their team specializes in handling emergency water damage situations and restoring

FAQs

What is the main difference between water mitigation and water restoration?

The main difference in Water Mitigation vs. Water Restoration: What’s the Difference? is that mitigation stops further damage, while restoration repairs and rebuilds the damaged property.

How quickly should water mitigation start?

Water mitigation should begin immediately, ideally within the first 24 hours, to prevent mold growth and structural damage.

Can restoration happen without mitigation?

No, restoration without proper mitigation is ineffective because underlying moisture and damage must first be controlled.

How Water Damage Escalates When Left Untreated

Why Water Damage Gets Worse the Longer You Wait

It often starts with something small—a faint stain on the ceiling, a damp smell in the hallway, or a minor leak under the sink. Many homeowners assume it can wait until the weekend or until they have more time. Unfortunately, water damage is one of those problems that quietly escalates while you’re busy with other priorities.

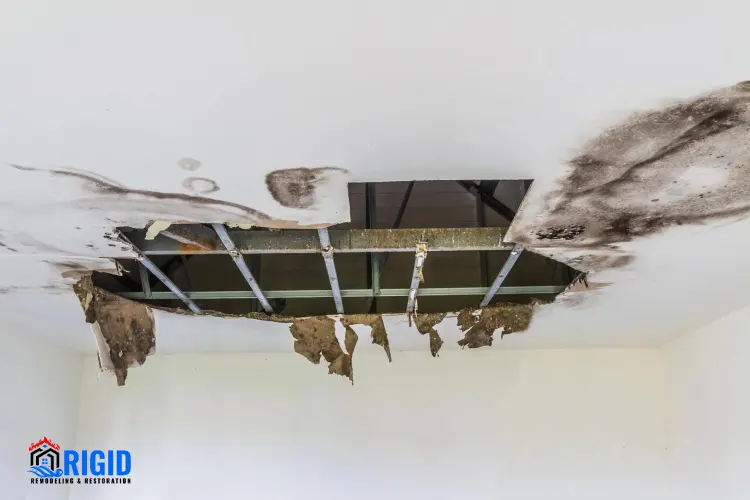
The reality is that water damage gets worse the longer you wait, and the progression is faster than most people expect. What begins as a manageable issue can quickly turn into structural damage, health risks, and significant repair costs. Understanding why this happens is the first step toward protecting your home and avoiding unnecessary stress. Also, calling a water damage restoration company can be helpful.

The Nature of Water Damage: Why Time Matters

Water is deceptively powerful. While it may seem harmless in small amounts, its ability to seep, spread, and weaken materials makes it a serious threat when left unattended. Unlike visible damage such as a broken window, water damage often works silently behind walls, under floors, and within ceilings.

As time passes, moisture penetrates deeper into building materials. Wood absorbs water and begins to swell, drywall softens and crumbles, and insulation loses its effectiveness. This ongoing process is why water damage gets worse the longer you wait, even if the surface appears unchanged. The longer moisture remains, the more extensive—and expensive—the damage becomes.

How Moisture Spreads Through Your Home

Before diving into specific consequences, it’s important to understand how water moves. Moisture doesn’t stay in one place; it travels through porous materials and follows gravity, often reaching areas far from the original source.

Capillary Action and Hidden Movement

Water can move upward and sideways through materials like drywall, wood, and concrete due to capillary action. This means a leak in one corner of your home can eventually affect walls, floors, and even ceilings in nearby areas.

This hidden movement makes water damage difficult to detect early. By the time visible signs appear, the damage is often more widespread than expected. This is one of the key reasons why water damage gets worse the longer you wait—because it rarely stays contained.

Trapped Moisture in Enclosed Spaces

Enclosed areas such as wall cavities and subfloors can trap moisture, creating the perfect environment for long-term deterioration. Without proper drying and ventilation, these spaces remain damp for extended periods.

Over time, trapped moisture leads to rot, mold growth, and weakened structural components. Since these areas are not easily visible, the problem continues to grow unnoticed, reinforcing the idea that delaying action only increases the severity of the issue.

Why Delaying Water Damage Repairs Makes Everything Worse

Structural Damage Becomes Inevitable

One of the most serious consequences of delayed action is structural damage. The longer water sits, the more it compromises the integrity of your home.

Wood Rot and Warping

Wood is highly vulnerable to prolonged moisture exposure. It absorbs water, swells, and eventually begins to rot. Floors may warp, doors may no longer close properly, and support beams can weaken.

This process doesn’t happen overnight, but it accelerates quickly. When water damage gets worse the longer you wait, wood structures often reach a point where repair is no longer possible, requiring full replacement.

Weakening of Foundations and Walls

Water can also affect concrete and masonry over time. While these materials are more resistant than wood, prolonged exposure leads to cracks, erosion, and reduced strength.

Walls may lose their stability, and foundations can shift or settle unevenly. Addressing these issues later becomes significantly more complex and costly than dealing with the original water source early on.

Mold Growth: A Fast and Dangerous Consequence

Mold is one of the most immediate risks associated with untreated water damage. It thrives in damp, warm environments and can begin growing within 24 to 48 hours.

Rapid Spread of Mold Colonies

Once mold appears, it spreads quickly by releasing microscopic spores into the air. These spores settle on other damp surfaces, creating new colonies in different parts of the home.

As water damage gets worse the longer you wait, mold contamination becomes more widespread and harder to control. What started as a localized issue can turn into a whole-house problem requiring professional remediation.

Health Risks for Occupants

Mold exposure can lead to respiratory issues, allergies, skin irritation, and other health concerns. Children, elderly individuals, and those with compromised immune systems are particularly vulnerable.

Ignoring water damage not only affects your property but also puts your health at risk. This is another critical reason why delaying action is never a safe option.

Electrical Hazards Increase Over Time

Water and electricity are a dangerous combination. As moisture spreads through walls and ceilings, it can come into contact with electrical wiring and outlets.

Risk of Short Circuits and Fires

Water intrusion can cause short circuits, leading to power outages or even electrical fires. Damaged wiring may not show immediate signs, making it a hidden hazard.

When water damage gets worse the longer you wait, the likelihood of electrical issues increases, adding another layer of danger to an already serious problem.

Damage to Appliances and Systems

Electrical systems, HVAC units, and appliances can suffer irreversible damage when exposed to moisture. Repairing or replacing these systems can significantly increase overall costs.

Early intervention can prevent this type of damage, but delays often lead to more extensive and expensive repairs.

The Hidden Risks of Ignoring Water Damage in Your Home

Financial Impact: Costs Multiply Quickly

Many homeowners delay repairs in an attempt to save money, but this approach often backfires. Water damage is one of the few problems where postponing action almost always leads to higher expenses.

From Minor Repairs to Major Restoration

A small leak might initially require only a simple fix, such as sealing a pipe or drying a small area. However, if left untreated, the damage can spread to floors, walls, and structural components.

As water damage gets worse the longer you wait, the scope of repairs expands, turning a minor expense into a major restoration project involving multiple contractors.

Insurance Complications

Insurance policies often require homeowners to take prompt action to prevent further damage. Delaying repairs may result in reduced coverage or denied claims.

Understanding your policy and acting quickly can make a significant difference in how much financial support you receive.

Timeline of Water Damage Progression

To better understand how quickly things can escalate, it’s helpful to look at a general timeline of water damage progression.

Time Frame Typical Effects
First 24 hours Surface water, minor absorption
24–48 hours Mold growth begins, materials start to swell
3–7 days Structural damage increases, mold spreads rapidly
1–2 weeks Severe damage, strong odors, potential health risks
3+ weeks Extensive structural failure, costly restoration


This table highlights how quickly water damage gets worse the longer you wait, emphasizing the importance of immediate action.

Why DIY Delays Make Things Worse

Some homeowners attempt to handle water damage themselves, which can be effective for very minor issues. However, without proper equipment and expertise, DIY efforts often fall short.

Incomplete Drying and Hidden Moisture

Household fans and basic tools cannot fully remove moisture from deep within walls and floors. As a result, hidden damp areas remain, allowing damage to continue.

Even if the surface appears dry, the underlying problem persists. This contributes to the ongoing cycle where water damage gets worse the longer you wait.

Misidentifying the Source

Without proper inspection, it’s easy to address the symptoms rather than the root cause. A leak may continue behind the scenes, undoing any temporary fixes.

Professional assessment ensures that the source is identified and resolved, preventing further damage.

Preventing Escalation: Acting at the Right Time

While water damage can be serious, it is also highly manageable when addressed promptly. Acting quickly can significantly reduce both the extent of damage and the cost of repairs.

Immediate Steps After Detection

As soon as you notice signs of water damage, it’s important to stop the source if possible. This may involve shutting off the water supply or fixing a visible leak.

Drying the affected area and increasing ventilation can help limit further spread. However, these steps should be followed by a thorough inspection to ensure no hidden damage remains.

The Role of Professional Restoration

Professional water damage restoration services use specialized equipment to detect and remove moisture from all affected areas. They also address mold, structural issues, and potential hazards.

Their expertise ensures that the problem is fully resolved, preventing future complications and reinforcing the importance of early action.

Final Thoughts

Water damage is not a problem that improves with time—it is one that intensifies. From structural deterioration to mold growth and financial strain, the consequences of delay are far-reaching. The key takeaway is simple: water damage gets worse the longer you wait, and even a short delay can significantly impact the outcome.

By understanding how water behaves and recognizing the early signs of damage, you can take swift action and protect both your home and your well-being. In many cases, a quick response is the difference between a minor inconvenience and a major disaster.

Frequently Asked Questions

How quickly does water damage become serious?

Water damage can start becoming serious within 24 to 48 hours, especially when mold begins to grow. While the initial effects may seem minor, the situation can escalate rapidly if not addressed promptly.

Can water damage go away on its own?

No, water damage does not resolve itself. Even if surfaces appear to dry, moisture can remain trapped inside materials, leading to long-term issues such as mold and structural weakening.

Is it safe to stay in a home with water damage?

It depends on the severity. Minor issues may not pose immediate risks, but significant water damage can lead to mold growth, electrical hazards, and compromised structural integrity, making it unsafe over time.

Does insurance cover delayed water damage?

Many insurance policies require timely action to prevent further damage. If you delay repairs, your claim may be reduced or denied, depending on the policy terms.

What is the most important first step after water damage?

The most important step is to stop the source of water and begin drying the area immediately.

Water Mitigation vs Simple Cleanup_ How to Know the Difference

How to Know When You Need Water Mitigation vs a Simple Cleanup

Water damage rarely announces itself politely. It often starts with something small—a damp patch under the sink, a musty smell in the basement, or a minor spill that seems easy to wipe away. Many homeowners assume these situations only require a quick cleanup. However, what appears to be a simple issue can sometimes hide deeper structural or moisture-related problems that demand professional attention. This is where understanding the difference between water mitigation vs a simple cleanup becomes essential.

Knowing when to act quickly and when to call in professionals can save you from costly repairs, mold growth, and long-term property damage. In this guide, we’ll walk through everything you need to know so you can confidently decide the right course of action without second-guessing.

What Is a Simple Cleanup?

A simple cleanup usually involves minor water exposure that hasn’t penetrated deeply into materials. This could be a small spill, a light leak, or water that has remained on non-porous surfaces for a short period. In these cases, drying and cleaning are often enough to resolve the issue without long-term consequences.

When dealing with a simple cleanup, the water hasn’t had enough time or volume to seep into flooring, drywall, or insulation. The situation remains manageable because the affected area is limited and visible. However, even in these cases, attention to detail is crucial to ensure no hidden moisture remains.

Common Situations That Only Need Cleanup

In many homes, minor incidents happen regularly, and most of them don’t require professional intervention. Understanding these scenarios can help you avoid unnecessary costs while still protecting your property.

Small kitchen spills, minor bathroom overflows, or condensation-related moisture are typical examples. These situations are usually easy to manage because they involve clean water and limited exposure time. As long as you dry the area properly and ensure ventilation, the risk of further damage remains low.

Another example is a short-lived leak that is quickly addressed. If the water hasn’t spread beyond a small area and hasn’t soaked into materials, a simple cleanup is often sufficient.

When to Choose Water Mitigation Instead of Basic Water Cleanup

What Is Water Mitigation?

Water mitigation is a more advanced process that focuses on preventing further damage after water intrusion. Unlike a simple cleanup, mitigation involves specialized equipment and techniques to remove water, dry affected areas, and protect the structure from long-term issues.

The goal of water mitigation is not just cleaning—it’s controlling damage and restoring safety. This process often includes moisture detection, industrial drying, dehumidification, and sometimes even removing damaged materials.

Why Water Mitigation Is More Than Just Drying

At first glance, drying might seem like the main solution. However, water mitigation goes much deeper than that. It addresses hidden moisture that can remain trapped in walls, floors, and ceilings.

Professionals use advanced tools such as moisture meters and thermal imaging to detect areas that are not visible to the naked eye. Without this level of inspection, moisture can linger and lead to mold growth, structural weakening, and indoor air quality issues.

This is why understanding water mitigation vs a simple cleanup is so important. What looks dry on the surface may still be saturated underneath.

Key Differences Between Water Mitigation vs a Simple Cleanup

Choosing the wrong approach can lead to bigger problems down the line. To make the right decision, you need to evaluate the severity, duration, and type of water involved.

Below is a simple table to clarify the differences:

Factor Simple Cleanup Water Mitigation
Water Volume Low Moderate to High
Water Type Clean Clean, Gray, or Black
Exposure Time Short Prolonged
Damage Depth Surface-level Deep/Structural
Equipment Needed Basic tools Professional equipment


This comparison highlights how quickly a situation can escalate. Even a small leak can turn into a mitigation case if left untreated.

Signs You Need Water Mitigation Instead of Cleanup

Many homeowners underestimate water damage because they only focus on visible signs. However, there are clear indicators that suggest the need for professional intervention.

Persistent Moisture or Dampness

If an area remains damp even after cleaning and drying, it’s a strong sign that moisture has penetrated deeper layers. This often happens in carpets, drywall, and wooden structures.

Ignoring persistent dampness can lead to mold growth within 24 to 48 hours. At this stage, a simple cleanup is no longer enough, and water mitigation becomes necessary to prevent further damage.

Musty Odors

A lingering musty smell is usually a sign of hidden moisture or early mold development. Even if the surface looks dry, the odor indicates that water has been absorbed into materials.

This is one of the most common situations where homeowners misjudge water mitigation vs a simple cleanup. Odor alone can signal a deeper issue that requires professional drying and inspection.

Visible Structural Damage

Warped floors, bubbling paint, or cracked drywall are clear indicators that water has affected the structure of your home. These signs suggest prolonged exposure and deeper damage.

At this point, mitigation is essential not only to dry the area but also to prevent further deterioration.

Risks of Choosing Cleanup When Mitigation Is Needed

Opting for a simple cleanup when water mitigation is required can lead to serious consequences. These risks often develop gradually, making them harder to detect until the damage becomes severe.

Hidden moisture can weaken structural components over time, leading to costly repairs. Mold growth is another major concern, as it can affect both property and health.

Additionally, improper drying can create long-term humidity issues, impacting indoor air quality. This is why understanding water mitigation vs a simple cleanup is not just about convenience—it’s about protecting your home and well-being.

How to Tell If You Need Water Mitigation or Just a Simple Cleanup

How to Decide: Cleanup or Water Mitigation?

Making the right choice doesn’t have to be complicated if you focus on a few key factors. The goal is to assess the situation objectively rather than relying on assumptions.

Evaluate the Source of Water

Clean water from a broken pipe is less risky than contaminated water from sewage or flooding. If the water source is questionable, mitigation is usually the safer option.

Consider the Time Factor

The longer water sits, the more damage it causes. If the issue has been present for more than 24 hours, it’s likely beyond a simple cleanup.

Check the Affected Materials

Porous materials like carpet, wood, and drywall absorb water quickly. If these are involved, professional drying may be necessary.

By considering these factors, you can better understand whether you’re dealing with water mitigation vs a simple cleanup and take appropriate action.

Final Thoughts

Water damage can be deceptive. What seems like a minor inconvenience today can turn into a major repair project tomorrow. The key is recognizing the difference between situations that require a simple cleanup and those that demand professional water mitigation.

By paying attention to warning signs such as persistent moisture, odors, and structural changes, you can make informed decisions and avoid unnecessary risks. Understanding water mitigation vs a simple cleanup empowers you to act quickly, protect your home, and prevent long-term damage.

Frequently Asked Questions

  1. Can I handle water mitigation on my own?

In most cases, water mitigation requires specialized equipment and expertise. While minor drying can be done at home, deeper moisture issues are best handled by professionals to ensure complete removal.

  1. How quickly should I act after water damage?

You should act immediately. Even within the first 24 hours, water can start causing structural damage and mold growth. Quick action can determine whether you need a simple cleanup or full mitigation.

  1. Is water mitigation always expensive?

The cost depends on the severity of the damage. While mitigation may seem costly upfront, it often prevents much larger expenses in the future by addressing the problem thoroughly.

Hidden Water Damage Problems You Don’t Notice

The Hidden Dangers of Water Damage You Can’t See

Water damage is one of those problems that often starts quietly and invisibly. A small leak behind a wall, a bit of moisture under the floor, or a slow roof drip may not look serious at first glance. But over time, these hidden issues can turn into costly structural damage and serious health risks. That is why understanding The Hidden Dangers of Water Damage You Can’t See is essential for every homeowner or property manager.

Many people assume that if there is no visible water, there is no problem. Unfortunately, that assumption is exactly what makes water damage so dangerous. By the time stains or odors appear, the real damage has often already spread inside walls, ceilings, and flooring.

Why Water Damage Is Often Invisible at First

Before we dive deeper into The Hidden Dangers of Water Damage You Can’t See, it is important to understand why water damage is so hard to detect in its early stages. Water has a unique ability to travel through materials and hide in spaces we rarely inspect.

In many cases, water leaks slowly seep into drywall, insulation, and wooden structures. These materials absorb moisture like a sponge, making the problem invisible from the outside while damage continues underneath the surface.

Moisture trapped behind walls

Walls are one of the most common places where hidden water damage develops. Pipes run inside them, and even a small leak can remain unnoticed for weeks or months. During this time, moisture spreads and weakens the internal structure.

This is one of the core reasons The Hidden Dangers of Water Damage You Can’t See are so serious in residential and commercial buildings alike.

Slow leaks and unnoticed drips

Unlike sudden flooding, slow leaks do not grab attention. A tiny drip under a sink or behind a washing machine can go unnoticed for a long time.

However, even small amounts of water accumulating daily can lead to major structural deterioration and mold growth.

Silent Dangers of Undetected Water Damage

Structural Damage You Cannot See

One of the most serious aspects of The Hidden Dangers of Water Damage You Can’t See is the gradual weakening of a building’s structure. This damage often happens long before any visible signs appear.

Wood, drywall, and even concrete can slowly degrade when exposed to moisture over time.

Weakening of wooden structures

Wood is highly sensitive to moisture. When water penetrates beams or flooring, it begins to soften the material and reduce its strength.

Over time, this can lead to sagging floors, cracked walls, and in severe cases, structural instability.

Damage to insulation and drywall

Insulation is designed to keep homes energy efficient, but once it gets wet, it loses its effectiveness completely. Wet drywall also becomes fragile and can crumble from the inside.

These hidden issues are a major part of The Hidden Dangers of Water Damage You Can’t See because they remain unnoticed until the damage is already advanced.

Mold Growth: The Silent Health Risk

Among all risks, mold is one of the most dangerous outcomes of hidden water damage. It develops quickly in moist environments and spreads silently through air and surfaces.

This makes it one of the most critical aspects of The Hidden Dangers of Water Damage You Can’t See that homeowners must be aware of.

How mold starts growing

Mold spores exist everywhere naturally, but they only grow when moisture is present. A hidden leak creates the perfect environment for mold to develop behind walls or under flooring.

Once it starts, it can spread rapidly without visible warning signs.

Health effects of mold exposure

Exposure to mold can cause respiratory issues, allergies, headaches, and in some cases, more severe health problems.

Children, elderly individuals, and people with asthma are especially vulnerable, making mold one of the most serious consequences of The Hidden Dangers of Water Damage You Can’t See.

Electrical Hazards Caused by Hidden Water

Water and electricity are a dangerous combination, and hidden leaks can create serious electrical risks inside buildings.

This is another overlooked aspect of The Hidden Dangers of Water Damage You Can’t See, especially in modern homes filled with wiring behind walls.

Short circuits and wiring damage

When moisture reaches electrical wiring, it can cause short circuits or corrosion. Over time, this increases the risk of power failure or even fire hazards.

These problems often remain hidden until a major electrical issue occurs.

Increased fire risk

Although it may seem surprising, water damage can indirectly increase fire risks. Damaged wiring can spark unexpectedly, especially in older buildings where insulation is already weak.

Damage to Flooring and Foundations

Water that seeps below the surface can seriously affect floors and even the foundation of a building.

This type of damage is particularly dangerous because it often goes unnoticed until it becomes severe.

Warping and swelling of floors

Wooden and laminate flooring can warp or swell when exposed to moisture. This leads to uneven surfaces and structural instability.

This is a key part of The Hidden Dangers of Water Damage You Can’t See, especially in homes with hidden plumbing leaks.

Foundation weakening

In extreme cases, water can reach the foundation and slowly erode its stability. Over time, this can lead to cracks and serious structural risks.

Invisible Risks of Water Damage in Your Home

Hidden Water Damage and Air Quality Issues

Even when water damage is not visible, it can still affect the air you breathe inside your home.

Moist environments contribute to poor indoor air quality and long-term health concerns.

Musty odors as early warning signs

One of the earliest signs of hidden water damage is a persistent musty smell. This odor usually indicates mold or trapped moisture inside walls or flooring.

Ignoring this sign can lead to more serious problems later.

Airborne contaminants

As mold and bacteria grow, spores can become airborne and spread throughout the building. This directly impacts indoor air quality and contributes to respiratory discomfort.

Detection Methods for Hidden Water Damage

Identifying hidden water damage early can save significant repair costs. Professionals often use specialized tools to detect moisture behind surfaces.

Moisture meters and infrared tools

These devices help detect moisture levels inside walls and floors without causing damage. They are widely used in restoration services.

Visual and sensory inspection

Sometimes, simple observation is enough. Discoloration, peeling paint, or unusual smells can indicate hidden problems related to The Hidden Dangers of Water Damage You Can’t See.

Prevention Tips to Avoid Hidden Water Damage

Preventing water damage is always easier and cheaper than repairing it.

Regular maintenance and awareness can significantly reduce risks.

Regular plumbing inspections

Checking pipes, faucets, and appliances regularly can help detect leaks early before they become serious.

Roof and gutter maintenance

A damaged roof or clogged gutter can allow water to seep into walls and ceilings unnoticed.

Restoration Process After Water Damage

Once hidden water damage is discovered, immediate action is necessary to prevent further deterioration.

Water extraction and drying

The first step is removing excess moisture using specialized drying equipment.

Repair and restoration

After drying, damaged materials are repaired or replaced to restore structural integrity.

Final Thoughts

Understanding The Hidden Dangers of Water Damage You Can’t See is crucial for protecting both your property and your health. What seems like a minor leak can silently evolve into structural damage, mold growth, and even electrical hazards.

The key takeaway is simple: do not wait for visible signs. Regular inspections and early action are the best ways to prevent costly repairs and long-term damage.

FAQs

  1. Why is hidden water damage more dangerous than visible damage?

Hidden water damage spreads silently behind walls and floors, causing structural and health issues before it becomes visible.

  1. How can I detect hidden water damage early?

Signs include musty odors, peeling paint, unusual humidity, and unexplained increases in water bills.

  1. Can hidden water damage cause health problems?

Yes, it can lead to mold growth, which may cause allergies, respiratory issues, and other health concerns over time.

How to Verify a Professional Water Mitigation Service

How to Tell If a Water Mitigation Company Is Legitimate?

Water damage rarely gives you a warning. One moment everything is fine, and the next, you’re dealing with soaked carpets, swollen walls, and the urgent stress of preventing mold growth. In that moment, most homeowners search quickly for help and often type something like “water mitigation near me” without much time to think.

This urgency is exactly why fraudulent or unqualified companies sometimes enter the market. Not every service provider claiming to offer emergency restoration actually follows industry standards. Understanding How to Tell If a Water Mitigation Company Is Legitimate can make the difference between a properly restored home and long-term structural damage.

In this guide, we’ll break down everything you need to know in a simple, practical way so that by the end, you’ll feel confident choosing the right professionals without second-guessing.

Why Choosing a Legitimate Water Mitigation Company Matters

Before looking at signs of legitimacy, it’s important to understand why this decision is so critical. Water damage is not just a surface problem; it affects structural materials, electrical systems, and indoor air quality.

A legitimate company follows standardized drying and restoration procedures that prevent mold growth and long-term damage. On the other hand, unqualified contractors may only remove visible water without addressing hidden moisture inside walls or flooring.

When evaluating How to Tell If a Water Mitigation Company Is Legitimate, remember that the wrong choice can lead to recurring damage, insurance complications, and higher repair costs in the future.

Check for Proper Licensing and Certifications

Why Licensing Matters

A trustworthy water mitigation company should always have the proper licenses required by your state or region. Licensing ensures that the company meets minimum legal and professional standards.

Without licensing, there is no guarantee that technicians are trained or that the company follows safety regulations.

Industry Certifications You Should Look For

One of the strongest indicators of legitimacy is certification from recognized organizations like the IICRC (Institute of Inspection Cleaning and Restoration Certification). These certifications show that technicians are trained in water damage restoration science.

A legitimate company will proudly display these credentials on its website, vehicles, or documentation. If you don’t see them, it’s a red flag when assessing How to Tell If a Water Mitigation Company Is Legitimate.

Signs of a Reliable Water Damage Restoration Company

Evaluate Their Emergency Response Time and Availability

Why Speed Matters in Water Damage

Water damage worsens every hour. Within 24–48 hours, mold can begin to grow, and structural materials may degrade significantly. Because of this, legitimate companies usually offer 24/7 emergency services.

If a company cannot respond quickly or avoids emergency calls, it may not be properly equipped to handle real mitigation work.

What a Professional Response Looks Like

A reliable company typically responds within minutes, provides an estimated arrival time, and immediately begins mitigation planning upon arrival. This responsiveness is a key part of understanding How to Tell If a Water Mitigation Company Is Legitimate.

Check Equipment and Work Process Transparency

Professional Equipment Use

Legitimate companies use industrial-grade equipment such as air movers, dehumidifiers, moisture meters, and thermal imaging tools. These tools ensure that water is not just removed visually but also from hidden layers.

If a contractor shows up with only basic household tools, that’s a warning sign.

Clear Explanation of Process

A trustworthy company will walk you through their entire process—from inspection to drying to final verification. They won’t rush or avoid explaining technical steps.

Transparency is a major indicator when learning How to Tell If a Water Mitigation Company Is Legitimate, because professional companies have nothing to hide.

Insurance Knowledge and Claim Support

Working With Insurance Companies

Legitimate water mitigation companies usually work directly with insurance providers. They document damage, provide detailed reports, and help streamline the claims process.

This reduces stress for homeowners and ensures proper compensation for repairs.

Red Flags in Insurance Handling

Be cautious if a company pressures you to avoid insurance claims or offers unclear documentation. Proper documentation is essential for transparency and accountability in water damage restoration.

Understanding this aspect is crucial in mastering How to Tell If a Water Mitigation Company Is Legitimate.

Online Reviews, Reputation, and Local Presence

Importance of Real Customer Feedback

One of the simplest ways to verify legitimacy is through online reviews. Platforms like Google Reviews, Yelp, or local directories often reflect real customer experiences.

Consistent positive feedback about professionalism, response time, and quality of work is a strong sign of credibility.

Local Business Verification

A legitimate company usually has a physical address, local presence, and verifiable contact information. Be cautious of companies that only operate through call centers without any traceable location.

This step plays a major role in understanding How to Tell If a Water Mitigation Company Is Legitimate in real-world situations.

Pricing Transparency and Written Estimates

Clear and Detailed Pricing

Legitimate companies provide written estimates that clearly break down labor, equipment, and material costs. This prevents unexpected charges later.

They also inspect the property before giving final pricing rather than offering vague quotes over the phone.

Warning Signs in Pricing

Be cautious of extremely low estimates or companies that demand full payment upfront. Reliable providers usually follow industry-standard billing practices and work with insurance whenever possible.

Transparent pricing is a key factor in evaluating How to Tell If a Water Mitigation Company Is Legitimate.

How to Identify a Legit Water Mitigation Company

Red Flags You Should Never Ignore

Sometimes, identifying a bad company is easier than identifying a good one. Certain behaviors should immediately raise concern.

If a company avoids written contracts, refuses to show certifications, or pressures you into quick decisions, these are serious warning signs. Similarly, lack of proper equipment or unclear communication should never be ignored.

Recognizing these red flags helps you quickly filter out unreliable providers when considering How to Tell If a Water Mitigation Company Is Legitimate.

Comparison Table: Legit vs Unreliable Companies

Feature Legitimate Company Unreliable Company
Licensing Fully licensed Missing or unclear
Certifications IICRC or similar None
Equipment Industrial-grade Basic tools
Estimates Written & detailed Vague or verbal
Insurance Support Yes No
Response Time Fast (24/7) Slow or inconsistent


Final Thoughts

Understanding How to Tell If a Water Mitigation Company Is Legitimate is not just about avoiding scams—it’s about protecting your home, your health, and your financial stability. Water damage escalates quickly, and the company you choose directly impacts the outcome of the restoration process.

A legitimate provider will always prioritize transparency, proper documentation, certified training, and professional equipment. If you remember even a few of these signs, you can confidently make a safe and informed decision during an emergency.

Frequently Asked Questions

  1. How quickly should a water mitigation company respond?

A professional company should respond within minutes and ideally arrive within a few hours, depending on location. Fast response is critical to prevent mold growth and structural damage.

  1. Do all legitimate companies work with insurance?

Most reputable water mitigation companies work directly with insurance providers and help with documentation and claims, making the process smoother for homeowners.

  1. What is the most important factor when choosing a company?

Certification and experience are the most important factors. Companies certified by organizations like IICRC are generally more reliable and follow industry-standard procedures.

What Qualifications Should a Water Damage Company Have

What Certifications Should a Water Damage Company Have?

When a pipe bursts in the middle of the night or a basement floods after a heavy storm, most homeowners panic and call the first available contractor. In that rush, one critical factor is often ignored: certification. Yet, in the water damage restoration industry, certifications are not just paperwork—they are proof of competence, safety knowledge, and technical standards.

A properly certified company doesn’t just remove water; it understands moisture behavior, microbial risks, structural drying science, and insurance documentation. Without these qualifications, even a well-intentioned contractor can leave hidden moisture behind, leading to mold growth and long-term structural damage.

This is why understanding What Certifications Should a Water Damage Company Have is essential before hiring anyone for restoration work. It can be the difference between a fully restored home and recurring damage that costs thousands more.

Why certifications matter in water damage restoration

Before listing the exact credentials, it’s important to understand why certifications carry so much weight in this industry. Water damage is not a simple cleaning job—it is a scientific process involving humidity control, material drying rates, and microbial prevention.

A certified technician follows industry-recognized standards such as the IICRC S500 guidelines, ensuring every step from inspection to drying is done correctly. Without these standards, restoration work becomes guesswork, which often leads to hidden moisture pockets and mold outbreaks.

Another key reason certifications matter is insurance compliance. Many insurance companies require documented proof that restoration was handled by trained professionals. This makes What Certifications Should a Water Damage Company Have not just a technical question but also a financial one for property owners.

Required Certifications for Water Damage Restoration Companies

IICRC Certification: The most important standard in the industry

When discussing What Certifications Should a Water Damage Company Have, the first and most essential credential is the IICRC certification.

What is IICRC?

The Institute of Inspection Cleaning and Restoration Certification (IICRC) is the global standard-setting body for restoration industries. Companies certified under IICRC are trained in water damage restoration, structural drying, and mold remediation.

Why it matters

An IICRC-certified technician understands how water migrates through building materials, how long different materials take to dry, and how to prevent secondary damage. This level of expertise significantly reduces the risk of mold growth and structural weakening.

Key standards followed

Certified professionals work according to S500 (water damage restoration standard), which outlines best practices for extraction, drying, and monitoring.

Without IICRC certification, a company is essentially operating without a scientific framework, which is risky in water damage situations.

EPA Certification for mold and environmental safety

Another important aspect of What Certifications Should a Water Damage Company Have is compliance with environmental safety regulations, especially from the Environmental Protection Agency (EPA).

Role of EPA guidelines

The EPA provides strict rules for handling mold, contaminated water, and airborne pollutants that may occur after water damage. Certified companies understand how to safely contain affected areas and prevent cross-contamination.

Why it matters in real cases

If water damage is left untreated for more than 24–48 hours, mold can begin to develop. EPA-trained professionals know how to handle these situations without exposing occupants to harmful spores or toxic materials.

This certification ensures that restoration is not only effective but also safe for long-term health.

OSHA certification for workplace safety compliance

One often overlooked part of What Certifications Should a Water Damage Company Have is OSHA compliance.

What OSHA covers

The Occupational Safety and Health Administration (OSHA) ensures that restoration workers follow strict safety protocols when dealing with hazardous environments.

Why OSHA matters in restoration work

Water damage sites often include electrical hazards, slippery surfaces, and contaminated water. OSHA-trained professionals know how to manage these risks while protecting themselves and the property owner.

This reduces accidents and ensures that the restoration process is carried out without additional damage or liability issues.

Mold remediation certification: Handling hidden threats

Water damage and mold are closely connected, which makes mold certification a critical part of What Certifications Should a Water Damage Company Have.

What this certification ensures

Companies trained in mold remediation understand how to identify, contain, and remove mold safely. They also know how to prevent spores from spreading during the drying process.

Why it is essential

Even after visible water is removed, moisture can remain inside walls or floors. This hidden moisture becomes the perfect environment for mold growth. Certified technicians use moisture meters and thermal imaging to detect these hidden risks.

Without proper mold certification, a restoration company may leave behind a problem that becomes more serious over time.

Essential Licenses and Certifications for Water Damage Contractors

Insurance and claims handling certification

Another important factor in What Certifications Should a Water Damage Company Have is experience with insurance documentation and claims processing.

Why insurance expertise matters

Water damage restoration is often tied to insurance claims. Certified companies understand how to document damage, provide accurate estimates, and communicate with insurance adjusters.

Benefits for homeowners

This ensures smoother claim approvals and reduces the chances of disputes or underpayment. A company experienced in insurance procedures can save homeowners significant stress and financial loss.

Table: Key certifications a water damage company should have

Certification Purpose Importance Level
IICRC Water damage restoration standards Essential
EPA Environmental and mold safety Very High
OSHA Workplace safety compliance High
Mold Remediation Certification Safe mold removal Very High
Insurance Handling Training Claims documentation Important


This table summarizes the core elements of What Certifications Should a Water Damage Company Have and helps homeowners quickly evaluate service providers.

How to verify a company’s certifications

Understanding What Certifications Should a Water Damage Company Have is not enough—you also need to verify them.

Check official listings

Most certification bodies like IICRC offer online directories where you can verify if a company is legitimately certified.

Ask for documentation

A reputable company will have no issue showing proof of certification. If a contractor avoids the question, it’s a red flag.

Look for continuous training

The restoration industry evolves constantly. Companies that invest in ongoing training demonstrate long-term professionalism and commitment.

Risks of hiring an uncertified water damage company

Choosing the wrong company can lead to serious consequences. One of the biggest risks is hidden moisture, which often results in mold growth weeks after the initial cleanup.

Another issue is improper drying techniques, which can weaken structural materials like drywall and wood. Over time, this can lead to expensive repairs that far exceed the original restoration cost.

This is why understanding What Certifications Should a Water Damage Company Have is not just helpful—it is essential for protecting your property investment.

Conclusion: Certifications are your first line of protection

Water damage is unpredictable, stressful, and often urgent. But rushing into a decision without checking qualifications can make the situation worse. Certifications exist to ensure that professionals follow scientific, safety, and industry-approved methods.

When evaluating What Certifications Should a Water Damage Company Have, the key takeaway is simple: look for IICRC, EPA compliance, OSHA safety standards, mold remediation expertise, and insurance handling experience.

These certifications are not optional extras—they are the foundation of reliable and professional restoration work. Choosing a certified company means choosing peace of mind, faster recovery, and long-term protection for your property.

Frequently Asked Questions

  1. Why is IICRC certification so important for water damage companies?

IICRC certification ensures that technicians follow internationally recognized standards for water extraction, drying, and restoration, reducing the risk of hidden damage and mold growth.

  1. Can a non-certified company handle water damage effectively?

While they may perform basic cleanup, non-certified companies often lack the technical knowledge required for proper drying and contamination control, increasing the risk of long-term damage.

  1. How do certifications affect insurance claims?

Insurance companies prefer certified restoration providers because their work meets industry standards and includes proper documentation, making claim approval smoother and more reliable.

How long does water damage repair take

How Long Does Water Damage Restoration Take? Complete Guide

Water damage is one of those problems that can turn a normal day into a stressful emergency within minutes. A burst pipe, a leaking roof, or even a small flood can quickly spread through flooring, walls, and furniture, leaving homeowners wondering what happens next and how long recovery will actually take.

One of the most common questions homeowners ask after such an incident is How Long Does Water Damage Restoration Take. The answer is not always simple, because every situation is different. However, understanding the process helps you set realistic expectations and avoid unnecessary stress during recovery.

In this guide, we will break down every factor that affects timing, step-by-step restoration stages, and what you can expect from professionals so that by the end, you will clearly understand How Long Does Water Damage Restoration Take in different scenarios.

What Influences How Long Water Damage Restoration Takes?

Before estimating How Long Does Water Damage Restoration Take, it is important to understand that no two water damage situations are identical. The timeline depends on several environmental and structural factors that can either speed up or delay the process.

In most cases, professionals assess the damage within the first few hours, but the actual drying and repair process can vary widely. This is why asking How Long Does Water Damage Restoration Take always leads to a range rather than a fixed number.

Severity of water damage

Light water exposure, such as a small leak, may take only a few days to restore, while severe flooding can extend the process to several weeks. The deeper the water penetrates into walls and flooring, the longer it takes to fully dry and repair.

Type of water involved

Clean water from a pipe is much easier to handle compared to gray or black water, which may contain contaminants. The more hazardous the water, the more steps are required, which directly impacts How Long Does Water Damage Restoration Take.

Typical Timeline of Water Damage Restoration

When homeowners ask How Long Does Water Damage Restoration Take, professionals usually explain the process in phases. Each phase has its own time requirement depending on equipment, damage level, and drying conditions.

The entire restoration process is not just about drying water; it includes inspection, extraction, drying, sanitizing, and rebuilding. These combined steps determine the overall timeline.

Initial inspection and emergency response

The first stage typically happens within the first 24 hours. Restoration teams assess the affected areas, identify moisture levels, and begin water extraction immediately.

Drying and dehumidification phase

This phase can take anywhere from 2 to 5 days in minor cases, but severe damage may extend it to over a week. Industrial air movers and dehumidifiers are used to remove hidden moisture from walls and floors.

Repair and reconstruction stage

Once everything is dry, repairs begin. This can include replacing drywall, flooring, or even structural elements. Depending on damage severity, this stage can take several days to weeks.

Understanding these stages helps answer How Long Does Water Damage Restoration Take in a more realistic and structured way.

Water damage restoration timeline explained

Key Factors That Affect Restoration Speed

Many people assume water damage drying is quick, but in reality, multiple hidden factors influence the timeline. That is why How Long Does Water Damage Restoration Take varies so widely from case to case.

Humidity levels, room ventilation, weather conditions, and material types all play a role in how quickly moisture evaporates and structures recover.

Material absorption level

Carpets, wood, and drywall absorb water differently. Wood flooring, for example, may warp and require replacement, while tile floors dry faster. This directly changes How Long Does Water Damage Restoration Take.

Mold risk development

If moisture is not removed quickly, mold can begin to grow within 24–48 hours. Once mold appears, additional remediation steps are required, which significantly extends the timeline.

Step-by-Step Water Damage Restoration Process

To better understand How Long Does Water Damage Restoration Take, it helps to look closely at each stage professionals follow during restoration. Each step builds upon the previous one, ensuring the property is fully restored and safe.

The process is methodical and designed to prevent long-term structural damage or health risks.

Water removal and extraction

The first priority is removing standing water using pumps and vacuum systems. This step is crucial because the faster water is removed, the shorter How Long Does Water Damage Restoration Take becomes overall.

Deep drying process

After visible water is removed, hidden moisture is addressed using dehumidifiers and air movers. This stage is often the longest because moisture can remain trapped inside walls and flooring.

Cleaning and sanitizing

All affected surfaces are cleaned and disinfected to remove bacteria and contaminants. This step ensures the environment is safe before reconstruction begins.

Average Time Based on Damage Level

To simplify How Long Does Water Damage Restoration Take, professionals often categorize damage into levels. Each level has an estimated timeline based on experience and industry standards.

Below is a general breakdown:

Damage Level Description Estimated Time
Light Damage Small leaks, limited area 2–4 days
Moderate Damage Multiple rooms affected 5–10 days
Severe Damage Flooding, structural impact 2–4 weeks


This table shows that How Long Does Water Damage Restoration Take depends heavily on how widespread the damage is.

Can Water Damage Restoration Be Speeded Up?

Many homeowners want to know if they can reduce How Long Does Water Damage Restoration Take. The answer is yes, but only to a certain extent. Professional equipment and fast response are key factors.

The sooner the drying process begins, the less chance there is for secondary damage like mold or structural weakening.

Quick response advantage

Calling restoration experts within the first 24 hours can significantly reduce total recovery time. Immediate action prevents water from spreading deeper into materials.

Proper ventilation and airflow

Improving airflow in the affected area can help speed up evaporation. However, this should always be done under professional guidance to avoid worsening the damage.

Common Mistakes That Increase Restoration Time

Understanding what slows down the process is just as important as knowing How Long Does Water Damage Restoration Take. Many delays happen because of avoidable mistakes made in the early stages.

One common issue is waiting too long before contacting professionals, which allows water to spread and absorb deeper into materials. Another mistake is attempting DIY drying without proper equipment.

When Should You Expect Full Recovery?

Full recovery means not just drying, but restoring the property to its original condition. This includes structural repairs, repainting, and replacing damaged materials.

In most cases, How Long Does Water Damage Restoration Take for complete recovery ranges from a few days to several weeks, depending on severity and response time.

Insurance claims and material availability can also influence the final timeline.

Final Thoughts

So, How Long Does Water Damage Restoration Take? The honest answer is that it depends on many factors, including severity, water type, and response speed. While minor cases may be resolved in just a few days, more serious damage can take weeks to fully repair.

The key takeaway is that fast action makes a huge difference. The sooner the restoration process begins, the shorter How Long Does Water Damage Restoration Take will be overall.

Frequently Asked Questions

  1. Can water damage be fixed in one day?

Only very minor cases, such as small spills or leaks, may be resolved in a day. Most situations require multiple days of drying and inspection.

  1. Does insurance cover water damage restoration?

In many cases, yes. However, coverage depends on the cause of the damage and your specific insurance policy.

  1. What happens if water damage is not treated quickly?

Delays can lead to mold growth, structural weakening, and increased repair costs, significantly extending How Long Does Water Damage Restoration Take.