images (4)_11zon (2)

How Mold Can Affect Indoor Air Quality

Mold growth in homes and commercial buildings is more than a cosmetic problem—it has a significant impact on indoor air quality and occupant health. Moist environments, water damage, and poor ventilation create ideal conditions for mold, which releases spores and volatile organic compounds (VOCs) into the air. Understanding how mold affects indoor air quality is essential for homeowners, property managers, and restoration professionals seeking to maintain a safe and healthy environment.

The Relationship Between Mold and Air Quality

Mold reproduces by releasing spores into the air. While spores are naturally present in the environment, high concentrations indoors can compromise air quality. These spores are lightweight and easily inhaled, allowing them to travel through ventilation systems, carpets, and upholstery. Prolonged exposure can irritate the respiratory system, trigger allergies, and exacerbate asthma.

Mold also produces VOCs, which contribute to musty odors and can further degrade indoor air quality. Even small amounts of mold growth in hidden areas, such as behind walls or under flooring, can release enough spores and VOCs to impact occupants’ health.

Common Health Effects of Mold Exposure

Exposure to mold can result in a range of health issues, depending on the individual’s sensitivity and the type of mold present:

  • Allergic Reactions: Sneezing, runny nose, itchy eyes, and skin rashes are common responses.
  • Respiratory Problems: Individuals with asthma or chronic respiratory conditions may experience wheezing, shortness of breath, or asthma attacks.
  • Sinus and Throat Irritation: Mold spores can irritate mucous membranes, causing congestion, coughing, and sore throats.
  • Headaches and Fatigue: VOCs produced by mold may contribute to headaches, dizziness, and general fatigue.
  • Serious Health Risks: Certain molds, such as Stachybotrys chartarum (black mold), produce mycotoxins that can cause more severe respiratory and neurological effects, particularly in vulnerable populations such as children, the elderly, or immunocompromised individuals.

How Mold Develops Indoors

Mold requires moisture, a food source, and suitable temperatures to thrive. Common causes of indoor mold include:

  1. Water Intrusion: Leaks from roofs, plumbing failures, or flooding introduce moisture into building materials.
  2. High Humidity: Indoor relative humidity above 60% creates favorable conditions for mold growth.
  3. Condensation: Poor insulation or inadequate ventilation can cause moisture accumulation on walls, ceilings, and windows.
  4. Organic Materials: Drywall, wood, carpeting, and fabrics provide nutrients for mold spores to grow.

The Importance of Early Detection

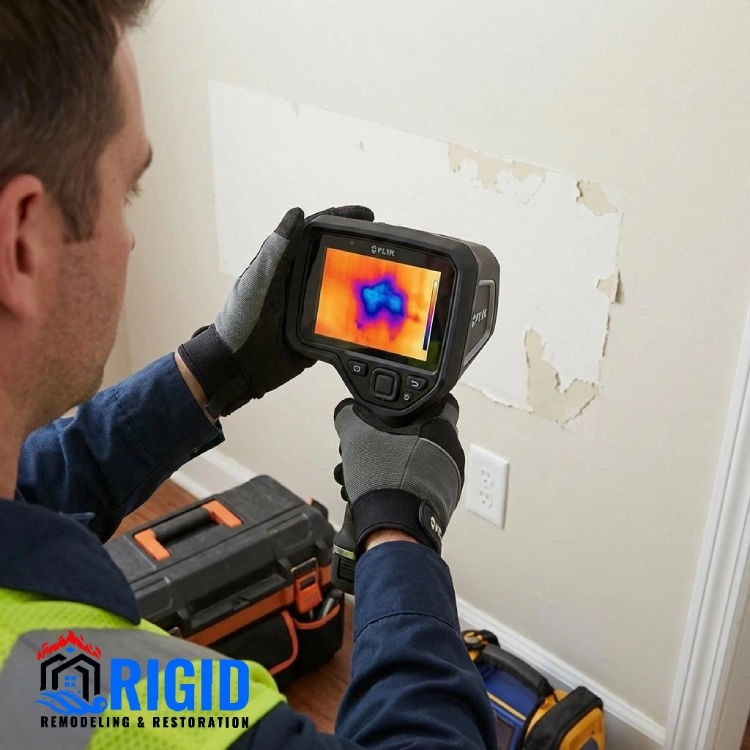
Early detection of mold is critical to maintaining healthy indoor air quality. Signs of mold growth include musty odors, visible discoloration or black spots, and persistent dampness. Professional mold inspections use moisture meters, thermal imaging, and air sampling to detect hidden mold and assess the severity of contamination.

Mitigation and Air Quality Improvement

Proper mold remediation not only removes visible mold but also improves indoor air quality by eliminating spores and VOCs. Key steps include:

  • Containment: Preventing spores from spreading to unaffected areas during cleanup.
  • Removal: Cleaning or replacing contaminated materials, such as drywall, insulation, and carpets.
  • Air Filtration: Using HEPA filters and air purifiers to capture spores and reduce airborne contaminants.
  • Moisture Control: Drying wet areas, repairing leaks, and maintaining humidity below 50% to prevent mold recurrence.
  • Ventilation: Ensuring adequate airflow and ventilation throughout the building to reduce moisture buildup.

Preventing Mold-Related Air Quality Issues

Prevention is always preferable to remediation. Homeowners and property managers can take several steps to protect indoor air quality:

  1. Regular Inspections: Monitor areas prone to moisture, such as basements, attics, and bathrooms.
  2. Prompt Water Damage Response: Address leaks and flooding immediately to prevent mold development.
  3. Humidity Monitoring: Use hygrometers to track indoor humidity and operate dehumidifiers as needed.
  4. Proper Ventilation: Ensure that HVAC systems are maintained, and exhaust fans are used in moisture-prone areas.
  5. Cleaning and Maintenance: Regular cleaning and removal of organic debris reduce nutrients available for mold growth.

The Role of Restoration Professionals

Certified mold remediation specialists play a crucial role in protecting indoor air quality. They have the expertise, equipment, and protocols to identify hidden mold, remove contamination, and restore safe air quality. Professional restoration ensures that remediation is effective, reduces health risks, and helps comply with insurance and building standards.

Conclusion

Mold growth has a profound impact on indoor air quality, affecting health, comfort, and property value. From respiratory irritation to structural damage, the consequences of untreated mold are significant. Early detection, prompt remediation, and ongoing moisture control are essential for maintaining a safe indoor environment.

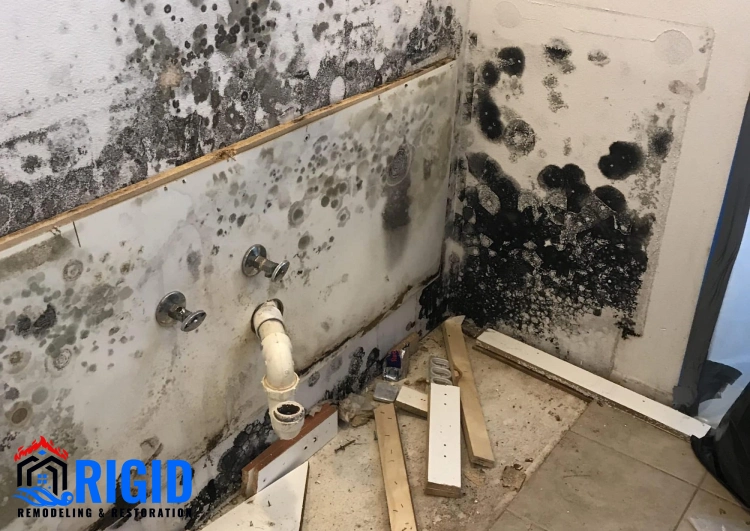
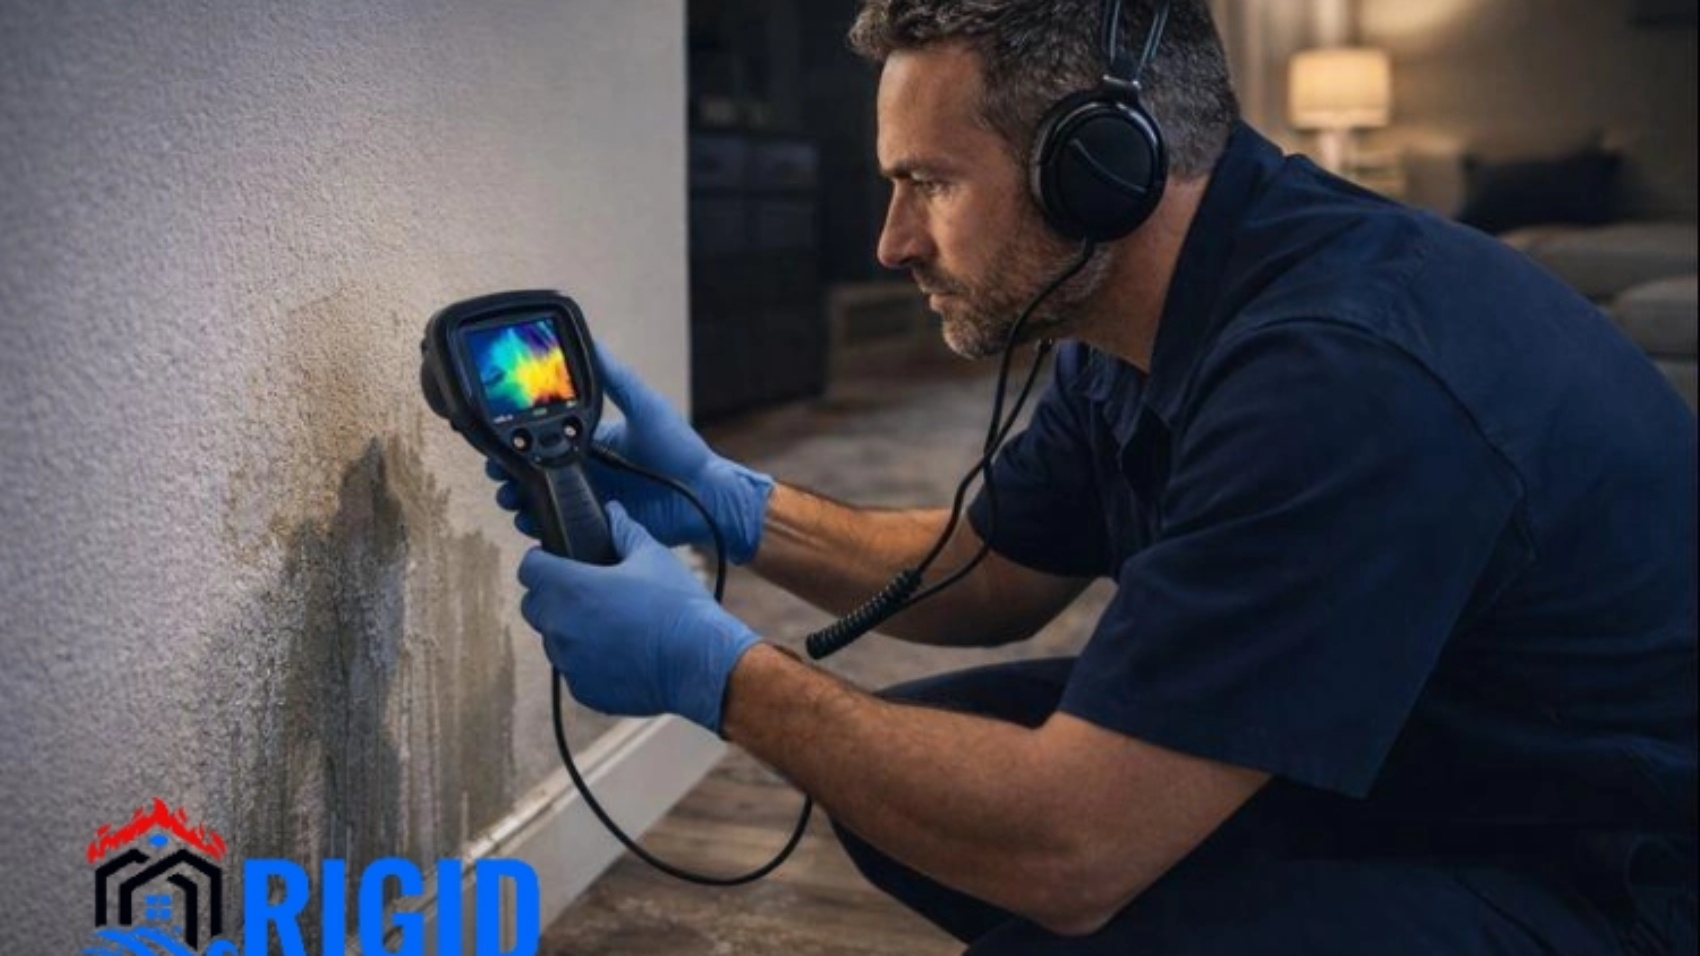
Mold growth in an overlooked area behind a home appliance

The Most Overlooked Areas for Mold Growth in Homes

When people think of mold, they picture a black patch on a bathroom ceiling. But the most troublesome mold usually grows where no one is looking. It thrives in the quiet, damp, poorly ventilated corners of a home that rarely get a second glance, and by the time it shows up in plain sight, it has often been growing for weeks.

The reason comes down to what mold needs: moisture, a food source, and still air. Plenty of spots in a typical home offer all three, and the EPA notes that mold can begin growing within 24 to 48 hours wherever those conditions exist. Knowing where to look is half the battle.

This guide covers the most overlooked mold hot spots, the warning signs for each, and how to keep them dry. If you suspect hidden mold, Rigid Restorations offers professional assessment across San Diego County. Call 760-500-1818.

TL;DR

  • Mold favors damp, dark, poorly ventilated spots that homeowners rarely inspect.
  • The most overlooked areas include under sinks, behind appliances, HVAC systems, window frames, and attics.
  • Front-loading washer door gaskets and bathroom exhaust areas are common but frequently missed sources.
  • A musty smell with no visible cause is often the first sign of mold in an overlooked area.
  • Controlling moisture and improving ventilation in these spots is the most effective prevention.
  • Mold in the HVAC system needs professional attention because it can spread spores throughout the home.

The Overlooked Mold Hot Spots

Each of these areas offers mold what it needs and rarely gets inspected. Run through them a few times a year, especially if you notice a musty smell.

Location Why Mold Grows There What to Watch For
Under sinks Slow leaks and condensation in a dark, closed cabinet Musty smell, warped cabinet base, staining
Behind appliances Fridge, dishwasher, and washer leaks against the wall Discoloration, odor, warped flooring
Washer door gasket Trapped moisture and residue in the rubber seal Black spotting on the gasket, musty laundry
HVAC and ducts Condensation on coils and in ductwork Musty air when the system runs, allergy symptoms
Window frames and sills Condensation where warm air meets cold glass Damp sills, mold on caulk and frame
Attic Roof leaks and poor ventilation Damp insulation, discolored sheathing, musty air
Crawl space Ground moisture and plumbing leaks High indoor humidity, wood rot, musty odor
Bathroom exhaust area Steam with inadequate ventilation Ceiling spotting near the fan, peeling paint

The Common Thread: Moisture Plus Still Air

Notice what links every location above. Each one collects moisture and lacks airflow. A closed cabinet under a sink traps humidity around a slow drip. An attic with poor ventilation holds roof moisture against the wood. A washer gasket seals dampness inside a rubber fold. Mold does not need much, and these spots quietly provide all of it. That is why the two best defenses everywhere are the same: keep it dry and keep air moving.

Warning Signs You Have Overlooked Mold

Because these areas are out of sight, the signs are often indirect. Pay attention to what you smell and how you feel, not just what you see.

  • A persistent musty odor in a room, closet, or near an appliance, with no visible source.
  • Allergy-like symptoms such as sneezing, congestion, or irritated eyes that ease when you leave the house.
  • Condensation on windows or a room that feels unusually humid or clammy.
  • Peeling paint or warped materials near sinks, appliances, or windows.
  • Musty-smelling laundry even after washing, a classic sign of washer gasket mold.

How to Keep These Areas Mold-Free

Prevention in overlooked areas is mostly about moisture and airflow, plus a habit of checking the spots you normally ignore.

  1. Fix leaks quickly. A slow drip under a sink or behind an appliance is a mold source waiting to grow. Repair it within the 24 to 48 hour window.
  2. Run exhaust fans. Use bathroom and kitchen fans during and after moisture-producing activities to clear humidity.
  3. Keep humidity below 60%. Use a dehumidifier in damp areas and monitor with a simple hygrometer.
  4. Dry the washer. Wipe the gasket and leave the door open between loads on front-loaders.
  5. Inspect hidden spots seasonally. Look under sinks, behind appliances, and in the attic a few times a year.
  6. Call a professional for HVAC mold. Never ignore mold in the HVAC system; it can spread through the whole home.

Real-World Example

The Musty Laundry Mystery

A homeowner could not shake a musty smell that clung to freshly washed clothes. The culprit was mold hidden in the folds of the front-loading washer’s door gasket, fed by trapped moisture and residue. Cleaning the gasket and leaving the door open to dry between loads solved it. Left alone, that same overlooked moisture can spread to the surrounding wall and flooring, turning a small nuisance into a real repair.

Glossary

Condensation: Moisture that forms when warm, humid air meets a cooler surface, such as a window frame or a cold water pipe. It is a common, overlooked mold trigger.

Washer Gasket: The rubber door seal on a front-loading washing machine. It traps moisture and detergent residue and is one of the most common overlooked mold sites.

HVAC System: The heating, ventilation, and air conditioning system. Mold here is serious because the system can distribute spores throughout the whole house.

Efflorescence: A white mineral residue on concrete or masonry that signals moisture movement, often found in overlooked basements and crawl spaces.

Ventilation: The exchange of air that removes humidity. Poor ventilation is a common thread linking nearly all overlooked mold locations.

Relative Humidity: The moisture level of the air. Keeping indoor humidity below 60% is a key defense against mold in hidden areas.

Frequently Asked Questions

Where does mold hide most often in a home?

In overlooked, poorly ventilated damp spots: under kitchen and bathroom sinks, behind and beneath appliances, inside HVAC systems and ducts, around window frames where condensation forms, in attics and crawl spaces, and in front-loading washer door gaskets. These areas combine moisture, a food source, and still air.

What is the first sign of hidden mold?

Usually a persistent musty or earthy odor with no visible source. Other clues include allergy-like symptoms that improve when you leave the house, condensation on windows, and unexplained humidity in one area. A professional assessment can confirm and locate it.

Why does mold grow around my windows?

Window frames and sills are prime spots for condensation, where warm indoor air meets cold glass. That moisture collects on the frame and sill, and if it is not wiped away, mold grows on the frame, caulk, and nearby wall. Improving ventilation and managing indoor humidity reduces it.

Is mold in a washing machine dangerous?

Mold in a front-loading washer’s door gasket is common and can cause musty odors on clothes and in the laundry area. It is usually manageable with regular cleaning and leaving the door open to dry, but heavy or recurring growth may signal a larger moisture or ventilation issue.

Should I be worried about mold in my HVAC system?

Yes. Mold in the HVAC system is a priority because the system can distribute spores throughout the entire home every time it runs. The EPA specifically flags HVAC mold as a situation that calls for professional remediation rather than DIY cleaning.

How do I prevent mold in these hidden areas?

Control moisture and improve airflow. Fix leaks promptly, run exhaust fans in bathrooms and kitchens, keep indoor humidity below 60%, wipe condensation from windows, leave the washer door open to dry, and inspect under sinks and behind appliances periodically.

Final Thoughts

Mold is rarely a surprise to the home; it is only a surprise to the homeowner who was not looking in the right places. The under-sink cabinet, the washer gasket, the attic, the window frame, these are where it quietly starts. A few minutes of attention to these overlooked spots, plus good ventilation and quick leak repairs, prevents the vast majority of hidden mold problems.

If a musty smell has you suspecting mold you cannot find, get it checked before it spreads. Rigid Restorations provides professional mold assessment and remediation across San Diego County. Call 760-500-1818.

confused-man-woman-looking-company-results

Water Damage Risks During California Storm Season

California is renowned for its sunny weather, but the state also faces seasonal storms that can lead to significant water damage in both residential and commercial properties. Heavy rainfall, flash floods, and wind-driven water intrusion create challenges for homeowners, property managers, and restoration professionals. Understanding the risks associated with California’s storm season is crucial for protecting property, reducing repair costs, and ensuring safety.

The Impact of Storms on California Properties

Storm season in California, typically occurring during winter and early spring, brings periods of heavy rainfall, strong winds, and occasionally hail. These storms can overwhelm drainage systems, damage roofs, and cause leaks in walls and foundations. Even properties that appear well-maintained are vulnerable, particularly in areas prone to flooding or with aging infrastructure.

Common Water Damage Risks

  1. Roof Leaks and Damage: Intense storms can dislodge shingles, damage flashing, and create gaps where water can enter the home. Even minor roof damage can lead to significant interior leaks if left unchecked.
  2. Foundation and Basement Flooding: Heavy rainfall can saturate soil around foundations, causing water to seep into basements and crawl spaces. Older properties or those with poor drainage are particularly at risk.
  3. Clogged Gutters and Downspouts: Storm debris can block gutters and downspouts, preventing proper drainage. Water may overflow and seep into walls, ceilings, or foundations.
  4. Wind-Driven Water Intrusion: High winds can drive rainwater into cracks around windows, doors, and vents, bypassing normal building protections.
  5. Flash Flooding: Certain regions in California, especially low-lying areas or those near rivers, are susceptible to sudden flash floods, which can cause extensive property damage in a short period.

Secondary Damage Risks

Water damage from storms doesn’t stop at visible leaks. Secondary effects include:

  • Mold Growth: Moist environments created by stormwater can lead to rapid mold proliferation within 24–48 hours. Mold can cause health problems and require professional remediation.
  • Structural Deterioration: Prolonged water exposure weakens wood, drywall, and concrete, potentially compromising the building’s structural integrity.
  • Electrical Hazards: Water intrusion can reach electrical wiring, outlets, and appliances, increasing the risk of fire or electrocution.
  • Damage to Personal Property: Furniture, electronics, and important documents are often damaged during storms if not properly protected.

Preventive Measures for California Properties

Effective preparation and mitigation are essential for reducing storm-related water damage:

  1. Roof Inspections and Maintenance: Ensure that roofing materials, flashing, and gutters are in good condition before storm season begins. Replace worn shingles and seal potential leaks.
  2. Foundation and Drainage Solutions: Maintain proper grading around the property to direct water away from foundations. Install sump pumps in basements or low-lying areas to handle excess water.
  3. Gutter Cleaning: Clear debris from gutters and downspouts regularly to prevent water overflow. Consider gutter guards to reduce future blockages.
  4. Weatherproofing Windows and Doors: Seal gaps and cracks around windows, doors, and vents. Installing storm windows can add additional protection.
  5. Emergency Response Planning: Develop a plan for quick action during storms, including water extraction, contacting restoration professionals, and protecting valuables.

The Role of Professional Restoration Services

Professional water damage restoration companies play a critical role in mitigating storm damage. Their services include:

  • Water Extraction and Drying: Rapid removal of standing water and thorough drying of affected areas to prevent structural damage and mold growth.
  • Moisture Detection: Using advanced tools like moisture meters and thermal imaging cameras to identify hidden water behind walls, ceilings, and floors.
  • Mold Remediation: Addressing early mold growth before it spreads, ensuring a safe indoor environment.
  • Structural Repairs: Repairing or replacing damaged building materials to restore the property to its pre-storm condition.

Insurance Considerations

California homeowners and commercial property policies often cover storm-related water damage, but coverage may vary based on the type of damage and the presence of preventive measures. Documenting property conditions before and after storms, as well as taking immediate action during flooding, strengthens insurance claims and ensures proper reimbursement.

Conclusion

California storm season presents serious risks for water damage in homes and commercial properties. From roof leaks and foundation flooding to secondary mold growth and structural deterioration, the potential for costly damage is high. Property owners and managers who prepare proactively, maintain building systems, and have an emergency response plan in place can minimize these risks.


multi-story building water damage causes

What Causes Water Damage in Multi-Story Buildings?

Water damage in multi-story buildings presents unique challenges due to the complexity of their structure, shared systems, and vertical layout. Understanding the common causes of water damage is crucial for property managers, building owners, and residents to prevent extensive damage, costly repairs, and safety hazards.

Plumbing Failures and Leaks

One of the most common causes of water damage in multi-story buildings is plumbing failure. Burst pipes, leaky faucets, or faulty water heaters can affect multiple units if the plumbing systems are interconnected. Because water travels vertically and horizontally, a single leak can impact several floors, leading to ceiling, wall, and floor damage in multiple apartments.

Roof Leaks and Exterior Vulnerabilities

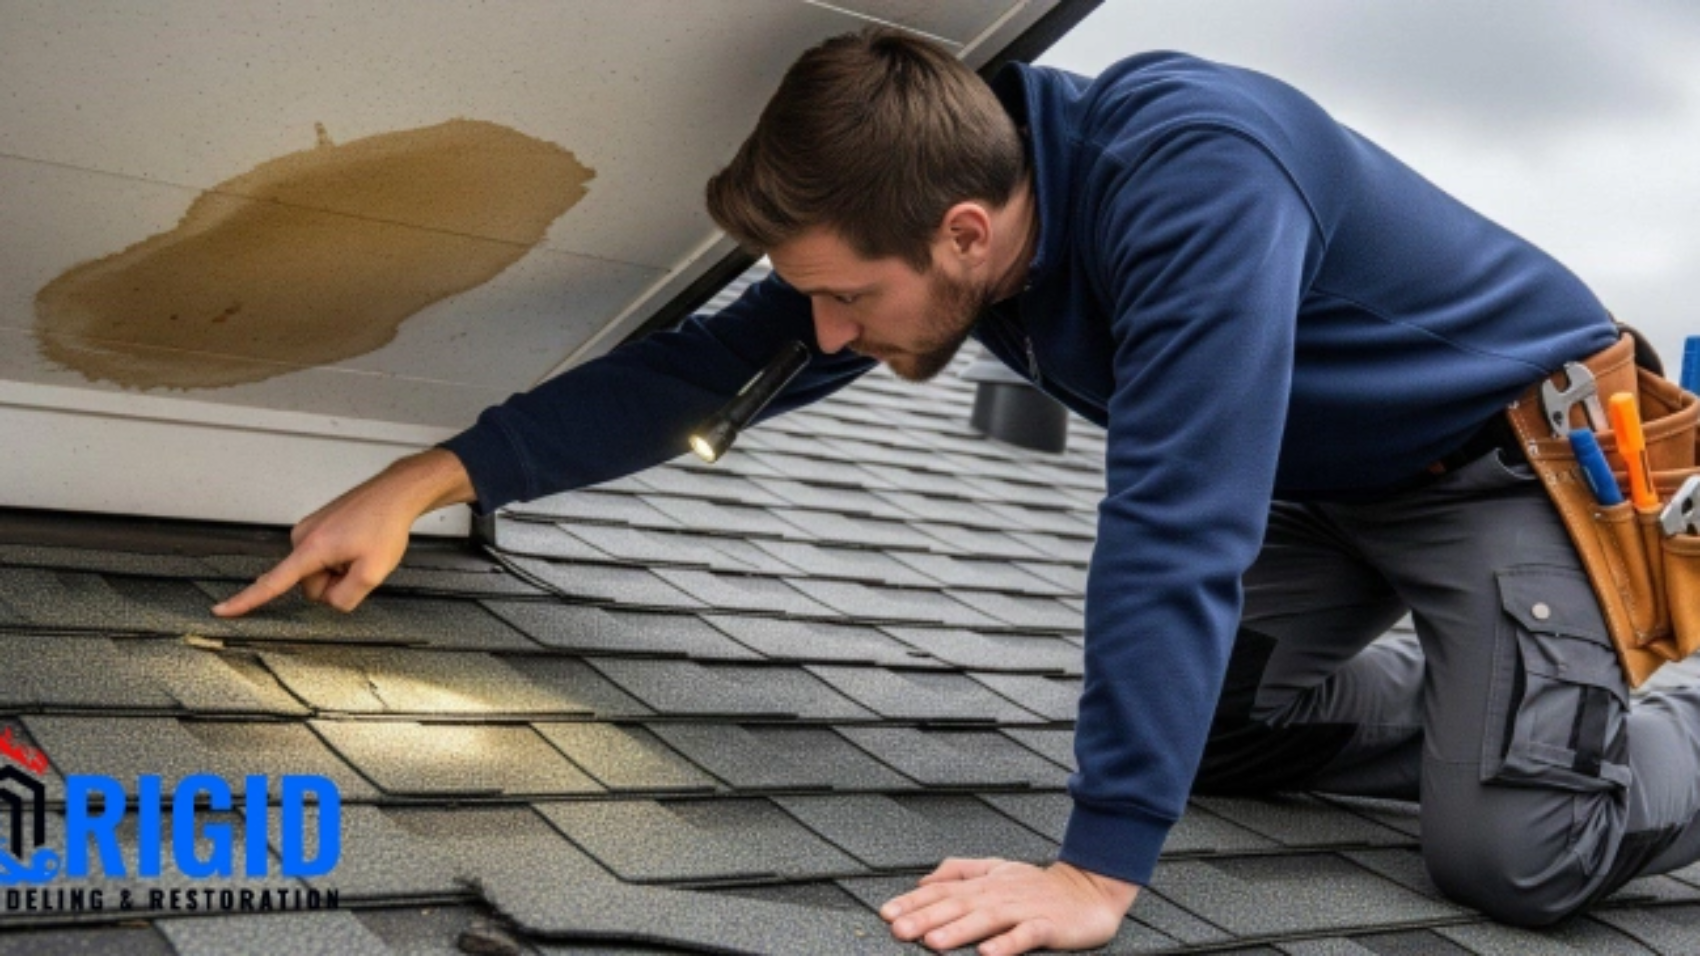
Roof damage or compromised building envelopes are major sources of water intrusion. Heavy rain, storm events, or aging roofing materials can create leaks that penetrate into upper floors, ceilings, and walls. Additionally, gaps around windows, balconies, and exterior cladding can allow water to enter, creating long-term moisture problems in the building’s structure.

water leakage between floors

HVAC and Condensation Issues

Heating, ventilation, and air conditioning (HVAC) systems can also contribute to water damage. Condensation from cooling systems, improperly maintained drip pans, or malfunctioning humidifiers can lead to moisture accumulation. Over time, this hidden moisture can damage ceilings, walls, and floors, especially in multi-story buildings where water can spread through shared ductwork.

Appliance Malfunctions

In multi-unit buildings, appliances like washing machines, dishwashers, and refrigerators can cause water damage if they malfunction or leak. Shared laundry facilities or individual unit appliances can create unexpected water intrusion that may go unnoticed until significant damage occurs.

Flooding and Groundwater Intrusion

Heavy rains, storms, or rising groundwater levels can affect the lower levels of multi-story buildings, including basements and parking garages. Poor drainage, clogged storm drains, or inadequate waterproofing can lead to flooding, which then spreads vertically through walls, elevator shafts, and plumbing conduits.

Sewer and Drain Backups

Sewer backups are a significant cause of water damage in multi-story buildings. Blockages or failures in shared drainage systems can allow contaminated water to flow into multiple units. This type of water, often categorized as gray or black water, poses both structural and health risks.

Construction and Structural Issues

Improper construction, aging infrastructure, and poor maintenance contribute to water intrusion. Cracks in foundations, walls, and ceilings provide pathways for water, while insufficient waterproofing of balconies, terraces, or roofs exacerbates the problem. Multi-story buildings require regular inspections and proactive repairs to mitigate these risks.

ceiling water damage in apartments

Secondary Effects of Water Damage

Water damage in multi-story buildings can lead to secondary issues if not addressed quickly:

  • Mold and mildew growth due to persistent moisture
  • Structural weakening of wood, drywall, and concrete
  • Electrical hazards from water contacting wiring and fixtures
  • Unpleasant odors and degraded indoor air quality

Preventive Measures

Preventing water damage in multi-story buildings involves proactive management:

  1. Regular Plumbing Inspections: Ensure that all pipes, valves, and water-using appliances are checked and maintained.
  2. Roof and Exterior Maintenance: Inspect roofs, windows, and building envelopes for signs of wear or gaps.
  3. HVAC Maintenance: Maintain systems to prevent leaks or condensation buildup.
  4. Flood Preparedness: Ensure proper drainage and waterproofing of lower levels.
  5. Resident Education: Encourage occupants to report leaks or signs of moisture immediately.

Professional Restoration and Mitigation

When water damage occurs, restoration professionals provide specialized services to limit secondary damage and restore the building:

  • Water extraction and drying using industrial equipment
  • Moisture detection behind walls, under flooring, and in ceilings
  • Mold prevention and remediation
  • Structural repairs and content protection

Conclusion

Water damage in multi-story buildings arises from a variety of sources, including plumbing failures, roof leaks, HVAC issues, appliance malfunctions, flooding, and sewer backups. Understanding these causes allows property managers, building owners, and residents to take preventive measures, reduce risk, and respond quickly to water intrusion.

FAQs

1. What are the most common causes of water damage in multi-story buildings?
The most common causes include plumbing leaks, burst pipes, roof leaks, faulty HVAC systems, and appliance failures in upper floors that allow water to spread downward through ceilings and walls.

2. Why is water damage worse in multi-story buildings compared to single-family homes?
Water in multi-story buildings can travel quickly between floors through ceilings, walls, and utility shafts, causing hidden structural damage and affecting multiple units before it is detected.

3. Can poor maintenance increase the risk of water damage in multi-story buildings?
Yes, lack of regular inspections, delayed pipe repairs, clogged drainage systems, and aging infrastructure significantly increase the risk of widespread water damage in multi-story properties.

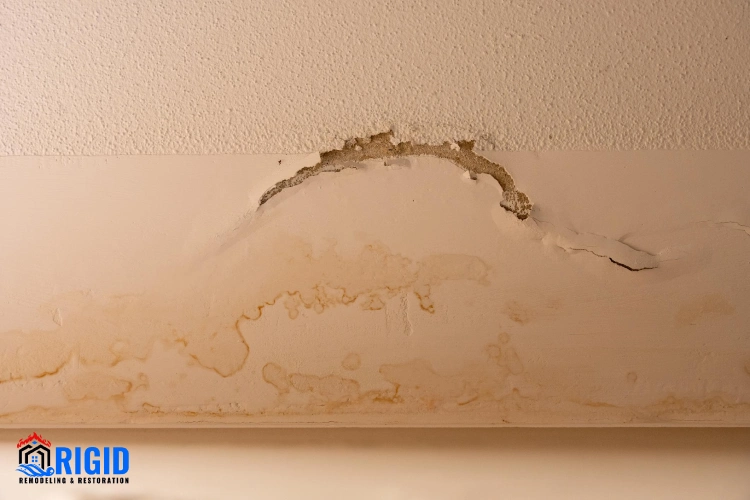
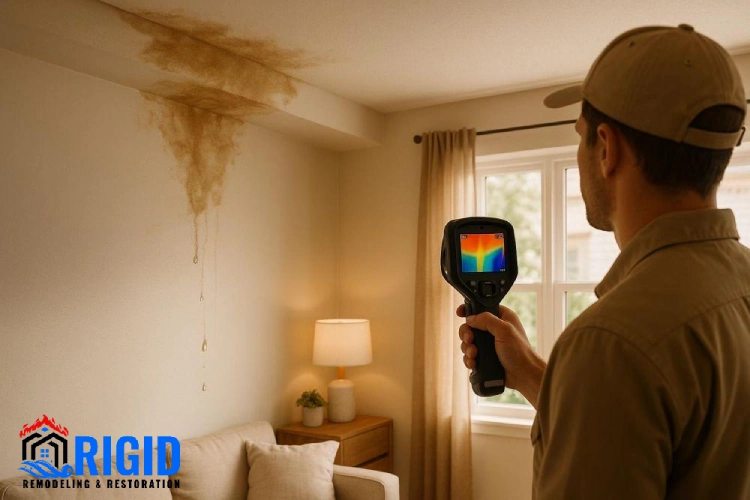
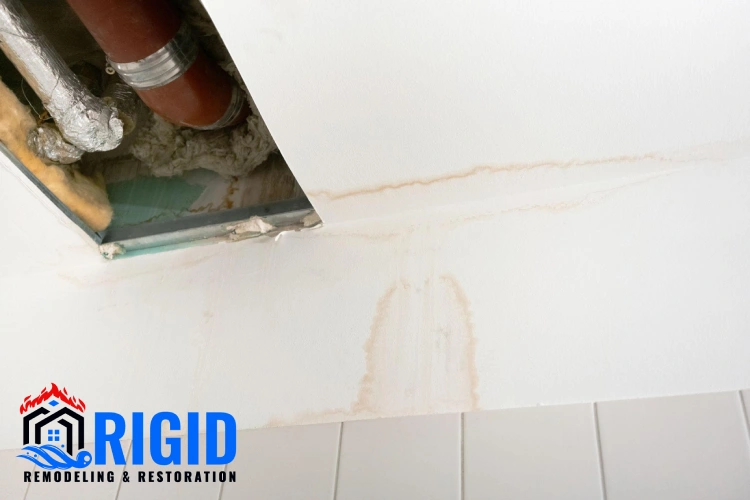
Roof leak causing water stains and mold on a home ceiling

The Relationship Between Roof Leaks and Mold Problems

A roof leak and a mold problem are usually the same story told at two different times. The leak comes first, quietly letting water into the attic, ceiling, and walls. The mold comes second, growing in the dark, damp spaces the water leaves behind. By the time a homeowner sees a ceiling stain, mold has often already begun its work overhead.

The connection is direct and fast. The EPA warns that mold can begin growing on damp materials within 24 to 48 hours, and a roof leak delivers exactly the slow, hidden moisture mold loves. Because attics and wall cavities are poorly ventilated and rarely inspected, roof-related mold can spread widely before it is discovered.

This guide explains how roof leaks lead to mold, the warning signs, and how to break the cycle. If a roof leak has led to moisture or mold in your home, Rigid Restorations can help across San Diego County. Call 760-500-1818.

TL;DR

  • Roof leaks are a leading hidden cause of home mold because they feed moisture into attics, ceilings, and walls.
  • Mold can begin within 24 to 48 hours of the roof leak wetting materials (EPA guidance).
  • Attics are high-risk because they combine roof moisture with poor ventilation and rare inspection.
  • Ceiling stains, sagging, musty attic air, and damp insulation are the main warning signs.
  • Fixing the leak is only half the job; the moisture and any mold must also be removed.
  • In San Diego, winter atmospheric river storms are a common trigger for roof leaks and the mold that follows.

How a Roof Leak Becomes a Mold Problem

The path from roof to mold is short and predictable. Water enters through a failure point, spreads into hidden materials, and mold follows in the damp aftermath.

Stage What Happens
1. Entry Water enters through worn shingles, failed flashing, or storm damage
2. Spread It soaks into roof decking, insulation, ceilings, and wall cavities
3. Incubation Dark, still, damp conditions let mold germinate within 24 to 48 hours
4. Growth Mold colonizes attic wood and drywall, often out of sight
5. Discovery A ceiling stain or musty smell finally reveals a problem that started earlier

Why Attics Are the Perfect Mold Environment

Attics combine every condition mold needs. They receive the roof leak’s moisture first, they are packed with organic materials like wood decking and paper-faced insulation, and they are typically poorly ventilated and rarely visited. Add San Diego’s coastal humidity and a roof leak can keep an attic damp long enough for mold to spread across the sheathing before anyone climbs up to look. This is why attic inspection after heavy storms is one of the most valuable habits a homeowner can build.

Warning Signs to Watch For

Roof-leak mold announces itself indirectly, usually from below or through smell. Take any of these seriously, especially after a storm.

  • Ceiling stains or discoloration, often yellow or brown rings, sometimes with more than one ring indicating a recurring leak.
  • Sagging or cracking ceilings, a sign of significant water accumulation above.
  • A musty smell in upstairs rooms or when you open the attic hatch.
  • Damp, matted, or discolored insulation visible in the attic.
  • Dark patches on attic wood or roof decking, a direct sign of mold growth.

Breaking the Cycle: Repair Plus Remediation

The most common mistake is fixing the roof and assuming the problem is solved. Repairing the leak stops new water, but it does nothing about the moisture already in the materials or the mold that has grown. A complete solution has two parts: repair the roof to stop the source, then dry the affected area and remediate any mold under the IICRC S520 standard, replacing saturated insulation and drywall as needed. Only when both are done is the cycle truly broken.

Prevention: Stop the Leak Before It Starts

  1. Inspect the roof twice a year and after major storms, looking for missing shingles and damaged flashing.
  2. Keep gutters and downspouts clear so water drains away instead of backing up under roofing.
  3. Check the attic after heavy rain for damp spots, stains, or a musty smell.
  4. Ensure the attic is well ventilated to remove moisture and discourage mold.
  5. Address ceiling stains immediately rather than repainting over them, which hides an active problem.

Real-World Example

The Storm That Left More Than a Stain

After a winter storm, a homeowner noticed a small brown ring on an upstairs ceiling. Assuming it was minor, they waited. Weeks later the musty smell in the room grew stronger. An assessment found a failed roof flashing had been leaking with each rain, and mold had spread across a section of attic decking and the insulation below. The fix required roof repair, removal of the affected insulation and drywall, mold remediation, and drying. Acting on the first stain would have caught it before the mold ever started.

Glossary

Roof Flashing: The metal used to seal roof joints and transitions, such as around chimneys and vents. Failed flashing is one of the most common sources of roof leaks.

Roof Decking (Sheathing): The wood layer beneath the roofing material. When a leak wets it, it can rot and grow mold on the attic side, out of sight.

Attic Ventilation: The airflow that removes heat and moisture from an attic. Poor ventilation lets roof-leak moisture linger and feed mold.

Ceiling Stain: A yellow or brown mark on a ceiling, usually the first visible evidence of a roof leak above.

Condensation: Moisture that forms in an attic when warm, humid air meets cold surfaces. It can mimic or compound a roof leak.

IICRC S520: The industry standard for professional mold remediation, used when roof-leak moisture has already led to mold growth.

Frequently Asked Questions

How does a roof leak cause mold?

A roof leak lets water into the attic, roof decking, insulation, ceilings, and wall cavities. These are dark, poorly ventilated spaces where moisture lingers, and the EPA notes mold can begin within 24 to 48 hours. Because the growth is hidden overhead, it often spreads before a homeowner notices.

How fast can mold grow after a roof leak?

Mold can begin growing within 24 to 48 hours of materials getting wet. A roof leak often provides a slow, steady moisture supply, which can keep materials damp for long periods and support ongoing growth until the leak is fixed and the area is dried.

What are the signs of roof-leak mold?

Watch for ceiling stains, sagging or cracked ceilings, a musty smell in upstairs rooms or the attic, damp or discolored insulation, and dark patches on attic wood. Allergy-like symptoms that worsen indoors can also signal hidden mold from a roof leak.

Do I need to replace insulation after a roof leak?

Often, yes. Wet insulation loses effectiveness and holds moisture against the structure, making it a mold reservoir. Saturated insulation is typically removed and replaced as part of addressing roof-leak moisture and any resulting mold.

If I fix the roof, will the mold go away?

Fixing the leak stops new moisture, but it does not remove mold that has already grown or dry out materials that are still wet. Existing mold must be remediated and the affected area dried. Repair and remediation together are what actually solve the problem.

Are roof leaks a bigger risk in San Diego winters?

Yes. San Diego’s winter atmospheric river storms deliver heavy, sustained rain that finds weak points in roofs and flashing. Combined with coastal humidity that slows drying, these storms are a common trigger for roof leaks and the mold that follows. Pre-winter roof maintenance is especially valuable here.

Final Thoughts

Roof leaks and mold are cause and effect. The water sneaks in through worn flashing or damaged roofing, settles into the attic and ceiling, and within a day or two mold begins to grow in the dark. Break the chain early, catch the leak and dry the moisture before mold establishes, and you avoid a much larger problem overhead.

If a roof leak has left moisture or mold in your home, address both the leak and its aftermath. Rigid Restorations provides moisture assessment, drying, and mold remediation across San Diego County. Call 760-500-1818.

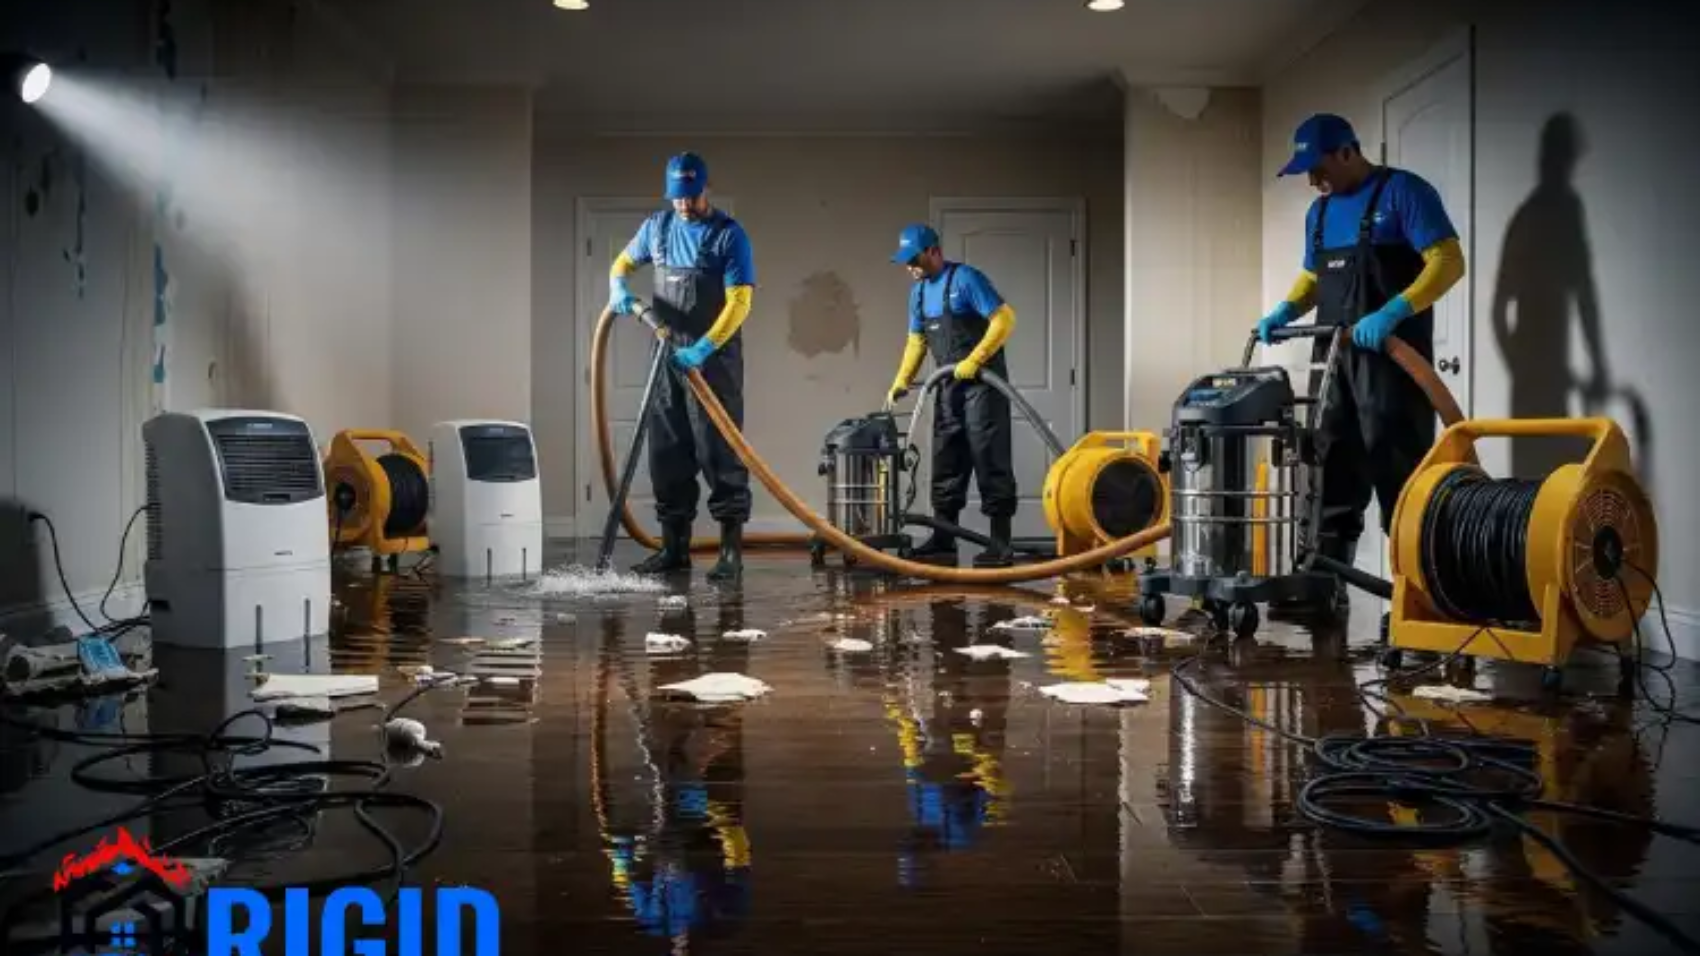
Flood Damage Restoration

Why Fast Response Time Matters After a Flood

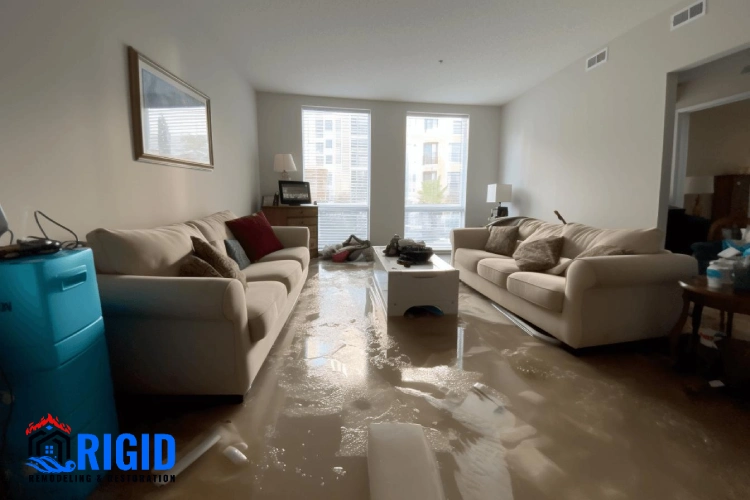
Flooding is one of the most destructive natural events that can affect homes and commercial properties. While the initial water intrusion is harmful, the response time following a flood significantly influences the extent of damage, health risks, and restoration costs. Understanding why fast response is critical allows property owners, managers, and restoration professionals to act decisively, minimizing losses and ensuring safety.

The Importance of Immediate Action

Water begins causing damage the moment it enters a property. Within minutes, it can soak flooring, walls, furniture, and personal belongings. The longer water remains, the greater the risk of structural compromise, mold growth, and contamination. A fast response ensures that water is removed quickly and drying begins immediately, preventing secondary damage that is far more expensive to repair.

Preventing Structural Damage

Floodwater weakens structural components, including wood framing, drywall, and concrete. Prolonged exposure can cause:

  • Warping or swelling of wood
  • Delamination of flooring materials
  • Cracking or spalling of concrete
  • Softening of drywall and ceilings

Rapid response teams use specialized equipment to extract water and dry affected areas, reducing structural degradation and preserving the integrity of the building.

Mold Prevention

Mold can begin to grow within 24 to 48 hours in damp conditions. A delayed response increases the likelihood of mold spreading throughout walls, ceilings, floors, and insulation. Mold not only damages building materials but also poses significant health risks, including respiratory issues and allergic reactions. Quick intervention prevents mold from establishing colonies and mitigates future remediation costs.

Protection of Personal Property

Floodwater can ruin furniture, electronics, documents, and sentimental items. Fast water extraction and content relocation limit exposure and reduce permanent losses. Restoration professionals often provide temporary storage solutions and protective measures to salvage as much property as possible.

Health and Safety Considerations

Standing water from floods can contain contaminants, including bacteria, chemicals, and sewage. Delayed cleanup increases the risk of health hazards for occupants and restoration personnel. Prompt response includes:

  • Removing contaminated water safely
  • Using personal protective equipment (PPE)
  • Treating surfaces with disinfectants to reduce pathogens

Minimizing Restoration Costs

Delays in flood response often result in higher repair costs. Secondary damage, such as mold remediation, structural repairs, and content replacement, can multiply expenses. Fast response reduces the scope of restoration, saving time and money while limiting insurance claims disputes.

Role of Professional Restoration Services

Certified restoration companies provide immediate response services following a flood. Their interventions include:

  • 24/7 water extraction and pumping
  • Industrial drying and dehumidification
  • Moisture detection using advanced tools such as infrared cameras
  • Mold prevention and remediation
  • Documentation for insurance claims

Professional teams can often prevent long-term damage that a homeowner might overlook, ensuring the property is restored safely and efficiently.

Insurance Implications

Insurance companies often emphasize timely mitigation in flood claims. Prompt reporting and restoration demonstrate proactive management, which can facilitate claims approval and maximize coverage. Delays can result in partial denial of claims if secondary damage is attributed to negligence.

Preventive Tips for Property Owners

  • Act Immediately: Contact restoration professionals as soon as flooding occurs.
  • Document the Damage: Take photos and videos to support insurance claims.
  • Relocate Valuables: Move furniture, electronics, and personal items to safe areas.
  • Avoid DIY Cleanup for Contaminated Water: Professional equipment and protocols are necessary for health and safety.
  • Monitor Moisture Levels: Use hygrometers or consult restoration experts to ensure complete drying.

Conclusion

Fast response time after a flood is critical to limiting structural damage, preventing mold, protecting personal property, and reducing health risks. Immediate intervention by certified restoration professionals ensures efficient water extraction, thorough drying, and mitigation of secondary damage. Homeowners and property managers who prioritize rapid response can save significant repair costs, maintain building integrity, and safeguard the well-being of occupants.


Water Damage Prevention for Vacation Homes

Water Damage Prevention Tips for Vacation Homes

Water Damage Prevention for Vacation Homes is essential because vacation properties are often left unoccupied for extended periods, making them particularly vulnerable to water damage. Leaks, flooding, and plumbing failures can go unnoticed for days or even weeks, resulting in costly repairs and long-term structural issues. Property owners can minimize risks by implementing preventive measures and monitoring strategies to protect their investment.

Understand the Risks

Water damage in vacation homes can originate from several sources:

Plumbing Failures: Burst pipes, leaking faucets, or faulty appliances can cause significant damage.
Roof and Window Leaks: Aging roofs or improperly sealed windows allow rainwater to penetrate the property.
HVAC and Condensation: Poorly maintained heating and cooling systems can introduce moisture.
Frozen Pipes: In colder climates, pipes can freeze and burst during winter months.
Flooding: Heavy rainfall or nearby water sources can lead to basement or ground-level flooding.

Understanding these common risks is a crucial part of Water Damage Prevention for Vacation Homes, helping property owners take proactive steps to avoid expensive repairs and maintain the long-term condition of their property.

Recognizing these risks allows property owners to take targeted actions to prevent water-related problems.

Preventive Plumbing Measures

Proper plumbing maintenance is essential for vacation homes:

  • Shut Off Main Water Supply: When the home is unoccupied, turning off the main water supply prevents leaks from causing damage.
  • Drain Pipes: Remove water from plumbing lines to prevent freezing and bursting in colder climates.
  • Inspect Appliances: Regularly check washing machines, dishwashers, and water heaters for leaks and malfunctions.
  • Install Leak Detectors: Smart sensors can alert owners remotely if a leak occurs, allowing prompt action.

Roof, Gutters, and Window Maintenance

Exterior maintenance protects the property from water intrusion:

  • Inspect the Roof: Replace damaged shingles and repair flashing to prevent leaks.
  • Clean Gutters: Ensure downspouts are clear and direct water away from the foundation.
  • Seal Windows and Doors: Check caulking and weatherstripping to prevent rainwater from entering the home.

HVAC and Ventilation

Proper HVAC maintenance reduces indoor moisture:

  • Turn Off and Drain HVAC Units: Prevent water accumulation and mold growth during extended vacancy.
  • Maintain Proper Ventilation: Ensure airflow in enclosed areas to reduce humidity levels.
  • Monitor Humidity: Use a dehumidifier or smart sensors to keep indoor humidity below 50%.

Flood and Storm Preparedness

Properties located in flood-prone areas require additional precautions:

  • Elevate Valuables: Store furniture, electronics, and important documents above potential flood levels.
  • Install Sump Pumps: Ensure basements or crawlspaces are equipped with operational sump pumps.
  • Seal Vulnerable Areas: Waterproof basements and reinforce ground-level entrances against water intrusion.

Regular Inspections and Monitoring

Even when unoccupied, periodic inspections are vital:

  • Hire Local Property Managers: Professionals can check for leaks, moisture, or structural issues during off-season periods.
  • Remote Monitoring: Smart home devices can track water sensors, humidity levels, and HVAC operation.
  • Schedule Maintenance: Conduct seasonal maintenance on plumbing, roofs, and appliances to catch potential issues early.

Content Protection

Water damage can destroy furniture, electronics, and personal belongings. Preventive strategies include:

  • Relocate Items: Move valuable items to elevated or secure locations.
  • Protect Floors and Carpets: Remove or cover absorbent materials to minimize damage.
  • Use Plastic Covers: Protect furniture and stored items from moisture in case of leaks.

Insurance Considerations

Insurance policies for vacation homes often require proactive measures to maintain coverage. Document preventive steps, inspections, and maintenance to support claims in the event of water damage. Some insurers may offer discounts for properties equipped with leak detection systems and flood mitigation features.

Emergency Response Planning

Even with preventive measures, emergencies can occur. A clear plan ensures rapid response:

  • Local Contacts: Have a restoration company or property manager on call for immediate mitigation.
  • Remote Monitoring Alerts: Use smart devices to receive alerts and act quickly.
  • Document Procedures: Provide instructions for mitigation steps, including shutting off water and protecting contents, to local contacts.

Conclusion

Vacation homes are particularly vulnerable to water damage due to their extended periods of vacancy. By implementing preventive plumbing measures, maintaining roofs and windows, controlling humidity, preparing for floods, and monitoring the property remotely, owners can minimize the risk of costly damage.

Proactive measures, combined with professional inspections and emergency response planning, help protect both the investment and the safety of the home. Understanding potential water risks and acting accordingly ensures that vacation homes remain secure, well-maintained, and ready for use when occupants arrive.


Shocked Woman Calling Plumber While Collecting Water Leaking From Ceiling Using Utensil

Commercial Water Damage: Lessons Learned from Real Emergencies

Commercial properties are particularly vulnerable to water damage due to their size, complexity, and high occupancy. Unlike residential homes, commercial buildings often contain sensitive equipment, valuable inventory, and multiple tenants. Water damage emergencies can disrupt operations, create safety hazards, and result in significant financial losses. Learning from real-life commercial water damage incidents provides valuable insights for property managers, business owners, and restoration professionals.

Common Causes of Commercial Water Damage

Water damage in commercial properties often stems from several sources:

  • Plumbing Failures: Burst pipes, faulty valves, or leaking appliances can impact multiple areas simultaneously.
  • Roof and Structural Leaks: Aging roofs or damaged building envelopes allow rainwater to enter, especially during storms.
  • HVAC and Sprinkler Systems: Malfunctioning air conditioning, heating, or fire suppression systems can introduce water into offices or storage areas.
  • Natural Disasters: Floods, hurricanes, and heavy storms can lead to widespread water intrusion.
  • Sewer and Drain Backups: Blockages in shared drainage systems can cause contaminated water to enter the building.

Understanding these causes helps commercial property owners anticipate risks and implement preventive strategies.

Lessons from Real Emergencies

Real-world water damage emergencies provide practical lessons on how to prevent or mitigate future incidents.

  1. Rapid Response Is Critical: Delays in addressing water intrusion lead to secondary damage, such as mold growth and structural weakening. In one commercial building incident, a two-day delay resulted in widespread mold requiring costly remediation. Immediate water extraction and drying minimized long-term damage in another case.
  2. Preventive Maintenance Reduces Risk: Regular inspections of plumbing, roofs, HVAC systems, and drainage systems can identify vulnerabilities before they escalate. Businesses that schedule annual maintenance often experience fewer emergencies and lower restoration costs.
  3. Document Everything: In emergencies, detailed documentation of the damage, affected areas, and mitigation efforts is essential for insurance claims. Photographs, videos, and professional reports help secure adequate coverage and prevent disputes with insurers.
  4. Professional Restoration Saves Time and Money: Attempting DIY repairs or using inadequate equipment can worsen damage. Professional restoration teams bring industrial-grade pumps, dehumidifiers, and moisture detection tools that ensure thorough mitigation, preventing secondary damage and reducing overall costs.
  5. Communication Is Key: In multi-tenant commercial properties, coordinating with tenants, staff, and restoration teams is essential. Clear communication ensures safe evacuation, prevents confusion, and facilitates efficient restoration.

Preventing Future Water Damage

Commercial property owners can apply lessons learned from past emergencies to strengthen resilience:

  • Regular Roof and Gutter Inspections: Identify potential leaks or weak spots before storms.
  • Plumbing System Audits: Check for corroded pipes, worn valves, and appliance leaks.
  • HVAC and Sprinkler Maintenance: Ensure systems operate efficiently and safely to prevent water intrusion.
  • Install Water Detection Devices: Sensors can alert managers to leaks in real-time, allowing immediate response.
  • Develop Emergency Response Plans: Prepare protocols for evacuation, water mitigation, and restoration to minimize downtime.

Case Study Example

In a commercial warehouse, a burst sprinkler head went unnoticed overnight, flooding inventory storage. Rapid response by a professional restoration team prevented mold growth, salvaged most products, and restored the building within 48 hours. The key takeaways were the importance of monitoring systems, professional intervention, and having an emergency plan in place.

Insurance Considerations

Commercial insurance policies often cover water damage, but coverage may depend on timely reporting and preventive measures. Property owners should maintain records of maintenance, inspections, and emergency responses to support claims. Policies may vary in terms of coverage for business interruption, mold remediation, and structural repairs.

Conclusion

Commercial water damage emergencies offer valuable lessons on prevention, response, and restoration. Rapid intervention, regular maintenance, professional mitigation, and clear communication are essential to minimizing financial losses, protecting property, and ensuring occupant safety.

By learning from real emergencies, commercial property owners can implement strategies that reduce risk, maintain business continuity, and safeguard valuable assets. Proactive planning and professional support are the keys to mitigating water damage effectively in commercial settings.


Working mood. Two men in protective helmet and bright vest crouched touching pipe on sand at construction site during day

How Property Owners Can Reduce Restoration Costs

Water damage and other property emergencies can be expensive to repair, especially in larger residential or commercial buildings. However, property owners can take proactive steps to reduce restoration costs, prevent secondary damage, and protect their investment. By understanding best practices for mitigation, maintenance, and restoration, owners can minimize financial impact while ensuring property safety and structural integrity.

Immediate Response Is Key

One of the most effective ways to reduce restoration costs is to act quickly. Water intrusion, leaks, or flooding causes damage the moment it enters a property. Delays allow water to penetrate deeper into walls, floors, and structural components, increasing the scope of repairs. Immediate actions include:

  • Stopping the source of water, such as turning off a burst pipe or shutting down a leaking appliance
  • Removing standing water with pumps or wet-dry vacuums
  • Relocating furniture, electronics, and valuables to prevent additional damage

Rapid response reduces the extent of damage, preventing structural weakening, mold growth, and costly secondary repairs.

Invest in Preventive Maintenance

Routine maintenance is a critical strategy for reducing restoration costs. Property owners should regularly inspect and maintain:

  • Roofs and gutters to prevent leaks
  • Plumbing systems, including pipes, valves, and appliances
  • HVAC systems to control moisture and prevent condensation
  • Foundations and drainage systems to avoid flooding

Preventive maintenance not only reduces the likelihood of emergencies but also keeps insurance premiums lower by demonstrating proactive risk management.

Hire Professional Mitigation Services

Professional restoration and mitigation services are equipped with specialized tools, including industrial pumps, dehumidifiers, and air movers. These tools extract water efficiently, dry structural components, and prevent hidden moisture that can lead to mold growth. Attempting DIY mitigation may miss critical areas, allowing damage to escalate. Professional intervention often reduces the total restoration cost by containing the problem early.

Document Damage for Insurance Claims

Proper documentation supports insurance claims, which can offset restoration costs. Property owners should:

  • Take photos and videos of affected areas before cleanup
  • Keep receipts for emergency repairs or mitigation services
  • Maintain records of restoration progress and equipment used

Insurance companies often require proof of timely action and thorough mitigation. Accurate documentation ensures claim approval and maximizes financial recovery.

Implement Moisture Monitoring

Moisture detection and monitoring tools help identify hidden water before it causes extensive damage. Hygrometers, moisture meters, and thermal imaging cameras detect dampness in walls, floors, and ceilings. Early identification allows targeted drying, reducing unnecessary demolition and replacement of structural materials.

Prevent Secondary Damage

Secondary damage, such as mold growth, warped wood, and compromised drywall, dramatically increases restoration costs. Property owners can prevent these issues by:

  • Acting immediately after water intrusion
  • Ensuring proper drying of affected areas
  • Using antimicrobial treatments on wet materials
  • Ventilating spaces to reduce humidity

By addressing these risks early, property owners limit the scope of restoration, reducing labor, material, and mold remediation costs.

Educate Tenants and Staff

In multi-unit or commercial properties, tenant and staff awareness plays a role in minimizing restoration costs. Encouraging immediate reporting of leaks, proper appliance use, and monitoring for moisture can prevent minor issues from escalating into major damage. Effective communication ensures that small incidents are addressed before they impact multiple units or areas.

Invest in Protective Infrastructure

Long-term investments in protective infrastructure can reduce future restoration costs. Examples include:

  • Sump pumps in basements and crawlspaces
  • Backflow prevention valves on plumbing systems
  • Water detection sensors and alarms
  • Proper grading and drainage systems around the property

These measures prevent water from causing severe damage, minimizing the need for expensive restoration.

Conclusion

Restoration costs can be significant, but property owners can take proactive measures to reduce expenses. Rapid response, preventive maintenance, professional mitigation, proper documentation, moisture monitoring, and tenant education all play vital roles in minimizing damage.


Remove Smoke Odor

7 Proven Ways to Remove Smoke Odor from Carpet & Walls

Smoke odor is one of the most stubborn household problems. Even after a fire is out, the smell can linger for weeks or even months. It seeps into carpets, walls, furniture, and even the air itself.

So, how do you remove smoke odor effectively from your home? The key is understanding how deeply smoke penetrates surfaces after Fire and Smoke Damage and then using the right cleaning methods consistently.

In this guide, we’ll share 7 proven ways to eliminate smoke odor from carpets and walls. We’ll also explain why quick action matters and how to prevent long-term damage.

Why Smoke Odor Is So Hard to Remove

Smoke is made of tiny particles. When a fire occurs, these particles spread quickly and attach to porous surfaces.

As a result:

  • Carpets absorb smoke deep into fibers
  • Walls trap soot in paint and drywall
  • Odors linger in air vents and insulation

Therefore, surface cleaning alone is not enough.

Understanding Fire and Smoke Damage

Before removing odor, it is important to understand Fire and Smoke Damage.

Smoke damage is not just about smell. It also includes:

  • Soot buildup
  • Chemical residue
  • Discoloration of surfaces
  • Air contamination

Because of this, proper cleaning requires more than basic household methods.

  1. Ventilate the Entire Area Immediately

The first step is to improve airflow.

Open all windows and doors to allow fresh air inside. Use fans to push smoke-filled air out of the room.

Additionally:

  • Turn on exhaust fans
  • Circulate air continuously
  • Keep ventilation running for several hours

As a result, airborne particles begin to reduce quickly.

  1. Deep Clean Carpets with Baking Soda

Baking soda is highly effective at absorbing odors.

To use it:

  • Sprinkle a generous amount over the carpet
  • Let it sit for at least 12–24 hours
  • Vacuum thoroughly afterward

However, for heavy smoke damage, repeat the process multiple times.

Therefore, consistency is key.

  1. Steam Clean for Deep Odor Removal

Steam cleaning penetrates deep into carpet fibers.

It helps to:

  • Break down soot particles
  • Remove trapped odors
  • Sanitize surfaces

Moreover, steam cleaning is one of the most effective methods for severe Fire and Smoke Damage situations.

If possible, hire a professional for best results.

  1. Wash Walls with Vinegar Solution

Walls absorb smoke quickly, especially if painted with porous finishes.

To clean them:

  • Mix white vinegar and warm water
  • Use a soft sponge to wipe walls
  • Focus on stained or darkened areas

Additionally, vinegar helps neutralize odor rather than just covering it.

  1. Repaint with Odor-Sealing Primer

In some cases, cleaning is not enough. Smoke particles can remain trapped inside paint layers.

Therefore, repainting becomes necessary.

Steps include:

  • Clean the wall thoroughly
  • Apply an odor-blocking primer
  • Repaint with fresh paint

As a result, trapped smoke odors are sealed permanently.

  1. Use Activated Charcoal or Odor Absorbers

Activated charcoal is highly effective at absorbing smoke particles from the air.

Place it around the affected rooms:

  • Near carpets
  • Corners of rooms
  • Closets and closed spaces

Furthermore, charcoal works continuously without chemicals.

Other options include:

  • Baking soda bowls
  • Commercial odor absorbers
  1. Clean HVAC Systems and Air Ducts

Smoke often spreads through air conditioning systems.

If not cleaned, it will continue circulating odor throughout the home.

Therefore:

  • Replace air filters
  • Clean vents and ducts
  • Consider professional HVAC cleaning

This step is crucial for complete odor removal after Fire and Smoke Damage.

Additional Tips for Better Results

To improve effectiveness, combine multiple methods.

For example:

  • Use baking soda and steam cleaning together
  • Ventilate while cleaning walls
  • Run air purifiers during the process

As a result, odor removal becomes faster and more complete.

How Long Does Smoke Odor Last?

Without treatment, smoke odor can last:

  • Weeks in light damage cases
  • Months in moderate damage
  • Years in severe fire incidents

However, with proper cleaning, it can be significantly reduced or eliminated.

Therefore, acting quickly is essential.

Common Mistakes to Avoid

Many homeowners make mistakes when trying to remove smoke odor.

Avoid the following:

  • Using only air fresheners (they mask, not remove odor)
  • Skipping HVAC cleaning
  • Ignoring walls and ceilings
  • Delaying cleanup after fire exposure

Because of this, odors often return if not properly treated.

Health Concerns Linked to Smoke Exposure

The effects of smoke go beyond smell. Fire and Smoke Damage can also impact indoor air quality.

Exposure may lead to:

  • Respiratory irritation
  • Headaches
  • Eye discomfort
  • Allergic reactions

Therefore, proper cleaning is also important for health and safety.

When to Call Professional Restoration Experts

In some cases, DIY methods are not enough.

Call professionals if:

  • Smoke odor is extremely strong
  • Large areas are affected
  • Walls and ceilings are heavily stained
  • HVAC systems are contaminated

Professionals use specialized equipment like ozone machines and thermal fogging.

As a result, they can remove deep-set odors more effectively.

Final Thoughts

Smoke odor is one of the most persistent problems after a fire. However, it can be removed with the right approach.

By understanding Fire and Smoke Damage, you can take targeted steps to eliminate odor from carpets and walls. From baking soda treatments to HVAC cleaning, each method plays an important role.

The key is to act quickly, combine methods, and be consistent. In the end, restoring your home is not just about removing smell—it is about restoring comfort, safety, and peace of mind.