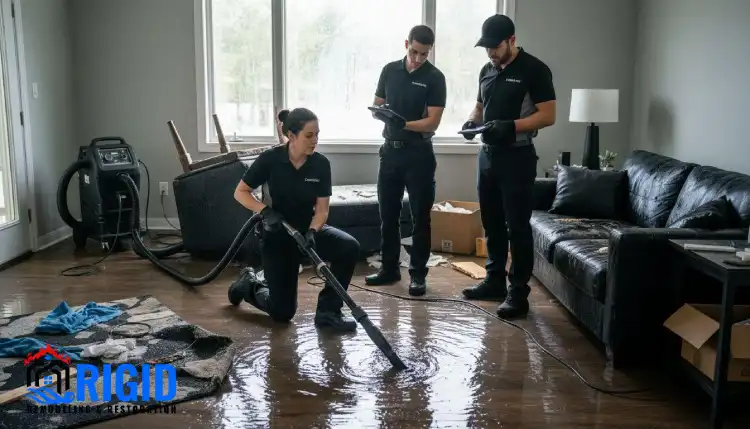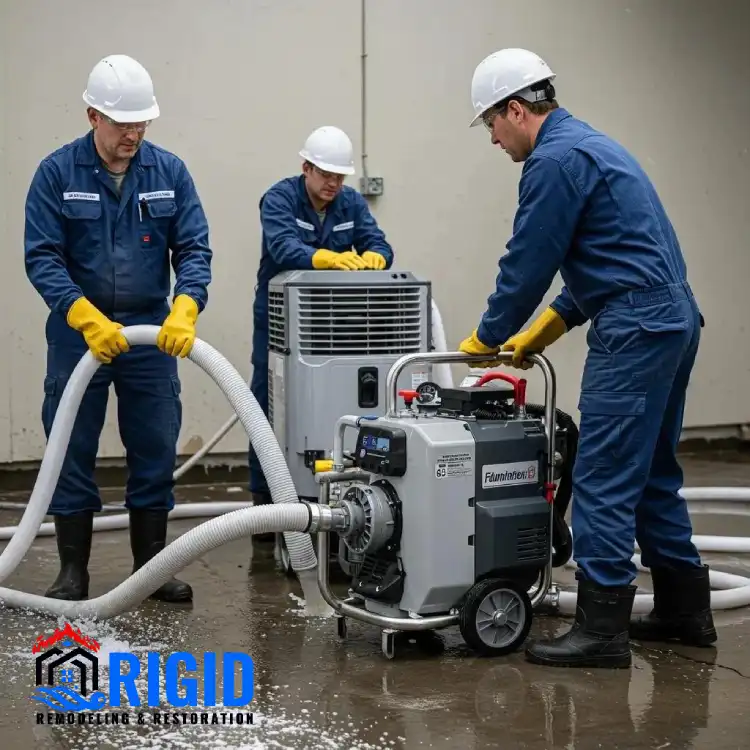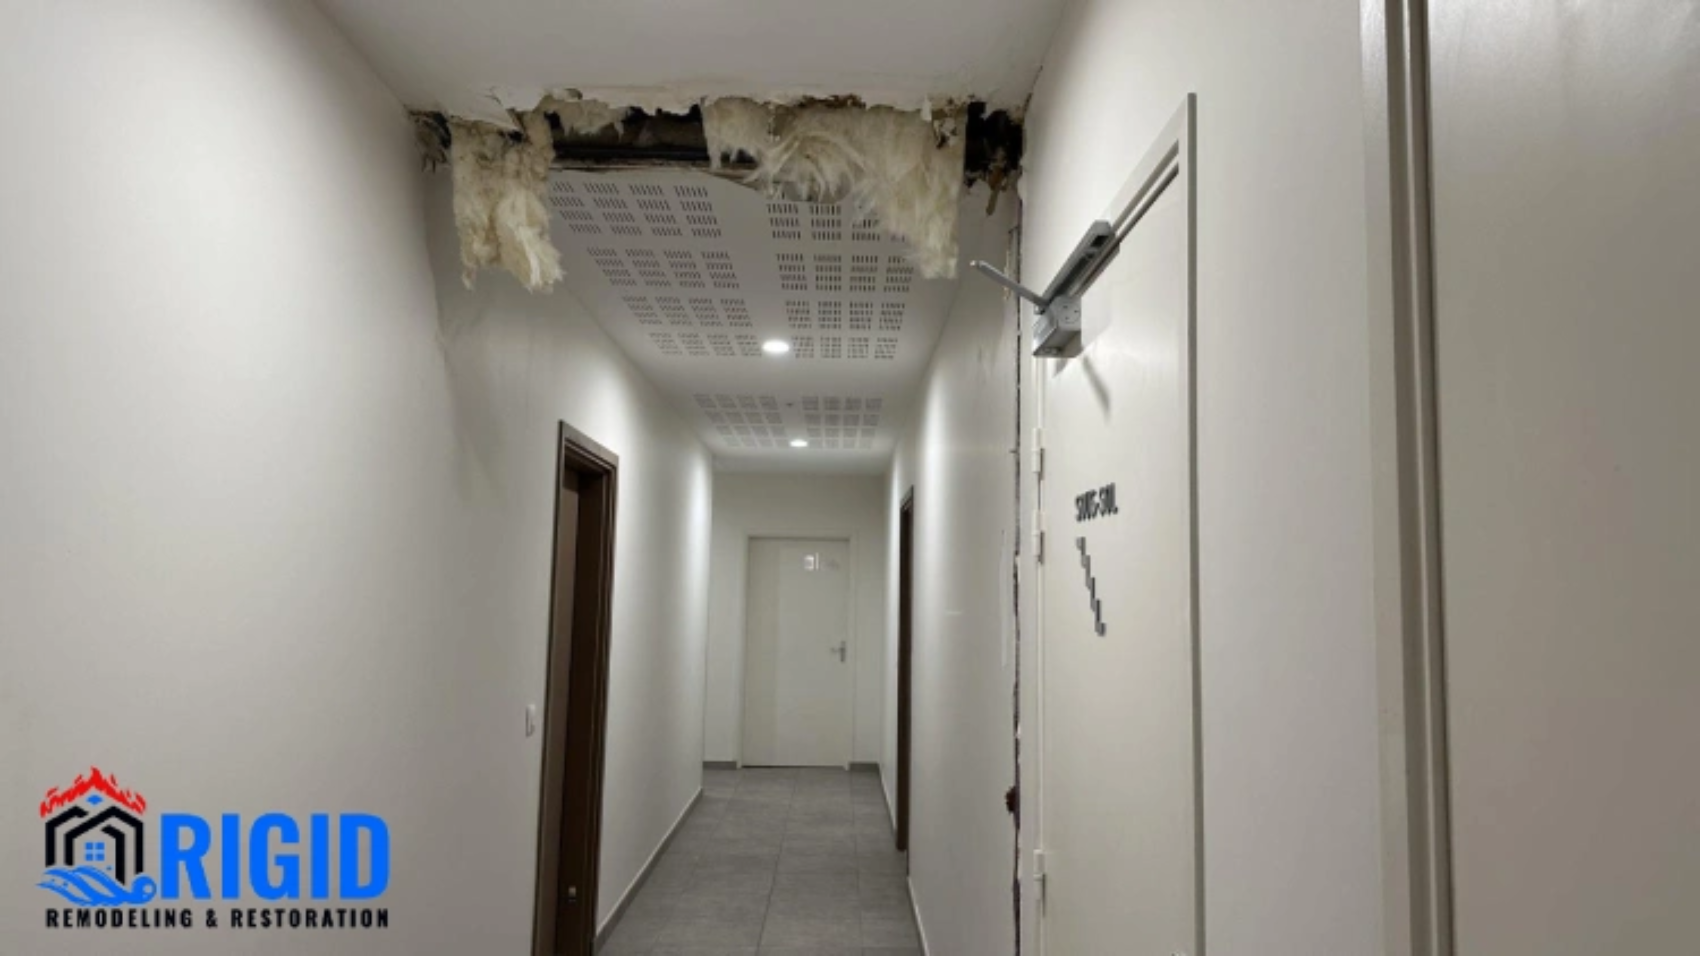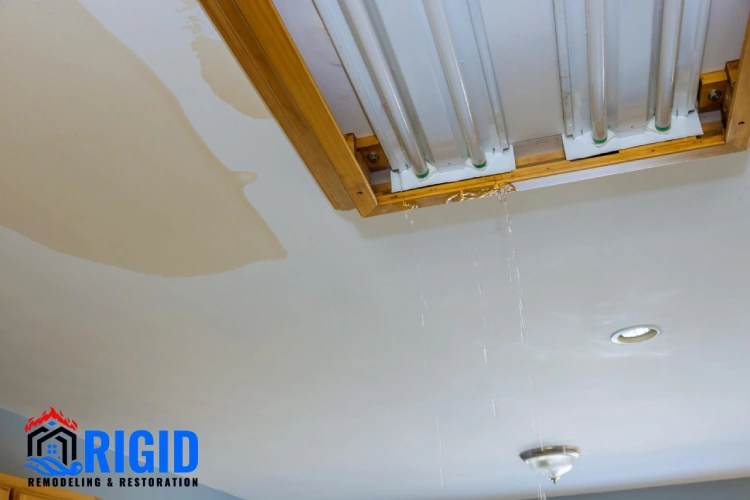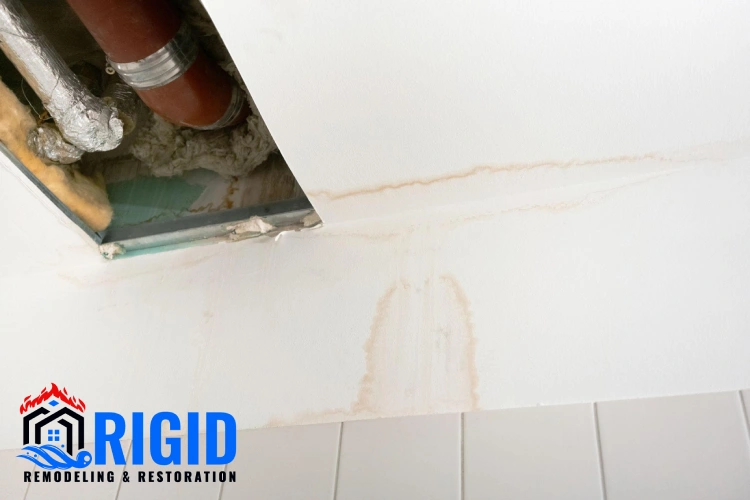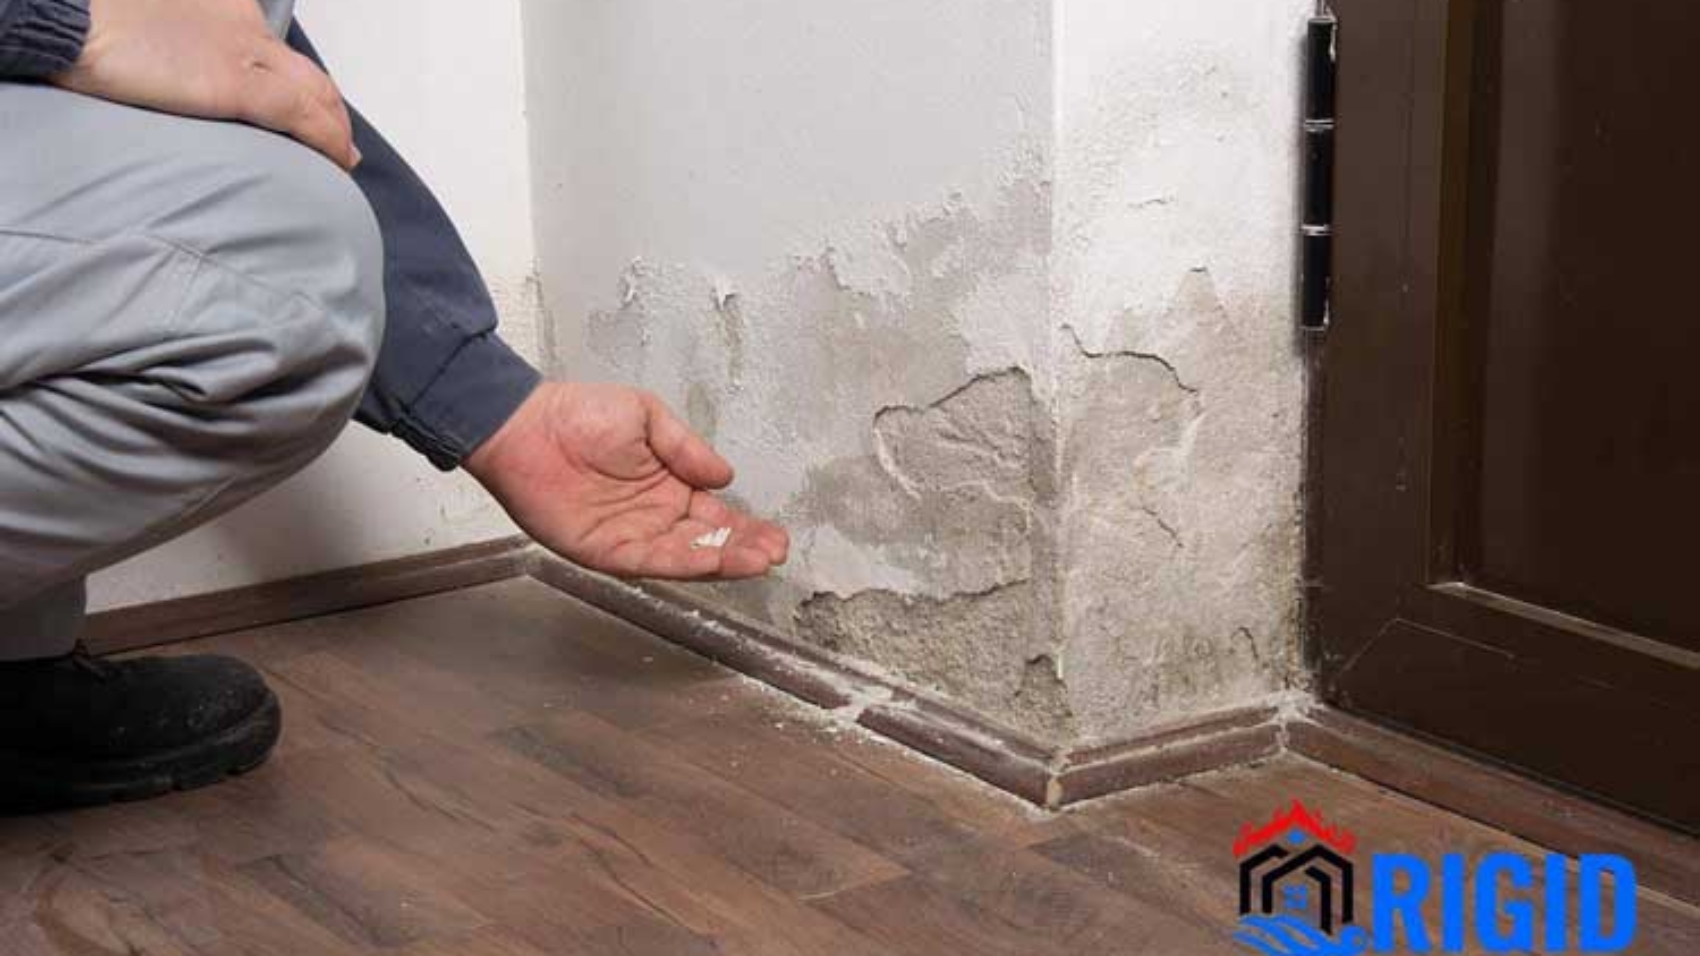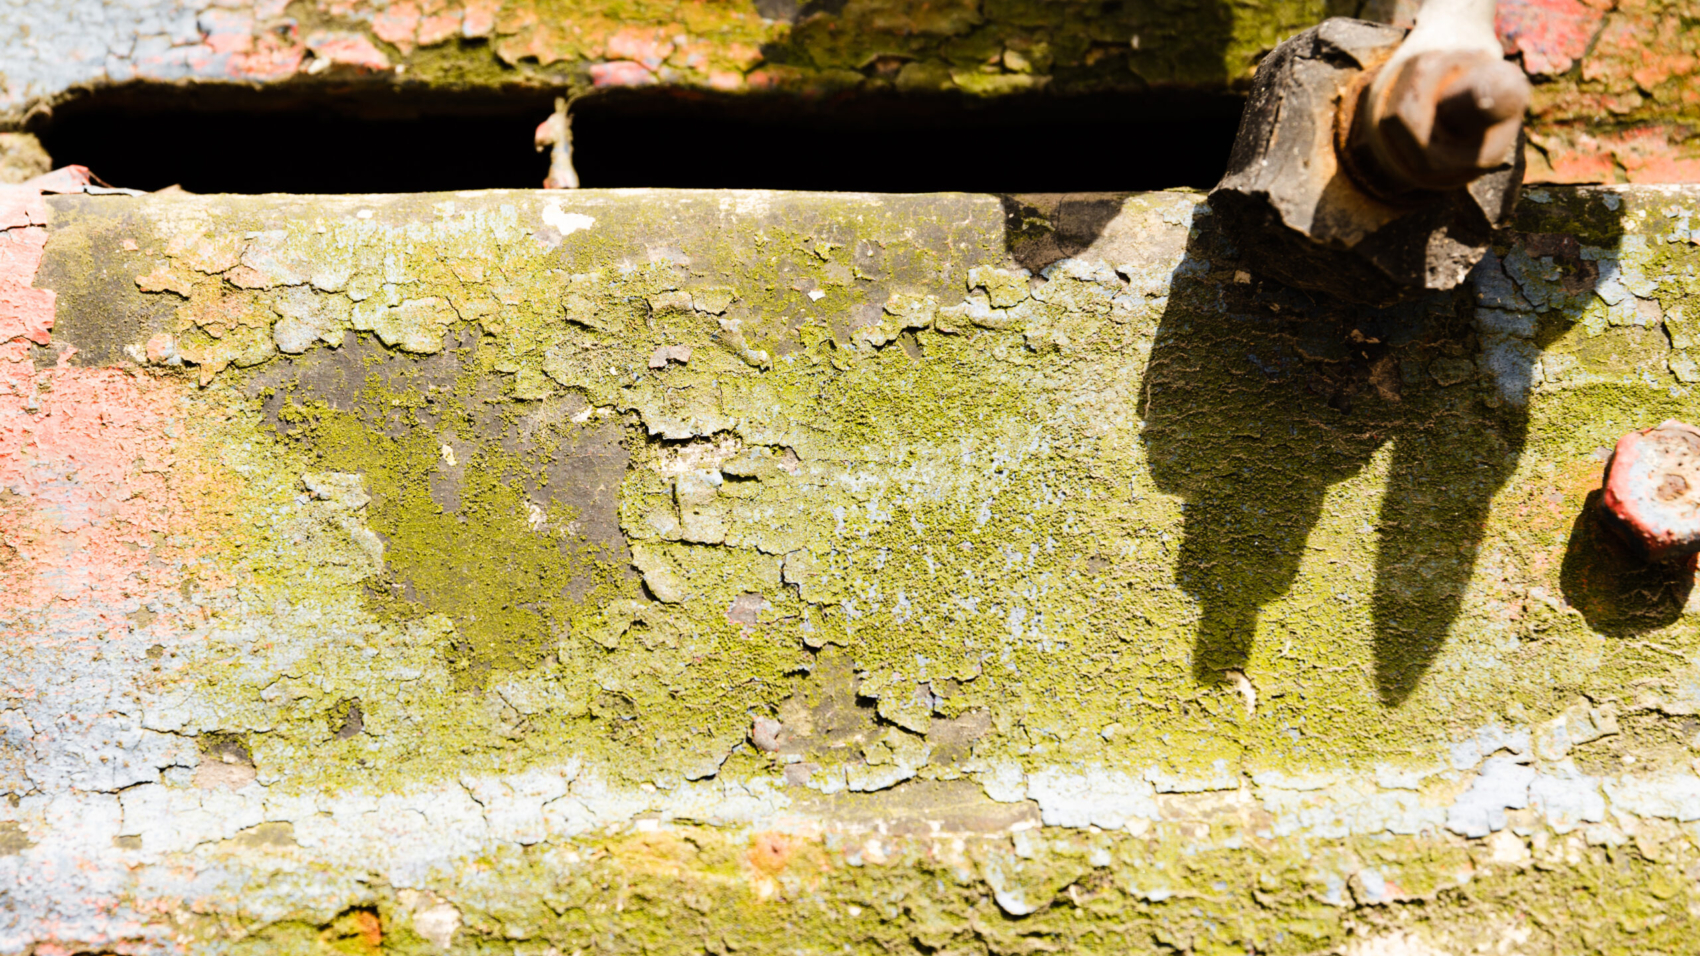

How Moisture Levels Influence Mold After Water Damage

How Humidity Levels Affect Mold Growth After Flooding

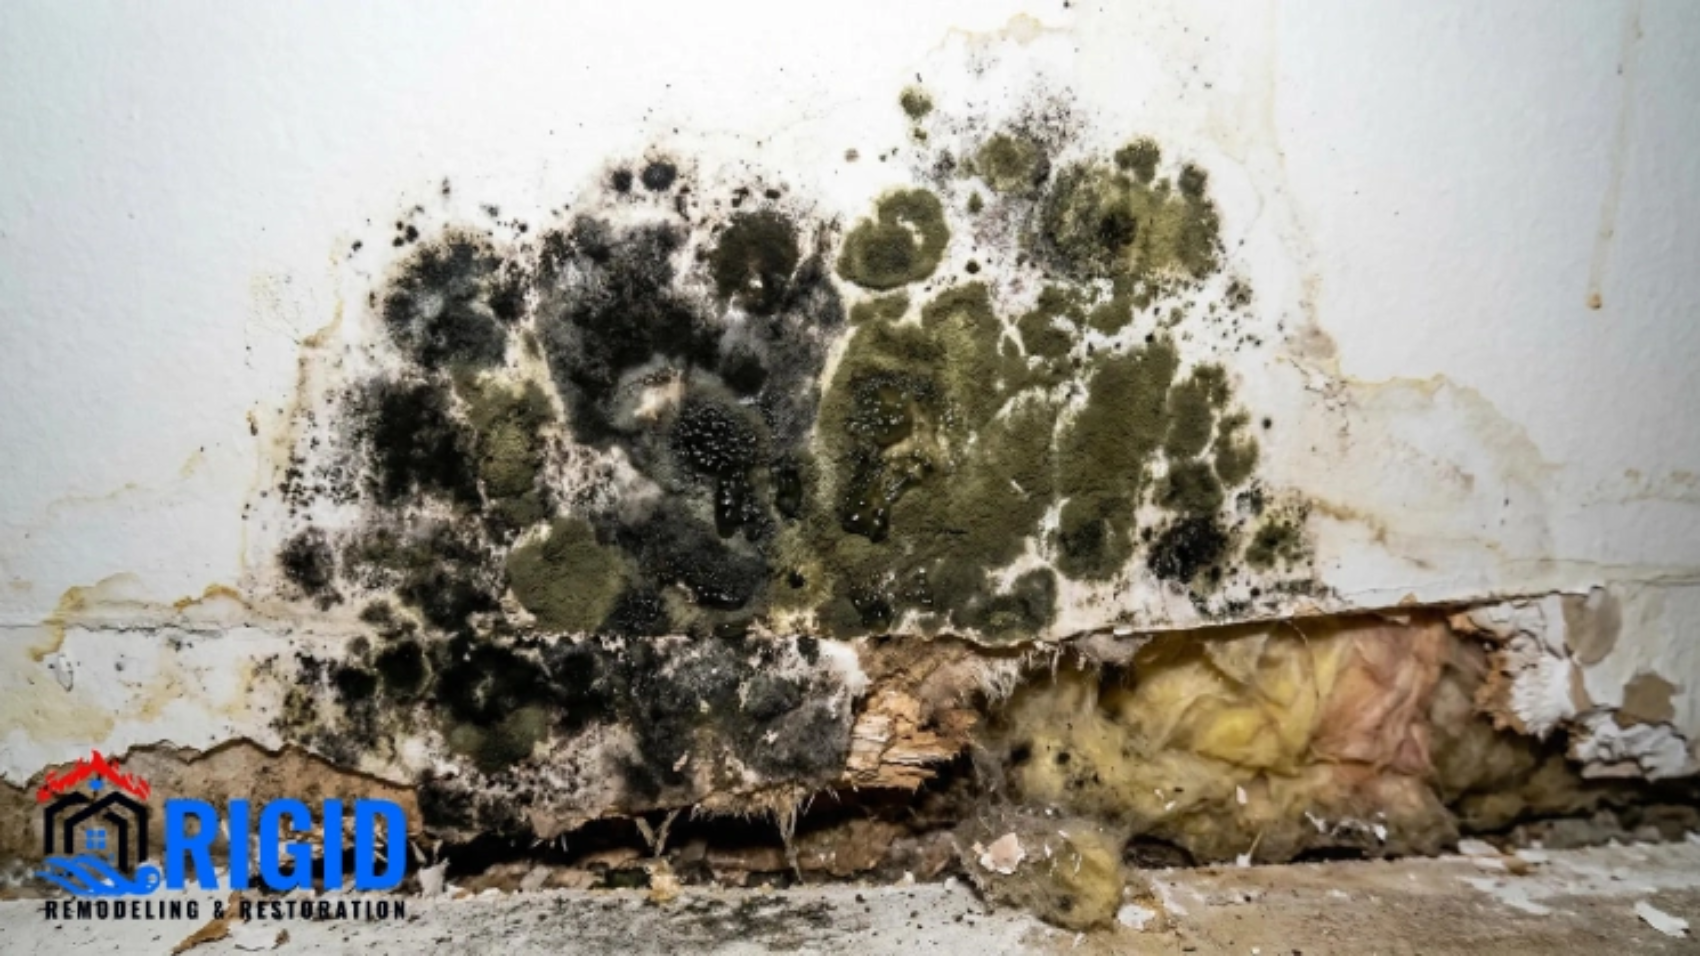
Flooding can cause extensive damage to residential and commercial properties, but one of the most persistent and dangerous consequences is mold growth.

Mold thrives in moist environments, and humidity levels play a critical role in determining how quickly and extensively it spreads. Understanding the relationship between humidity and mold growth is essential for homeowners, property managers, and restoration professionals seeking to protect both property and occupant health.

The Role of Humidity in Mold Development

Humidity refers to the amount of water vapor present in the air. When humidity levels are elevated, moisture can accumulate on walls, ceilings, floors, and other surfaces. After flooding, excess moisture in the building structure creates ideal conditions for mold spores, which are naturally present in the environment, to germinate and multiply.

Mold can begin growing within 24 to 48 hours if surfaces remain damp, and the process accelerates as humidity levels rise. The higher the relative humidity, the faster mold spreads, affecting not only structural materials but also the indoor air quality.

Impact of Humidity on Mold Formation After Flooding

Critical Humidity Thresholds for Mold Growth

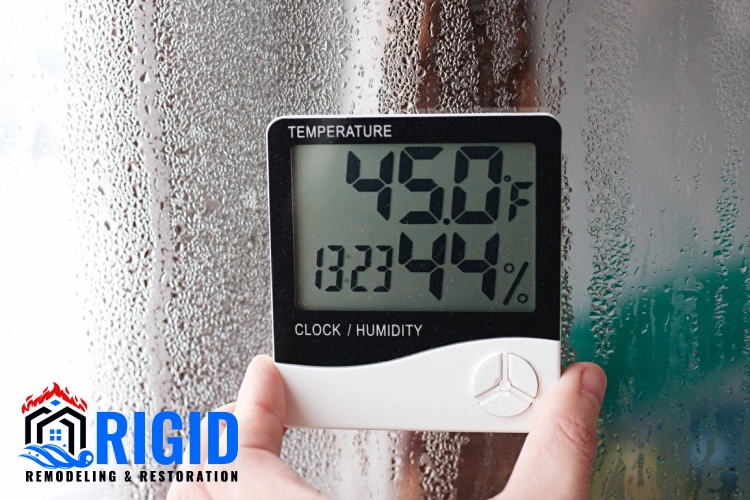
Research and restoration experience indicate that mold growth becomes a significant risk when indoor humidity exceeds 60%. In post-flood environments, relative humidity can reach 70–90% if proper drying techniques are not applied. Prolonged exposure to these levels promotes the growth of common molds such as Aspergillus, Penicillium, and Cladosporium.

How Flooding Exacerbates Humidity Problems

Flooding introduces large volumes of water into a building, soaking flooring, drywall, insulation, and other absorbent materials. Without prompt removal and drying, moisture remains trapped, elevating humidity throughout the affected areas. Even after surface water is extracted, residual moisture in hidden cavities, crawl spaces, and behind walls can maintain high humidity levels, creating long-term mold risk.

Additionally, floodwater may introduce contaminants, providing nutrients for mold to thrive. The combination of high humidity and organic matter in building materials accelerates the mold proliferation process.

Health Risks of Mold Growth

Mold is not just a property concern—it is a health hazard. Exposure to mold spores can trigger respiratory issues, allergic reactions, sinus infections, and asthma attacks. In severe cases, toxic molds such as Stachybotrys chartarum (black mold) can cause more serious health complications. Post-flooding environments are particularly dangerous because the combination of high humidity and stagnant water accelerates mold growth.

Signs of Mold Growth After Flooding

Property owners should watch for early indicators of mold after flooding:

  • Musty or earthy odors
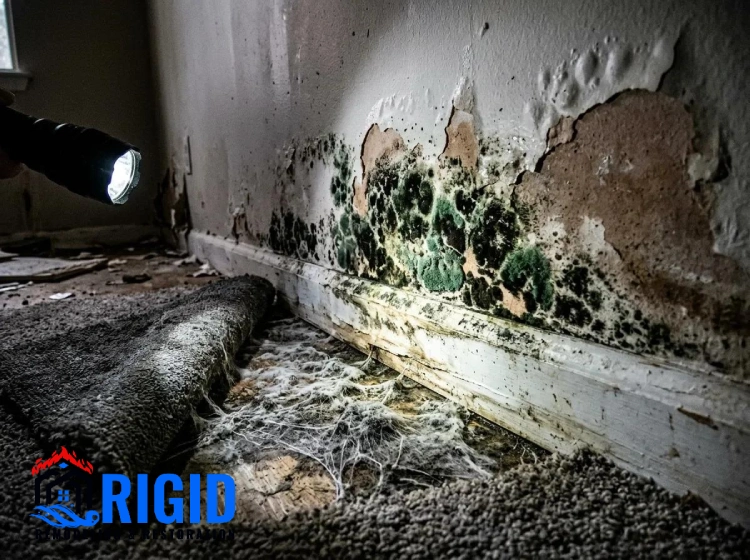
  • Discoloration or black spots on walls, ceilings, or floors
  • Peeling, bubbling, or warped paint and wallpaper
  • Allergic reactions in occupants, such as coughing, sneezing, or irritation

Effects of Humidity on Mold Growth After Flooding

Prompt action is essential once these signs appear, as mold can spread rapidly and penetrate porous materials.

Mitigating Mold Growth Through Humidity Control

Controlling humidity is the most effective way to prevent mold growth after flooding. Professional restoration companies employ several strategies:

  1. Water Extraction: Removing standing water immediately after a flood reduces moisture and limits humidity levels.
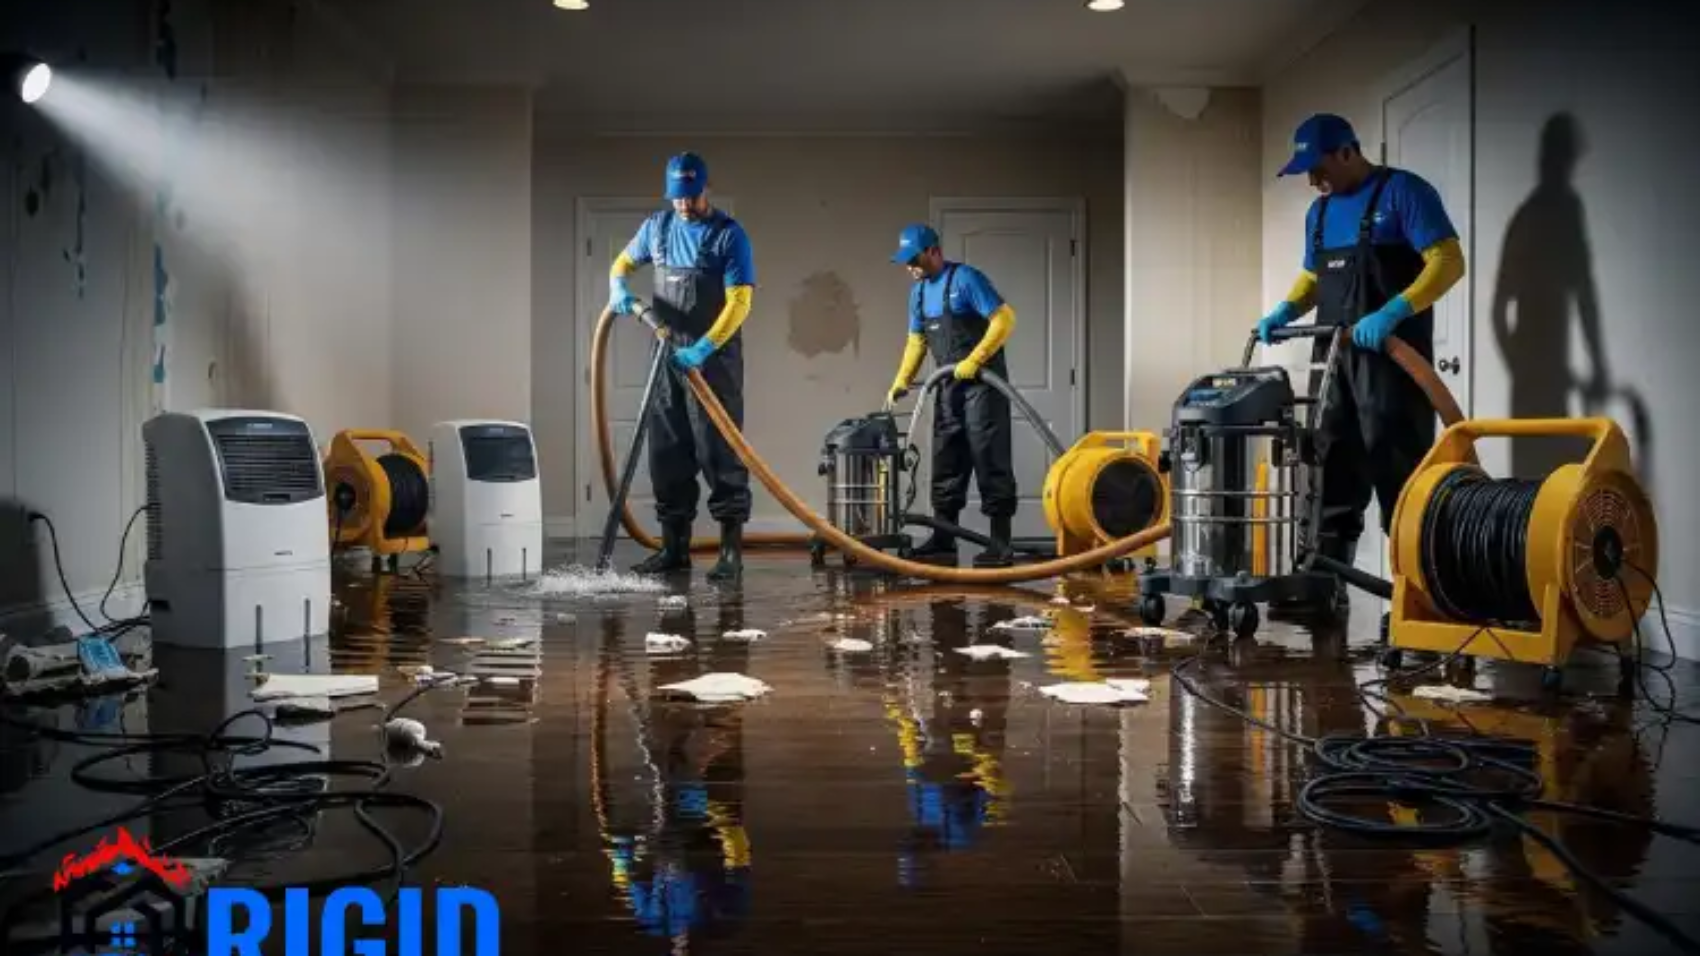
  2. Drying Equipment: Industrial fans, blowers, and dehumidifiers remove moisture from air and surfaces, lowering relative humidity to safe levels.
  3. Ventilation: Opening windows and using HVAC systems can help circulate air and remove moisture, further reducing humidity.
  4. Moisture Monitoring: Using moisture meters and sensors ensures that all areas, including hidden cavities, are dry and safe from mold risk.
  5. Preventive Treatments: Application of antimicrobial solutions on affected surfaces helps prevent mold spores from germinating, particularly in high-humidity areas.

Long-Term Humidity Management

Even after immediate flood damage is addressed, maintaining proper humidity levels is critical. Installing dehumidifiers, monitoring indoor air quality, and addressing leaks promptly can prevent residual moisture from triggering mold growth. Relative humidity should ideally remain below 50% in indoor environments to minimize mold risk.

Insurance and Restoration Considerations

Insurance companies often require documentation of flood damage and mitigation efforts. Proper humidity control is a crucial part of restoration and helps support claims for mold remediation. Restoration professionals provide detailed reports, including moisture readings and drying timelines, which are essential for insurance purposes.

Preventive Tips for Property Owners

  • Immediate Action: Begin water extraction and drying as soon as flooding occurs.
  • Monitor Humidity: Use hygrometers to track relative humidity in affected areas.
  • Hire Professionals: Certified restoration companies have the equipment and expertise to manage post-flood humidity and prevent mold growth.
  • Check Hidden Areas: Crawl spaces, attics, and wall cavities are often overlooked but are prime locations for mold if humidity remains high.
  • Maintain HVAC Systems: Proper ventilation and air conditioning can help manage indoor humidity levels long-term.

Conclusion

High humidity after flooding creates the perfect conditions for mold growth, which can cause significant property damage and pose serious health risks. Controlling humidity through prompt water extraction, professional drying, and ongoing monitoring is critical for preventing mold proliferation.

FAQs

1. How does humidity contribute to mold growth after flooding?
High humidity creates the perfect environment for mold spores to grow and spread rapidly. After flooding, excess moisture in the air and building materials accelerates mold development, often within 24 to 48 hours.

2. What humidity level promotes mold growth in flooded areas?
Mold typically begins to grow when indoor humidity levels rise above 60%. After flooding, humidity can easily exceed this level, making immediate drying and dehumidification essential.

3. How can you control humidity to prevent mold after flooding?
You can control humidity by using dehumidifiers, improving ventilation, and removing wet materials quickly. Keeping indoor humidity below 50% significantly reduces the risk of mold growth.

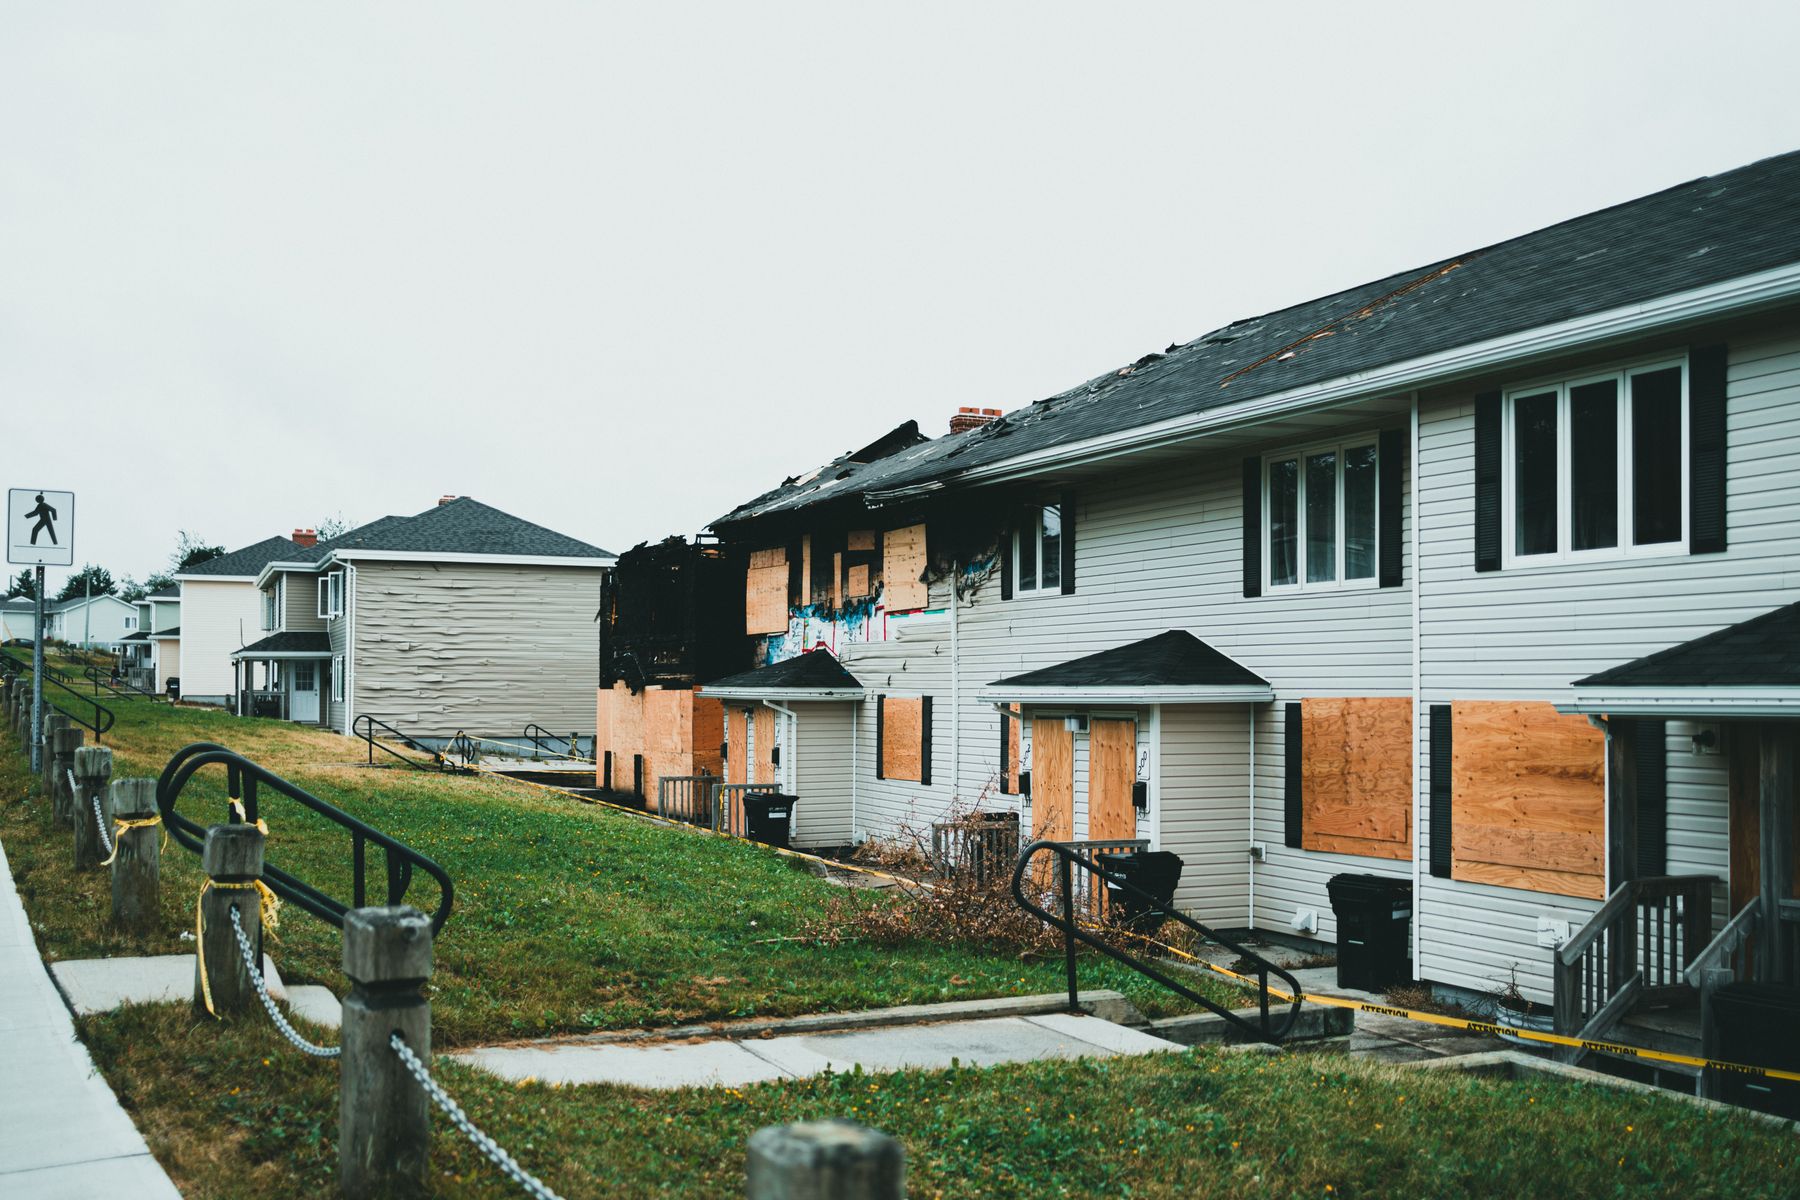
Fire-damaged apartment building with boarded windows

What Does Fire Damage Restoration Cost in San Diego? Costs, Insurance, and Timelines

Fire moves fast, and recovery should, too. Have flames, smoke, or firefighting water affected your San Diego home? You’re probably wondering what restoration will actually cost, what your insurance may cover, and how long it will take to make the space safe and livable again. The short answer: it depends on the damage, hazards found on site, and the scope of repairs the city will permit.

This guide breaks down realistic price ranges, local rules that affect your budget, how pros estimate work, and simple steps to control costs without cutting corners. You will also see examples that mirror common local scenarios so you can benchmark your own quote with confidence.

Because fire recovery often involves smoke cleanup, water extraction, drying, odor control, and rebuilding, our restoration plan can address the entire loss, not just the burned area. 

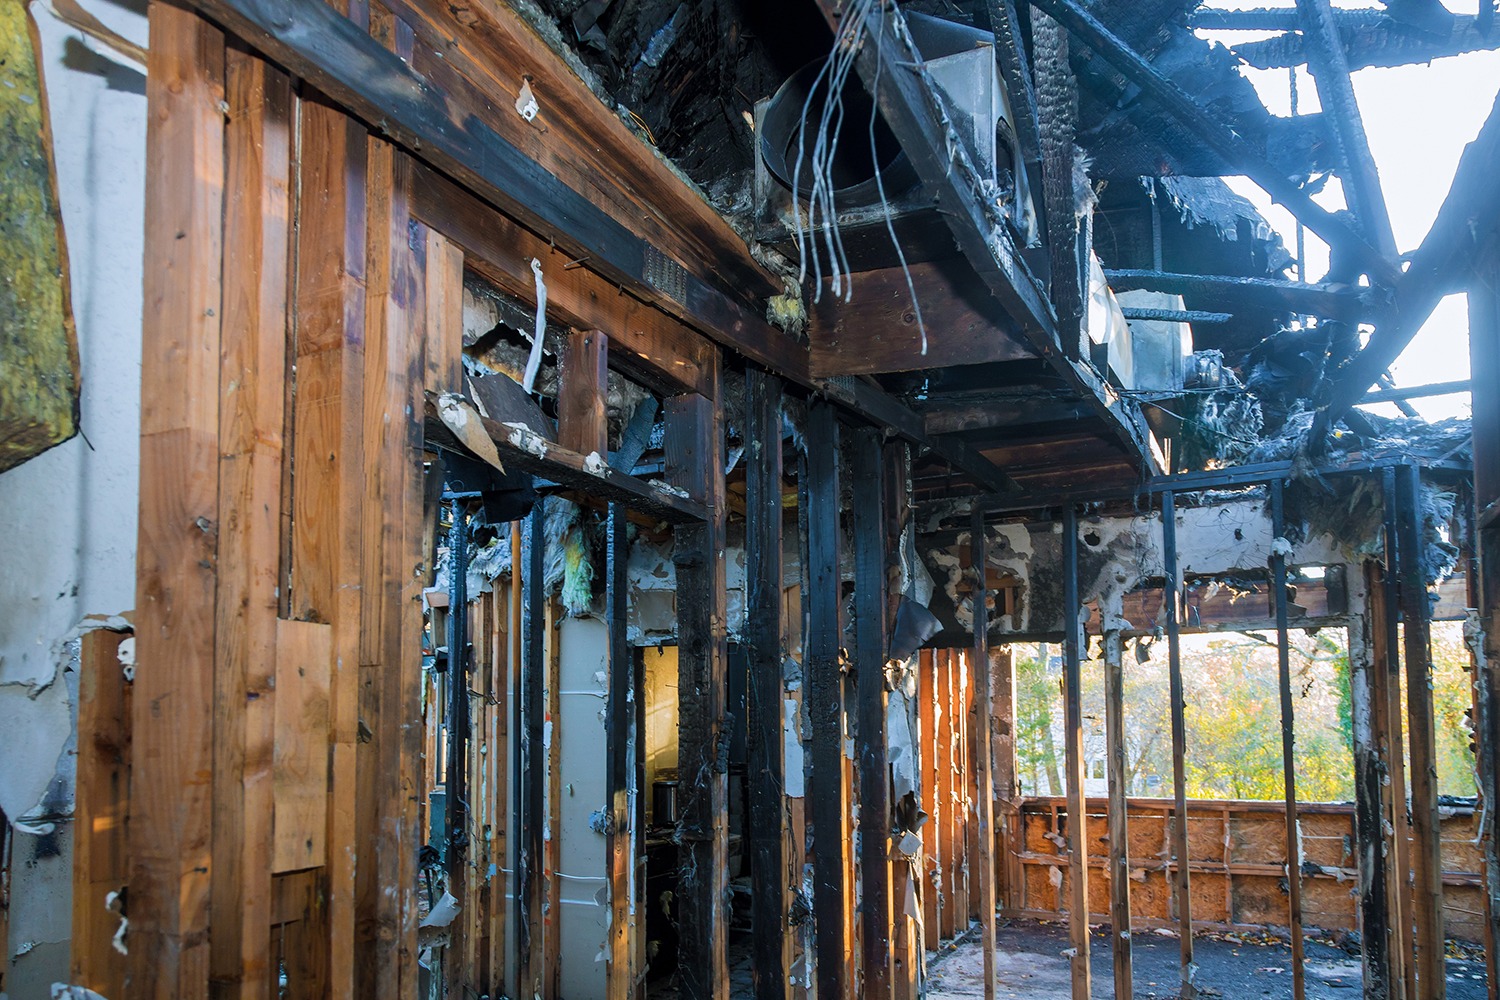
Interior of a home with charred walls and roof damage

TL;DR

  • Fire restoration costs vary widely. National benchmarks range from the low thousands to tens of thousands of dollars, while major structural rebuilds can reach six figures. Labor, materials, permits, hazard testing, and rebuild scope can move a quote above or below those averages.
  • If suppression water, sprinklers, or fire hoses affected the home, include water-damage restoration, drying, and mold-prevention steps in the estimate, not just soot cleaning. 
  • Smoke-only cleanup costs far less than structural rebuilds. Hazardous materials testing, permits, and after-hours emergency work drive up costs.
  • California homeowners’ policies often cover dwelling, contents, and Additional Living Expenses. Insurers must decide on your claim within 40 days after receiving proof of claim.
  • Expect permits for structural repairs and an asbestos survey before many renovations or demolitions. Choose a licensed contractor.
  • Get two detailed, line-item estimates and compare the scope. This may include emergency dry-out, soot removal, deodorizing, contents handling, hazard testing, permits, and rebuild work, which should be clearly separated. 

Typical San Diego Fire Damage Restoration Costs

Every fire is different, yet many fire and smoke restoration projects are in the low-thousands to tens-of-thousands range. Limited smoke cleanup sometimes costs less, and major structural rebuilds reach six figures. Your final price depends on what must be cleaned, dried, removed, tested, permitted, rebuilt, and documented for insurance.

Rigid Remodeling and Restoration Inc. can help separate the estimate into practical categories. This may include emergency water extraction and drying, smoke and soot cleaning, odor control, demolition, and reconstruction. This lets you see what requires mitigation, what needs repair, and what may require insurer review.

What Drives Cost Here

A clear view of these specific cost drivers helps you anticipate exactly where your money goes during a recovery project. This knowledge helps protect you from unexpected fees so that you can plan your finances with peace of mind.

For homes in the broader San Diego area, Rigid can prepare a line-by-line repair scope that separates emergency services, cleaning, drying, rebuilding materials, and insurance documentation, making the estimate easier to review. 

  • Extent and type of damage: Cleaning light soot and deodorizing is usually cheaper than removing charred materials, replacing framing, repairing drywall, or coordinating electrical and plumbing work. Typical line items may include water extraction and drying, soot removal, odor control, debris removal, contents handling, selective demolition, and build-back. 
  • Hazardous materials and testing: San Diego County APCD rules may require an asbestos facility survey before regulated renovation or demolition work, depending on the property type and scope of work. 
  • Permits and inspections: Structural repairs often require building permits and inspections, which add time and fees and may require code-compliant upgrades during the rebuild.
  • Contents handling: Pack-out, cleaning, and storage of salvageable belongings add separate cost lines.
  • Access and urgency: Attics, crawl spaces, and after-hours emergency response increase labor hours.

What to Expect: Estimated Costs and Timelines for Local Fire Recovery

Use these scenarios as planning examples, not guaranteed prices. The actual number should come from an inspection, moisture readings when suppression water is present, soot/residue evaluation, and a repair scope tied to local permit requirements. 

Factor Light smoke cleanup, no structural damage One-room fire with localized rebuild Multi-room or structural fire
What it includes Soot wipe-down, HEPA vacuuming, spot sealing, odor treatment selected for the residue type, and used only under appropriate safety controls, optional duct cleaning as needed Debris removal, drying, soot removal, odor control, replace drywall/insulation/finishes in affected room, electrical checks, water extraction/drying if suppression water affected nearby flooring, walls, or cabinetry Extensive demolition, framing, roof or truss work, electrical/plumbing rebuild, asbestos/lead evaluation and abatement if required, contents pack-out and storage
Typical cost range ~$800 to $3,500 ~$12,000 to $50,000 ~$60,000 to $180,000+
Typical timeline 1 to 5 days 1 to 6 weeks 2 to 6+ months
Insurance likelihood Commonly covered if fire is a covered peril Often covered, subject to policy limits/deductible Often covered, but limits and scope drive out-of-pocket costs

These ranges combine national cost benchmarks with common project variables. Your actual scope, materials, permits, hazard findings, and insurance approvals will affect the final number.

How Pros Price the Job

Reputable restoration firms use a documented scope that covers assessment, cleaning, odor management, drying when water is present, photos, measurements, and repair documentation.

On-site, a project manager scopes each area, tests materials as needed, and writes a line-item estimate that covers mitigation first (stabilize, dry, clean, deodorize), then repairs. Expect separate pricing for:

  • Emergency services: Board-up, water extraction, drying equipment.
  • Cleaning: Soot removal, detailed wipe-downs, HEPA vacuuming, selective encapsulation.
  • Odor control: Source removal, cleaning, sealing when appropriate, and deodorizing methods selected based on the residue type. Ozone should only be used by trained professionals in unoccupied spaces with proper ventilation and safety controls. 
  • HVAC: Cleaning only as needed when evidence supports it.
  • Repairs: Drywall, framing, cabinets, flooring, paint, electrical, plumbing, or other rebuild work as required by the local building department. 
  • Hazard testing/abatement: Asbestos survey or sampling when required by San Diego County APCD rules, any required notifications, and lead-safe practices for applicable pre-1978 painted surfaces
  • Contents: Inventory, pack-out, cleaning, storage, and pack-back.

Fire-damaged apartment building with boarded windows

What Insurance Usually Covers in California

Grasping your policy entitlements provides a sense of security during a stressful period by clarifying how your policy keeps you afloat. 

  • Dwelling and contents: Homeowners policies typically cover direct fire and smoke damage to the structure and personal property, subject to limits, deductibles, and exclusions.
  • Additional Living Expenses (ALE): If a covered fire makes your home uninhabitable, ALE may reimburse reasonable extra costs such as temporary housing, added meal costs, utility setup, storage, furniture rental, and extra transportation, subject to your policy. For losses tied to a declared state of emergency, California provides additional ALE time protections, although policy dollar limits can still apply. 
  • Claim timelines: After receiving proof of claim, California regulations generally require the insurer to accept or deny the claim, in whole or in part, within 40 calendar days, or send written notice explaining why more time is needed and continue updates every 30 days. Once a claim is accepted, payment is generally due within 30 calendar days, unless an exception applies.

We can prepare a detailed repair scope, photos, measurements, and estimate documentation for your insurer or adjuster, helping clarify what damage was found and what repairs are needed. Coverage decisions, policy interpretation, and claim settlement remain between you, your insurance company, and any licensed public adjuster or attorney you choose to involve. 

Local Rules That Affect Your Budget

Staying informed about these guidelines keeps your recovery on track and safeguards your investment.

  • Permits: Depending on where the home is located, Carlsbad, City of San Diego, or an unincorporated area, the local building department may require permits for structural, electrical, plumbing, mechanical, and major repair work. Cosmetic repairs may be exempt, but fire damage often uncovers hidden framing, wiring, drywall, insulation, or system repairs that need inspection.
  • Asbestos: APCD Rule 1206 applies to certain renovation, demolition, and asbestos-removal work. Some single-family and small residential remodels may be exempt. However, regulated facilities and larger disturbance areas can require a facility survey regardless of age, along with proper handling and notification when regulated asbestos-containing material (RACM) is involved.
  • Lead-safe practices: For paid contractors working in pre‑1978 homes or child‑occupied facilities, EPA’s Renovation, Repair and Painting (RRP) Rule requires firm and renovator certification and lead-safe work practices when disturbing painted components.
  • Licensing: California’s minor-work exemption is limited and doesn’t apply when permits are required or when the project involves hired workers. Because fire restoration often involves demolition, cleaning, drying, specialty trades, and rebuild work, homeowners should verify a contractor’s licensing, insurance, and the scope of repairs before work begins.

A Carlsbad-based restoration and remodeling contractor can help identify:

  • Which local department has jurisdiction
  • Which repairs may need permits
  • Which parts of the scope require specialty testing or trade work before the rebuild begins

Examples

Real-life scenarios give you a tangible perspective on how similar properties recovered from unexpected disasters.

Small Kitchen Flare-Up in a 1,600‑Sq‑Ft Home

A stovetop fire fills the kitchen and hallway with light soot. No drywall burns; cabinets are salvageable. The crew performs HEPA vacuuming, wet cleaning, spot sealing, and thermal fogging; the ducts are inspected but not cleaned because no debris is present. 

The total comes in at around the low-to-mid-thousands, and the work takes 3 to 5 days. The insurer covers cleanup and deodorizing, and ALE pays for two nights in a hotel.

Garage Fire With Attic Damage

An electrical short ignites a storage fire in an attached garage, scorching the rafters and pushing smoke into the bedrooms. The city requires permits, and the APCD asbestos survey precedes demolition. The scope includes selective framing replacement, roof sheathing in one section, smoke cleaning throughout, ozone treatment, contents pack‑out, and short‑term storage. 

The job runs into the mid‑five to low‑six figures and takes 8 to 12 weeks from mitigation through final inspection. ALE covers temporary housing and extra mileage while repairs proceed.

Actionable Steps / Checklist

Use this checklist to protect your family, limit secondary damage, and make the claim and repair process easier to document.

  • Make it safe: Call the fire department if smoke reappears. Shut off utilities if advised. Don’t re‑energize power or gas on your own.
  • Start your claim: Report the loss, get a claim number, and ask where to email photos and receipts. Document every room before cleanup.
  • Ask for a combined damage review: Have the restoration team look for soot, smoke odor, suppression-water damage, wet insulation, damaged flooring, affected cabinetry, and early mold risk before cleanup begins.
  • Choose qualified help: Shortlist restoration contractors that can document fire, smoke, water, and rebuild needs. Verify California contractor licensing, liability insurance, and workers’ compensation coverage.
  • Expect testing: Ask about the required asbestos survey and whether lead‑safe practices apply for pre‑1978 areas. Clarify who pays and when.
  • Get two detailed estimates: Compare the scopes line by line, including emergency services, deodorizing method, duct-cleaning criteria, abatement, repairs, and contents handling.
  • Coordinate permits: Confirm which local jurisdiction applies to your property and whether the contractor will prepare plans, pull permits, schedule inspections, and budget permit fees.
  • Separate must-do repairs from upgrades: Do you want to improve cabinets, flooring, tile, or layout during the rebuild? Separate insurance-related restoration from optional remodeling choices so the budget stays clear.
  • Track ALE: Keep receipts for lodging, meals above normal, storage, and extra commuting costs. Send copies to your adjuster regularly.
  • Lock in the schedule: Ask for a written timeline that separates mitigation from repairs. Confirm who packs out and who stores contents.
  • Inspect before closeout: Request odor verification, documentation photos, abatement clearances (if any), and permit finals before the final payment.
  • Keep records: Save contracts, change orders, estimates, lab results, inspection cards, and correspondence with insurers.

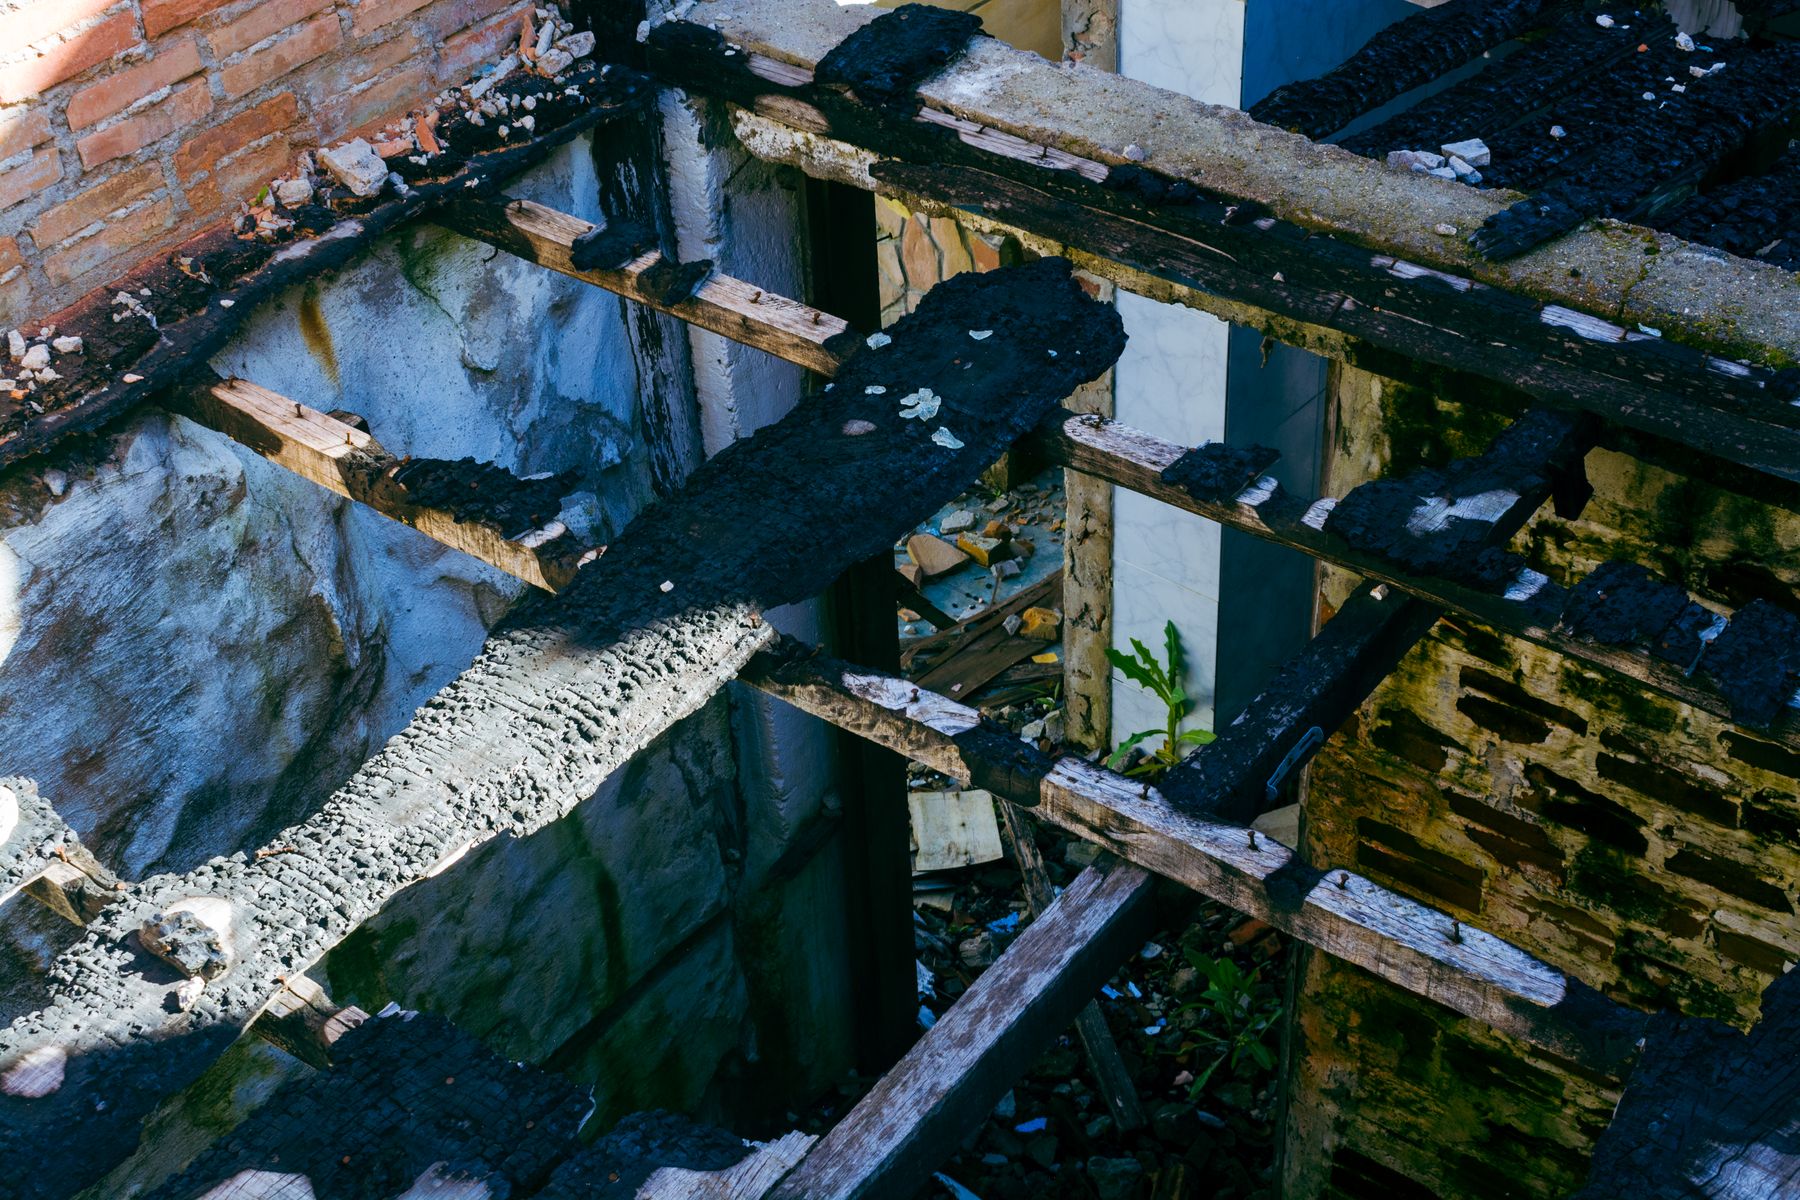
Burned wooden beams inside a fire-damaged structure

Glossary

Learning standard industry terms helps you communicate confidently with adjusters and contractors throughout the recovery process.

  • IICRC: Industry group that publishes standards for cleaning and restoration; firms often train on its fire and smoke protocols.
  • Thermal Fogging: A deodorizing method that uses a heated fog to reach porous surfaces and neutralize smoke odors.
  • Ozone Treatment: A deodorizing method sometimes used by trained professionals in unoccupied spaces under controlled conditions; it shouldn’t replace source removal, soot cleaning, or proper ventilation.
  • Pack‑Out: Inventorying, removing, cleaning, storing, and returning salvageable personal belongings.
  • RACM: Regulated Asbestos‑Containing Material that must be handled and removed under specific rules.
  • ALE: Additional Living Expenses coverage that reimburses extra costs when your home isn’t livable after a covered loss.
  • Proof of Claim: Documentation that an insurer needs to evaluate your loss starts the 40‑day decision clock in California.
  • Duct Cleaning As Needed: HVAC and ducts should be inspected after a fire, but cleaning should be based on visible soot, debris, contamination, or material being released, and not done automatically after every smoke event.

FAQ

Q: Does homeowners’ insurance cover smoke damage?
A: Homeowners’ insurance usually covers smoke damage when the fire is a covered peril, although deductibles, policy limits, and exclusions apply. Ask your adjuster to confirm in writing.

Q: Do I need a permit for fire repairs in San Diego?
A: If repairs involve structural, electrical, plumbing, mechanical, or major rebuild work, your local building department may require permits and inspections. This depends on whether the home is in Carlsbad, the City of San Diego, or another city.

Q: Should I clean my ducts after a fire?
A: It’s not ideal to automatically clean ducts after a fire. Have the HVAC system inspected first, then clean ducts only if there’s evidence of soot, debris, contamination, or material being released into the home.

Q: How long does restoration take?
A: Light smoke jobs can wrap in days. Structural repairs can run weeks to months once permits, abatement, and inspections are factored in.

Q: Can I use an unlicensed handyperson to save money?
A: California allows unlicensed work only under $1,000 with no permits or employees. Fire restoration typically exceeds that and needs permits, so hire a licensed contractor.

Final Thoughts

While you don’t control when a fire starts, you can control the recovery plan. Start with safety, document the damage, separate emergency mitigation from rebuild work, confirm permit and hazard-testing requirements, and keep your insurer updated with organized photos, receipts, and repair documentation.

San Diego and South Orange County homeowners can book Rigid Remodeling and Restoration Inc. to assess fire, smoke, and suppression-water damage from suppression. Our restoration specialists can also outline the scope of repairs, support insurance documentation, and plan the rebuild work needed to make the space livable again. 

water restorations secondary damage restorations

How Restoration Professionals Prevent Secondary Damage?

Water damage is not just about the initial leak or flood. Secondary damage, which occurs after the primary event, can be far more destructive if not addressed promptly. This includes mold growth, structural deterioration, electrical issues, and damage to personal property. Restoration professionals play a crucial role in preventing secondary damage by using specialized techniques, tools, and protocols to protect homes and commercial properties.

Understanding Secondary Damage

Secondary damage occurs when water remains in a property for an extended period, allowing it to spread and affect other materials. Even clean water can cause significant issues if it is not removed quickly. Secondary damage can include:

  • Mold and mildew growth
  • Warped or swollen wood and flooring
  • Stained or weakened drywall
  • Corroded metal components
  • Electrical hazards
  • Unpleasant odors

The longer water remains untreated, the higher the risk of extensive secondary damage. Professionals are trained to identify these risks early and implement measures to mitigate them.

secondary damage prevention from water damage

Rapid Water Extraction

One of the first steps restoration professionals take is water extraction. Using industrial-grade pumps and vacuums, they remove standing water quickly to prevent it from penetrating deeper into structural materials. Rapid extraction is essential for preventing:

  • Saturation of walls, flooring, and furniture
  • Expansion of mold colonies
  • Long-term structural weakening

Prompt removal of water significantly reduces the scope and cost of restoration while protecting both property and occupant health.

Structural Drying Techniques

Once the standing water is removed, drying becomes the priority. Restoration professionals use high-volume air movers, dehumidifiers, and specialized heating equipment to target moisture in walls, floors, ceilings, and substructures. Proper drying prevents:

  • Wood warping or delamination
  • Paint or wallpaper damage
  • Flooring buckling or cupping
  • Hidden mold growth

By carefully monitoring moisture levels throughout the property, professionals ensure that every area is thoroughly dried, reducing the risk of secondary damage.

Moisture Detection and Monitoring

Hidden water can be difficult to detect without specialized tools. Restoration experts use moisture meters, hygrometers, and infrared thermal imaging to locate areas where water has penetrated behind walls, under floors, or into ceilings. Continuous monitoring during the drying process ensures that moisture does not go unnoticed, preventing the development of secondary issues.

Mold Prevention

Mold is one of the most common and costly forms of secondary damage. Restoration professionals prevent mold growth by:

  • Removing damp materials that cannot be dried effectively
  • Applying antimicrobial solutions to surfaces
  • Controlling humidity levels during and after the drying process

Early intervention stops mold spores from spreading and protects both the building structure and indoor air quality.

water damage secondary preventions

Electrical and Safety Considerations

Water intrusion can compromise electrical systems, posing fire and electrocution hazards. Restoration professionals assess electrical safety by:

  • Shutting off power to affected areas
  • Inspecting wiring, outlets, and appliances
  • Coordinating with licensed electricians for repairs

Addressing electrical risks is critical to preventing secondary damage and ensuring the safety of occupants.

Content Protection

Personal belongings, furniture, and appliances can be severely damaged if water is allowed to sit. Professionals implement strategies to protect content, such as:

  • Relocating items to dry areas
  • Using protective coverings or plastic wrap
  • Documenting and assessing damage for insurance purposes

Protecting property during the restoration process helps reduce loss and facilitates insurance claims.

Documentation and Insurance Support

Restoration professionals document all mitigation efforts, including water extraction, drying, and preventive measures. Detailed records support insurance claims and ensure that property owners receive proper compensation. Proper documentation also provides a roadmap for follow-up inspections to confirm that secondary damage has been prevented.

Preventive Maintenance Recommendations

Beyond immediate restoration, professionals often advise property owners on strategies to prevent future secondary damage:

  • Routine inspections of plumbing, roofing, and drainage
  • Regular maintenance of HVAC systems and dehumidifiers
  • Early detection systems for leaks and water intrusion
  • Proper ventilation and humidity control in high-risk areas

Implementing these measures reduces the likelihood of future water-related incidents and secondary damage.

Conclusion

Preventing secondary damage is a critical aspect of water damage restoration. From mold prevention and structural drying to moisture monitoring and electrical safety, restoration professionals employ specialized tools and techniques to safeguard property. Early intervention, thorough drying, and continuous monitoring minimize long-term damage, protect occupant health, and reduce restoration costs.

FAQs

What is secondary damage in property restoration?

Secondary damage refers to additional harm that occurs after the initial incident, such as mold growth after water damage or structural weakening due to delayed repairs. It often results from moisture, humidity, or lack of immediate professional intervention.

How do restoration professionals prevent mold after water damage?

Restoration professionals use advanced drying equipment, dehumidifiers, and moisture detection tools to remove hidden water. They also sanitize affected areas to stop mold spores from developing and spreading.

Why is quick response important in restoration services?

A fast response minimizes the spread of damage and reduces repair costs. The sooner professionals begin the restoration process, the lower the risk of secondary issues like mold, rot, or structural deterioration.

multi-story building water damage causes

What Causes Water Damage in Multi-Story Buildings?

Water damage in multi-story buildings presents unique challenges due to the complexity of their structure, shared systems, and vertical layout. Understanding the common causes of water damage is crucial for property managers, building owners, and residents to prevent extensive damage, costly repairs, and safety hazards.

Plumbing Failures and Leaks

One of the most common causes of water damage in multi-story buildings is plumbing failure. Burst pipes, leaky faucets, or faulty water heaters can affect multiple units if the plumbing systems are interconnected. Because water travels vertically and horizontally, a single leak can impact several floors, leading to ceiling, wall, and floor damage in multiple apartments.

Roof Leaks and Exterior Vulnerabilities

Roof damage or compromised building envelopes are major sources of water intrusion. Heavy rain, storm events, or aging roofing materials can create leaks that penetrate into upper floors, ceilings, and walls. Additionally, gaps around windows, balconies, and exterior cladding can allow water to enter, creating long-term moisture problems in the building’s structure.

water leakage between floors

HVAC and Condensation Issues

Heating, ventilation, and air conditioning (HVAC) systems can also contribute to water damage. Condensation from cooling systems, improperly maintained drip pans, or malfunctioning humidifiers can lead to moisture accumulation. Over time, this hidden moisture can damage ceilings, walls, and floors, especially in multi-story buildings where water can spread through shared ductwork.

Appliance Malfunctions

In multi-unit buildings, appliances like washing machines, dishwashers, and refrigerators can cause water damage if they malfunction or leak. Shared laundry facilities or individual unit appliances can create unexpected water intrusion that may go unnoticed until significant damage occurs.

Flooding and Groundwater Intrusion

Heavy rains, storms, or rising groundwater levels can affect the lower levels of multi-story buildings, including basements and parking garages. Poor drainage, clogged storm drains, or inadequate waterproofing can lead to flooding, which then spreads vertically through walls, elevator shafts, and plumbing conduits.

Sewer and Drain Backups

Sewer backups are a significant cause of water damage in multi-story buildings. Blockages or failures in shared drainage systems can allow contaminated water to flow into multiple units. This type of water, often categorized as gray or black water, poses both structural and health risks.

Construction and Structural Issues

Improper construction, aging infrastructure, and poor maintenance contribute to water intrusion. Cracks in foundations, walls, and ceilings provide pathways for water, while insufficient waterproofing of balconies, terraces, or roofs exacerbates the problem. Multi-story buildings require regular inspections and proactive repairs to mitigate these risks.

ceiling water damage in apartments

Secondary Effects of Water Damage

Water damage in multi-story buildings can lead to secondary issues if not addressed quickly:

  • Mold and mildew growth due to persistent moisture
  • Structural weakening of wood, drywall, and concrete
  • Electrical hazards from water contacting wiring and fixtures
  • Unpleasant odors and degraded indoor air quality

Preventive Measures

Preventing water damage in multi-story buildings involves proactive management:

  1. Regular Plumbing Inspections: Ensure that all pipes, valves, and water-using appliances are checked and maintained.
  2. Roof and Exterior Maintenance: Inspect roofs, windows, and building envelopes for signs of wear or gaps.
  3. HVAC Maintenance: Maintain systems to prevent leaks or condensation buildup.
  4. Flood Preparedness: Ensure proper drainage and waterproofing of lower levels.
  5. Resident Education: Encourage occupants to report leaks or signs of moisture immediately.

Professional Restoration and Mitigation

When water damage occurs, restoration professionals provide specialized services to limit secondary damage and restore the building:

  • Water extraction and drying using industrial equipment
  • Moisture detection behind walls, under flooring, and in ceilings
  • Mold prevention and remediation
  • Structural repairs and content protection

Conclusion

Water damage in multi-story buildings arises from a variety of sources, including plumbing failures, roof leaks, HVAC issues, appliance malfunctions, flooding, and sewer backups. Understanding these causes allows property managers, building owners, and residents to take preventive measures, reduce risk, and respond quickly to water intrusion.

FAQs

1. What are the most common causes of water damage in multi-story buildings?
The most common causes include plumbing leaks, burst pipes, roof leaks, faulty HVAC systems, and appliance failures in upper floors that allow water to spread downward through ceilings and walls.

2. Why is water damage worse in multi-story buildings compared to single-family homes?
Water in multi-story buildings can travel quickly between floors through ceilings, walls, and utility shafts, causing hidden structural damage and affecting multiple units before it is detected.

3. Can poor maintenance increase the risk of water damage in multi-story buildings?
Yes, lack of regular inspections, delayed pipe repairs, clogged drainage systems, and aging infrastructure significantly increase the risk of widespread water damage in multi-story properties.

Homeowner checking under-sink plumbing to prevent water damage

How to Prevent Water Damage in Your Home

Most water damage is preventable. Behind the dramatic burst pipes and storm floods, the majority of home water damage starts small: a worn washing machine hose, a slow drip under a sink, a clogged gutter, a water heater past its prime. The EPA reports that household leaks waste more than 1 trillion gallons of water nationwide every year, and the average home loses nearly 10,000 gallons to leaks annually.

The good news is that a modest amount of routine maintenance stops most of it. This guide walks through the highest-value prevention steps, room by room and season by season, so you can catch the small problems before they become five-figure ones.

And if prevention comes too late, Rigid Restorations provides 24/7 emergency water damage response across San Diego County. Call 760-500-1818 for fast help.

TL;DR

  • Household leaks waste over 1 trillion gallons a year nationwide; fixing them can cut your water bill by about 10% (EPA WaterSense).
  • Replace rubber washing machine and appliance hoses every 5 years, and know where your main water shutoff is.
  • Inspect and clean gutters and downspouts twice a year to keep storm water away from your foundation.
  • Water heaters typically last 8 to 12 years; replace aging units before they fail.
  • Install water leak detectors and consider an automatic shutoff valve for early warning.
  • In San Diego, prepare specifically for winter atmospheric river storms and hidden slab leaks in older homes.

Start With the One Thing Everyone Should Know

Before any maintenance checklist, learn where your main water shutoff valve is and how to operate it. In a burst-pipe emergency, the difference between a minor cleanup and a flooded home is often the 60 seconds it takes to shut off the water. Test the valve once a year so it is not seized when you need it, and make sure everyone in the household knows where it is.

Room-by-Room Prevention Checklist

Most leaks originate in a few predictable places. Work through these areas a couple of times a year.

Area What to Check How Often
Kitchen Under-sink connections, dishwasher hose, fridge water line Every 3 to 6 months
Bathrooms Toilet supply and seal, caulking, under-sink lines, tub and shower grout Every 3 to 6 months
Laundry Washing machine hoses for bulging or cracks Twice a year; replace hoses every 5 years
Water heater Tank base for corrosion or moisture, age of unit Twice a year; replace at 8 to 12 years
Roof and attic Missing shingles, flashing, ceiling stains Twice a year and after major storms
Gutters and drainage Clogs, proper downspout runoff away from foundation Twice a year, before and after winter

Fix the Small Leaks First

Small leaks are easy to ignore and surprisingly costly. A faucet dripping once per second wastes more than 3,000 gallons a year. Ten percent of homes have leaks that waste 90 gallons or more per day. Beyond the water bill, a slow leak under a sink or behind a wall is a direct path to hidden mold and rot. Fixing the easy leaks can also cut your water bill by around 10%.

Small Leak Annual Water Wasted
Faucet dripping once per second More than 3,000 gallons
Showerhead leaking 10 drips per minute More than 500 gallons
Running or worn toilet flapper Hundreds to thousands of gallons
Average home’s combined leaks Nearly 10,000 gallons

Seasonal Prevention for San Diego Homes

San Diego’s risks are seasonal and structural. The dry months are the time to prepare the roof and drainage for winter. The wet months are when atmospheric river storms test those defenses. Older homes on slab foundations carry a year-round risk of hidden slab leaks.

  • Before winter (fall): clean gutters and downspouts, inspect and repair roof flashing, clear yard drains, and check that grading slopes water away from the foundation.
  • During storm season (winter): monitor ceilings and attics for leaks after heavy rain, keep an eye on low-lying areas, and clear debris from drains between storms.
  • Year-round: watch for warm spots on floors, unexplained water bill increases, and musty odors that can signal a slab leak.

Technology That Prevents Floods

A few inexpensive devices dramatically reduce risk. Smart water leak detectors placed near appliances and the water heater sound an alarm or alert your phone the moment they sense moisture. An automatic shutoff valve goes further, cutting off water flow when it detects abnormal use, which is especially valuable when you are away from home. For the cost of a single service call, these tools can prevent a flood that would cost thousands.

Real-World Examples

The Hose That Was Replaced in Time

During a routine check, a homeowner noticed a small bulge in a rubber washing machine hose and replaced both hoses with braided stainless lines. Two months later a neighbor with identical original hoses had one burst while at work, flooding a laundry room and hallway. A five-dollar part and ten minutes of maintenance prevented the same outcome.

The Leak Detector That Paid for Itself

A family installed a leak sensor under the kitchen sink after a prior scare. Months later it alarmed overnight when a supply line began seeping. They shut the valve and made a simple repair the next morning. Without the sensor, the slow leak would have saturated the cabinet base and subfloor before anyone noticed.

Glossary

Main Water Shutoff Valve: The valve that stops all water entering your home. Knowing its location and testing it yearly is the single most important preventive step in an emergency.

Automatic Shutoff Valve: A smart device that detects abnormal flow and shuts off your water automatically, preventing a small leak from becoming a flood while you are away.

Water Leak Detector: A small sensor placed near appliances, water heaters, and sinks that alarms when it detects moisture, giving you early warning of a leak.

Slab Leak: A leak in the water lines beneath a home’s concrete foundation, common in older San Diego homes and a frequent cause of hidden water damage.

Supply Line: The flexible hose connecting an appliance or fixture to the water supply. Braided stainless lines are more durable than rubber and less prone to bursting.

Atmospheric River: A concentrated band of moisture in the atmosphere that delivers heavy, sustained rain, the primary storm-related water damage risk in San Diego winters.

Frequently Asked Questions

What is the most common cause of home water damage?

Plumbing and appliance failures lead the list: burst or leaking supply lines, failed water heaters, washing machine hose ruptures, and slow leaks under sinks. Many begin as small drips that go unnoticed until they cause major damage, which is why regular inspection matters.

How often should I replace appliance water hoses?

Replace rubber washing machine and appliance supply hoses about every 5 years, and consider upgrading to braided stainless steel lines, which are far more resistant to bursting. Inspect them for bulging, cracking, or corrosion at least once a year.

How can I prevent water damage while on vacation?

Shut off your main water supply before extended trips, or install an automatic shutoff valve. Have someone check the home periodically, and consider smart leak detectors that alert your phone. Most vacation-home floods come from failures that ran unchecked for days.

How long do water heaters last?

Most tank water heaters last 8 to 12 years. As they age, corrosion can cause slow leaks or sudden tank ruptures. Replacing an aging unit proactively is far cheaper than cleaning up after it fails and floods the surrounding area.

Do smart leak detectors really help?

Yes. Leak detectors placed near water heaters, washing machines, dishwashers, and sinks provide early warning of moisture, and automatic shutoff valves can stop a leak before it floods. They are among the most cost-effective ways to prevent major water damage.

What water damage risks are specific to San Diego?

Winter atmospheric river storms that overwhelm gutters and roofs, and hidden slab leaks in older homes built on concrete foundations. Coastal humidity also slows drying, so any leak has more time to cause mold. Seasonal roof and drainage maintenance is especially important here.

Final Thoughts

Preventing water damage is not about expensive systems or constant worry. It is about a handful of simple habits: know your shutoff valve, replace aging hoses and water heaters, keep water flowing away from your foundation, and let inexpensive sensors watch the spots you cannot. Do those things and you eliminate the vast majority of water damage risk.

If a leak or storm gets past your defenses, act fast. Rigid Restorations provides 24/7 emergency water damage restoration across San Diego County, with rapid drying and full insurance support. Call 760-500-1818.

Remove Smoke Odor

7 Proven Ways to Remove Smoke Odor from Carpet & Walls

Smoke odor is one of the most stubborn household problems. Even after a fire is out, the smell can linger for weeks or even months. It seeps into carpets, walls, furniture, and even the air itself.

So, how do you remove smoke odor effectively from your home? The key is understanding how deeply smoke penetrates surfaces after Fire and Smoke Damage and then using the right cleaning methods consistently.

In this guide, we’ll share 7 proven ways to eliminate smoke odor from carpets and walls. We’ll also explain why quick action matters and how to prevent long-term damage.

Why Smoke Odor Is So Hard to Remove

Smoke is made of tiny particles. When a fire occurs, these particles spread quickly and attach to porous surfaces.

As a result:

  • Carpets absorb smoke deep into fibers
  • Walls trap soot in paint and drywall
  • Odors linger in air vents and insulation

Therefore, surface cleaning alone is not enough.

Understanding Fire and Smoke Damage

Before removing odor, it is important to understand Fire and Smoke Damage.

Smoke damage is not just about smell. It also includes:

  • Soot buildup
  • Chemical residue
  • Discoloration of surfaces
  • Air contamination

Because of this, proper cleaning requires more than basic household methods.

  1. Ventilate the Entire Area Immediately

The first step is to improve airflow.

Open all windows and doors to allow fresh air inside. Use fans to push smoke-filled air out of the room.

Additionally:

  • Turn on exhaust fans
  • Circulate air continuously
  • Keep ventilation running for several hours

As a result, airborne particles begin to reduce quickly.

  1. Deep Clean Carpets with Baking Soda

Baking soda is highly effective at absorbing odors.

To use it:

  • Sprinkle a generous amount over the carpet
  • Let it sit for at least 12–24 hours
  • Vacuum thoroughly afterward

However, for heavy smoke damage, repeat the process multiple times.

Therefore, consistency is key.

  1. Steam Clean for Deep Odor Removal

Steam cleaning penetrates deep into carpet fibers.

It helps to:

  • Break down soot particles
  • Remove trapped odors
  • Sanitize surfaces

Moreover, steam cleaning is one of the most effective methods for severe Fire and Smoke Damage situations.

If possible, hire a professional for best results.

  1. Wash Walls with Vinegar Solution

Walls absorb smoke quickly, especially if painted with porous finishes.

To clean them:

  • Mix white vinegar and warm water
  • Use a soft sponge to wipe walls
  • Focus on stained or darkened areas

Additionally, vinegar helps neutralize odor rather than just covering it.

  1. Repaint with Odor-Sealing Primer

In some cases, cleaning is not enough. Smoke particles can remain trapped inside paint layers.

Therefore, repainting becomes necessary.

Steps include:

  • Clean the wall thoroughly
  • Apply an odor-blocking primer
  • Repaint with fresh paint

As a result, trapped smoke odors are sealed permanently.

  1. Use Activated Charcoal or Odor Absorbers

Activated charcoal is highly effective at absorbing smoke particles from the air.

Place it around the affected rooms:

  • Near carpets
  • Corners of rooms
  • Closets and closed spaces

Furthermore, charcoal works continuously without chemicals.

Other options include:

  • Baking soda bowls
  • Commercial odor absorbers
  1. Clean HVAC Systems and Air Ducts

Smoke often spreads through air conditioning systems.

If not cleaned, it will continue circulating odor throughout the home.

Therefore:

  • Replace air filters
  • Clean vents and ducts
  • Consider professional HVAC cleaning

This step is crucial for complete odor removal after Fire and Smoke Damage.

Additional Tips for Better Results

To improve effectiveness, combine multiple methods.

For example:

  • Use baking soda and steam cleaning together
  • Ventilate while cleaning walls
  • Run air purifiers during the process

As a result, odor removal becomes faster and more complete.

How Long Does Smoke Odor Last?

Without treatment, smoke odor can last:

  • Weeks in light damage cases
  • Months in moderate damage
  • Years in severe fire incidents

However, with proper cleaning, it can be significantly reduced or eliminated.

Therefore, acting quickly is essential.

Common Mistakes to Avoid

Many homeowners make mistakes when trying to remove smoke odor.

Avoid the following:

  • Using only air fresheners (they mask, not remove odor)
  • Skipping HVAC cleaning
  • Ignoring walls and ceilings
  • Delaying cleanup after fire exposure

Because of this, odors often return if not properly treated.

Health Concerns Linked to Smoke Exposure

The effects of smoke go beyond smell. Fire and Smoke Damage can also impact indoor air quality.

Exposure may lead to:

  • Respiratory irritation
  • Headaches
  • Eye discomfort
  • Allergic reactions

Therefore, proper cleaning is also important for health and safety.

When to Call Professional Restoration Experts

In some cases, DIY methods are not enough.

Call professionals if:

  • Smoke odor is extremely strong
  • Large areas are affected
  • Walls and ceilings are heavily stained
  • HVAC systems are contaminated

Professionals use specialized equipment like ozone machines and thermal fogging.

As a result, they can remove deep-set odors more effectively.

Final Thoughts

Smoke odor is one of the most persistent problems after a fire. However, it can be removed with the right approach.

By understanding Fire and Smoke Damage, you can take targeted steps to eliminate odor from carpets and walls. From baking soda treatments to HVAC cleaning, each method plays an important role.

The key is to act quickly, combine methods, and be consistent. In the end, restoring your home is not just about removing smell—it is about restoring comfort, safety, and peace of mind.


Fire and Smoke Damage

15 Items You Must Throw Away After Smoke Damage

Smoke damage is one of the most difficult types of home damage to deal with. Even after a fire is out, smoke particles continue to spread and settle into your belongings. As a result, many items become unsafe to use, even if they look fine on the surface.

So, what should you throw away after smoke exposure? Understanding the impact of Fire and Smoke Damage is key to protecting your health and your home.

In this guide, we’ll break down 15 items you must discard after smoke damage and explain why they cannot always be cleaned or restored.

Why Smoke Damage Is So Serious

Smoke is made up of toxic particles, chemicals, and soot. These particles are extremely fine, which allows them to penetrate deep into materials.

Therefore, smoke damage is not just about smell. It also affects:

  • Air quality
  • Surface safety
  • Material integrity
  • Long-term health

As a result, some items must be discarded for safety reasons.

Understanding Fire and Smoke Damage

Before deciding what to keep or throw away, it is important to understand Fire and Smoke Damage.

Smoke can:

  • Contaminate porous materials
  • Leave toxic residues
  • Cause permanent discoloration
  • Spread harmful particles through the air

Because of this, not everything can be cleaned effectively.

15 Items You Must Throw Away After Smoke Damage

Let’s explore the most important items you should discard after a fire incident.

  1. Food and Perishables

Any exposed food must be thrown away immediately.

Smoke particles can settle on:

  • Open food packages
  • Refrigerated items
  • Canned goods with damaged seals

Therefore, they are unsafe for consumption.

  1. Medications and Supplements

Smoke can contaminate medicine containers and alter their chemical stability.

As a result, all exposed medications should be discarded.

  1. Smoke-Exposed Cosmetics

Makeup, skincare products, and personal care items absorb smoke easily.

Therefore:

  • Lipsticks
  • Creams
  • Lotions

should all be thrown away if exposed.

  1. Upholstered Furniture

Couches, chairs, and padded furniture absorb smoke deeply.

Even after cleaning, odors often remain trapped inside.

Consequently, replacement is usually necessary.

  1. Mattresses and Pillows

These items are highly porous.

Because of this, they:

  • Retain soot
  • Absorb odors
  • Harbor toxins

Therefore, they should be discarded after smoke exposure.

  1. Clothing and Fabrics (Severely Damaged)

Light smoke exposure may be washable. However, heavily affected clothing often cannot be fully restored.

Items include:

  • Undergarments
  • Bedding
  • Curtains

As a result, disposal is often the safest option.

  1. Carpets and Rugs

Carpets absorb smoke deep into fibers and padding.

Even professional cleaning may not remove all toxins left by Fire and Smoke Damage.

Therefore, replacement is often required for safety.

  1. Wooden Items with Heavy Damage

Wood absorbs smoke quickly. If the damage is severe, odor and soot may remain permanently.

This includes:

  • Wooden furniture
  • Shelving units
  • Decorative pieces
  1. Paper Documents and Books

Paper is extremely absorbent.

Smoke can:

  • Discolor pages
  • Leave permanent odor
  • Make documents brittle

Therefore, heavily damaged items may need to be discarded or professionally restored.

  1. Plastic Kitchenware

Plastic absorbs smoke chemicals easily.

Even after washing, it may retain toxic residues. As a result, items like containers and utensils should be replaced.

  1. Non-Sealed Food Packaging

Even if food inside looks fine, packaging can absorb smoke particles.

Therefore, items like:

  • Open cereal boxes
  • Snack bags
  • Paper packaging

should be discarded.

  1. Electronics with Heavy Smoke Exposure

Electronics can be damaged internally by smoke particles.

This may lead to:

  • Malfunctions
  • Corrosion
  • Safety hazards

Therefore, professional inspection is required before reuse.

  1. Baby Items and Toys

Safety is critical when it comes to children’s items.

Because of Fire and Smoke Damage, baby bottles, toys, and clothing should be discarded if exposed.

  1. Filters and Air Purifiers

Air filters trap smoke particles permanently.

Therefore:

  • HVAC filters
  • Portable air filters
  • Vacuum filters

must be replaced after exposure.

  1. Insulation Materials

Insulation inside walls and ceilings absorbs smoke and toxins.

Once contaminated, it cannot be cleaned effectively.

As a result, replacement is often necessary during restoration.

Why Some Items Cannot Be Saved

Not all materials respond to cleaning. Porous items absorb smoke deeply, making removal impossible.

Therefore, even after cleaning:

  • Odors may remain
  • Toxic particles may stay trapped
  • Health risks may continue

This is why Fire and Smoke Damage often requires selective disposal.

Health Risks of Keeping Contaminated Items

Keeping smoke-damaged items can affect your health.

Exposure may lead to:

  • Respiratory problems
  • Eye irritation
  • Headaches
  • Allergic reactions

Therefore, safety should always come first.

How to Decide What to Keep or Throw Away

Not every item must be discarded. Use this simple guide:

  • Non-porous items → Cleanable
  • Lightly affected items → Wash and sanitize
  • Heavily porous items → Discard

When in doubt, consult a professional.

Cleaning vs. Replacing: A Simple Rule

A helpful rule is:

  • If smoke is only on the surface → Clean it
  • If smoke has soaked inside → Replace it

This helps avoid health risks and future odor problems.

Professional Restoration Can Help

In severe cases, professionals can:

  • Assess damage
  • Clean salvageable items
  • Remove soot and odor
  • Restore air quality

Therefore, expert help is often necessary after major fire incidents.

Final Thoughts

Smoke damage is more than just a lingering smell. It affects the safety, usability, and cleanliness of your belongings.

Understanding Fire and Smoke Damage helps you make the right decisions about what to keep and what to discard.

By removing contaminated items quickly, you protect your health and prevent long-term problems. Although it may be difficult, proper cleanup is essential for restoring a safe and healthy home.


Water leaking from a ceiling revealing hidden water damage in a home

Hidden Water Damage Signs Homeowners Should Never Ignore

The most dangerous water damage is the kind you never see. While an obvious flood gets an immediate response, hidden moisture behind walls, under floors, and inside ceilings can sit for weeks or months, quietly rotting framing and feeding mold. By the time it surfaces, the repair is often far larger than it needed to be.

Hidden water damage is common because water moves. It travels along pipes, wicks through drywall, and pools in places you rarely look. The EPA warns that mold can begin growing within 24 to 48 hours of materials becoming damp, so moisture that hides for weeks has more than enough time to cause serious harm.

This guide covers where water hides, the subtle signs that give it away, and how professionals find it. If you suspect hidden moisture, Rigid Restorations offers professional moisture detection across San Diego County. Call 760-500-1818 for an assessment.

TL;DR

  • Water hides in wall cavities, subfloors, ceilings, attics, crawl spaces, and behind appliances, well out of normal view.
  • The earliest signs are often smell and touch, a musty odor or a soft spot, not a visible stain.
  • Hidden moisture drives secondary damage: mold, wood rot, corroded fasteners, and failing insulation.
  • A sudden jump in your water bill is one of the most reliable signs of a hidden or slab leak.
  • Professionals confirm hidden damage with moisture meters and thermal imaging, not by looking.
  • Materials should read below 16% moisture content and indoor humidity below 60% to be considered safe.

Where Water Hides in Your Home

Hidden water damage almost always starts in one of a handful of predictable places. Knowing where to focus your attention makes the subtle signs much easier to catch.

Location Common Source How It Shows Up
Wall cavities Leaking supply lines, roof intrusion Musty smell, peeling paint, soft drywall
Subfloor and under flooring Appliance leaks, slab leaks Soft, warped, or uneven floors
Ceilings Roof leaks, upstairs plumbing Stains, sagging, cracks along seams
Attic Roof and flashing failures Damp insulation, wood discoloration, musty air
Crawl space Plumbing leaks, poor drainage Rising indoor humidity, musty odor, wood rot
Behind appliances Dishwasher, washer, water heater Warped cabinets, floor discoloration, odor

The Subtle Signs Most Homeowners Overlook

Hidden damage rarely announces itself with a puddle. It reveals itself through small changes that are easy to explain away. Pay attention to these:

  • A musty or earthy smell that lingers even after cleaning, especially in one room or near the floor.
  • Soft or spongy spots underfoot or when you press a wall, indicating saturated material beneath.
  • A warm spot on the floor which can signal a hot water slab leak beneath the foundation.
  • Paint or wallpaper that bubbles, peels, or cracks without an obvious cause.
  • One room that feels humid or clammy compared to the rest of the house.
  • A water bill that climbs with no change in how much water you use.

Why Hidden Moisture Is So Damaging

The danger of hidden water damage is time. Because no one addresses it, moisture keeps working on your home around the clock. Wood framing absorbs water and begins to rot. Metal fasteners and connectors corrode. Insulation loses its ability to work and holds moisture against the structure. And mold, which needs only 24 to 48 hours to start, spreads freely in the dark, still conditions inside walls and floors.

This chain of secondary damage is why a hidden leak so often costs more than a visible flood. A flood gets dried out in days. A hidden leak gets discovered after it has already compromised the materials around it.

Time Hidden What Happens
First 24 to 48 hours Mold can begin; materials absorb and hold moisture
First 1 to 2 weeks Wood swells and warps, drywall softens, musty odor develops
1 month and beyond Wood rot, corroded fasteners, ruined insulation, widespread mold

How Professionals Find Hidden Water Damage

You cannot fix what you cannot find, and hidden moisture is invisible to the eye. Professionals locate it with instruments. Pin and pinless moisture meters measure how much water is trapped inside a material, giving a number rather than a guess. Thermal imaging cameras reveal cooler, damp zones behind walls and ceilings. Thermo-hygrometers track indoor humidity to confirm whether the air itself is holding excess moisture.

With these tools, a technician can map the full footprint of a hidden leak, identify the source, and open only the areas that actually need attention. Materials are considered safe when they read below 16% moisture content and indoor relative humidity sits below 60%.

Real-World Examples

The Odor With No Source

A homeowner reported a musty smell in a guest bedroom but could see nothing wrong. Thermal imaging revealed a cool, damp patch inside the exterior wall, traced to a small roof leak above. The moisture had wicked down two feet of drywall. Because it was found before rot set in, the repair was a contained dry-out and patch instead of a wall rebuild.

The Warm Floor

A family noticed one area of tile that always felt warm. It was a hot water slab leak that had been quietly saturating the subfloor for weeks. Moisture readings under the tile exceeded 25%. Catching it when the warm spot appeared, rather than waiting for visible buckling, kept the damage limited to a manageable section of flooring.

Glossary

Wall Cavity: The hollow space between wall studs where pipes and wiring run. Water that enters here is invisible from the room and dries very slowly on its own.

Subfloor: The structural layer beneath your finished flooring. It absorbs and holds water, and damage here often shows up as soft or uneven floors above.

Thermal Imaging: An infrared camera technique that reveals cooler, damp areas behind walls and ceilings, helping locate hidden moisture without opening the structure.

Wicking: The upward or sideways movement of water through porous materials such as drywall and wood, which spreads moisture far beyond the original wet area.

Crawl Space: The shallow area beneath a raised home. Poor drainage and plumbing leaks here can raise moisture throughout the house and go unnoticed for months.

Pin-Type Moisture Meter: A tool that measures moisture inside a material by inserting two pins. Readings above 16% for wood and drywall indicate risk.

Frequently Asked Questions

Where does water damage most often hide?

In wall cavities, under flooring and subfloors, inside ceilings, in attics and crawl spaces, and behind appliances like dishwashers, washing machines, and water heaters. These are all places water can accumulate out of sight and dry very slowly.

What are the first signs of hidden water damage?

Often a musty odor or a soft, spongy spot before any stain appears. Other early signs include peeling paint, a warm spot on the floor, higher humidity in one room, and an unexplained increase in your water bill.

How do professionals find water behind walls?

They use moisture meters to measure water content inside materials and thermal imaging cameras to reveal cooler, damp areas behind the surface. This lets them map the full extent of hidden moisture without tearing open the wall to look.

Can hidden water damage make me sick?

It can. Hidden moisture feeds mold, which can affect indoor air quality and trigger allergy and respiratory symptoms. Persistent musty odors and unexplained symptoms indoors are worth investigating for hidden moisture.

How much damage can a hidden leak cause?

A great deal. Because hidden leaks go unaddressed for so long, they can rot framing, ruin insulation, warp floors, and spread mold across large areas. Just one inch of water can cause around $25,000 in damage, and slow hidden leaks often exceed that before they are found.

Should I open the wall myself to check?

It is better to start with a professional moisture assessment. Opening a wall blindly can spread contamination if the water is not clean and may miss the true source. Professionals locate the moisture first, then open only what needs to be addressed.

Final Thoughts

Hidden water damage is a slow, quiet problem that becomes an expensive, urgent one the longer it goes unnoticed. The signs are there if you know what to look and smell for: the musty odor, the soft spot, the warm patch on the floor, the water bill that does not add up. Trusting those signals early is what keeps a hidden leak from becoming a gut renovation.

If something in your home feels off but you cannot see the source, get it checked. Rigid Restorations provides professional moisture detection and 24/7 emergency restoration across San Diego County. Call 760-500-1818 for a same-day assessment.

Mold growth spreading on a damp wall after a water leak

How Fast Does Mold Grow After a Water Leak or Flood?

After a leak or flood, the clock starts immediately. Mold does not need weeks to become a problem; it needs hours. The EPA states that mold can begin growing on damp materials within 24 to 48 hours, and once it starts, it spreads quickly through the still, damp conditions inside walls, floors, and ceilings.

Understanding this timeline is what turns a stressful situation into a manageable one. If you know that the first two days are decisive, you understand why fast extraction and drying matter so much, and why waiting to see if things dry out on their own is the most expensive choice you can make.

This guide breaks down exactly how fast mold grows, what speeds it up, and what to do in that critical window. If you have water damage now, Rigid Restorations provides 24/7 emergency drying across San Diego County. Call 760-500-1818.

TL;DR

  • Mold can begin growing within 24 to 48 hours of materials getting wet (EPA guidance).
  • By 48 to 72 hours, visible colonies appear and spores begin spreading to new surfaces.
  • Three things drive growth: moisture, a food source (drywall, wood, carpet), and temperatures of 68 to 86 degrees.
  • Warmth and high humidity accelerate every stage, and San Diego’s coastal humidity slows natural drying.
  • Drying materials within the first 24 to 48 hours usually prevents mold entirely.
  • Once mold is established past 48 hours, you likely need remediation, not just drying.

The Mold Growth Timeline, Hour by Hour

Mold follows a predictable progression after materials get wet. This timeline assumes normal indoor conditions of 68 to 86 degrees. Warmth and humidity move everything faster.

Time After Wetting What Is Happening Visible Signs
0 to 24 hours Spores absorb moisture and begin to germinate None; material simply looks wet
24 to 48 hours Active colonization; hyphae penetrate the material Faint musty odor, early discoloration
48 to 72 hours Colonies mature and begin producing spores Visible mold, stronger odor
72+ hours Spores spread to new surfaces via air and HVAC Multiple areas affected, structural risk

The Three Things Mold Needs to Grow

Mold requires three conditions at once. Remove any one and growth stops. In practice, moisture is the only one you can realistically control, which is why moisture removal is the entire game.

  • Moisture: damp materials or air humidity sustained above 60%. This is the controllable factor and the target of all drying.
  • A food source: organic building materials like drywall paper, wood, carpet, and insulation are everywhere in a home.
  • Temperature: roughly 68 to 86 degrees, which is normal indoor range, so temperature is almost always favorable for mold.

What Speeds Mold Up

Not every wet material grows mold at the same rate. Several factors push growth toward the fast end of the window, and San Diego’s climate contributes to a couple of them.

Factor Effect on Mold Growth
High humidity Slows drying and keeps materials damp longer, accelerating growth
Warm temperatures Speeds germination and colonization within the favorable range
Poor ventilation Traps moisture in still air, ideal for mold inside walls and closets
Highly absorbent materials Carpet pad, drywall paper, and insulation stay wet longer
Contaminated water Gray and black water carry nutrients that speed microbial activity

Why the First 48 Hours Decide the Outcome

The reason professionals stress same-day response is that the first 48 hours are the difference between prevention and remediation. Dry the materials completely within that window and, in most cases, mold never gets started. Miss it, and you move from a straightforward drying job to containment, material removal, and cleanup. The problem is that hidden moisture in wall cavities and subfloors will not dry on its own in time, which is exactly why moisture meters and professional drying matter so much.

Real-World Examples

Beat the Clock

A pipe burst under a sink and soaked a kitchen and hallway. The homeowner called for emergency service the same morning. Crews extracted the water, opened the affected wall base, and dried everything to verified levels within four days. Because drying started inside the 48 hour window, no mold developed and the repair was minimal.

Missed the Window

A slow leak behind a wall ran for over a week before a musty smell gave it away. By then mold had colonized the drywall and framing. The response was no longer simple drying; it required containment, removal of affected materials, and cleaning under the IICRC S520 standard. The same leak, caught in the first two days, would have been a quick fix.

Glossary

Mold Spore: A microscopic, airborne mold seed always present in indoor air. It is harmless until it lands on a damp surface and begins to grow.

Germination: The stage when a mold spore, having absorbed moisture, begins to grow root-like filaments into a material. It can start within 24 hours.

Hyphae: The root-like threads a mold colony sends into porous materials. Because they penetrate below the surface, wiping the surface does not remove them.

Colonization: The stage, often within 24 to 48 hours, when mold forms a visible, spreading colony on a damp surface.

Relative Humidity: The moisture content of the air relative to its maximum. Sustained indoor levels above 60% support mold growth.

Moisture Content: The amount of water inside a material. Wood and drywall are at risk when readings exceed about 16%.

Frequently Asked Questions

How quickly does mold grow after water damage?

The EPA states mold can begin growing on damp materials within 24 to 48 hours. Under warm, humid conditions it can start toward the faster end of that range. Visible colonies often appear within 48 to 72 hours, and spore spreading follows soon after.

Can mold grow in less than 24 hours?

Growth typically begins in the 24 to 48 hour window, but warm temperatures and high humidity can push it toward the earlier edge. The EPA gives 24 to 48 hours as guidance, not a guarantee, so the safest assumption is that the clock is already running the moment materials get wet.

What conditions make mold grow faster?

Three factors together: moisture, a food source such as drywall, wood, or carpet, and temperatures between 68 and 86 degrees, which covers normal indoor conditions. Higher humidity and warmth accelerate every stage, which is one reason coastal and humid climates see faster growth.

If I dry everything within 48 hours, will I avoid mold?

Usually, yes. The EPA notes that if wet materials are dried within 24 to 48 hours, in most cases mold will not grow. The challenge is that surface drying often misses moisture hidden in walls and subfloors, which is why professional drying with moisture verification is the reliable way to beat the clock.

Is it too late if it has been several days?

Not too late to act, but the response changes. After 48 to 72 hours mold is likely established, so the job shifts from simple drying to remediation, which means containment and removal of affected materials under the IICRC S520 standard. The sooner you call, the more you can save.

Where does mold usually start growing first?

On the most absorbent materials in the wettest, least ventilated spots: carpet padding, the paper facing of drywall, wood framing, and insulation inside wall cavities. These places stay damp longest and are often out of sight, so growth can be advanced before you notice it.

Final Thoughts

The answer to how fast mold grows is simple and urgent: fast enough that speed is your best defense. Within a day, mold can germinate. Within two to three, it is visible and spreading. The entire strategy for beating it fits in one sentence: get the moisture out, completely and quickly, before the window closes.

If your home has a leak or flood, treat it as time-sensitive from the first minute. Rigid Restorations provides 24/7 emergency extraction and verified drying across San Diego County to stop mold before it starts. Call 760-500-1818.

what to do after a flood

Steps Homeowners Should Take Immediately After a Flood Damages Their Property

Floods can cause significant damage to your home, leading to destruction of belongings, structural issues, and even health risks. The aftermath of a flood can be overwhelming, but taking immediate action can help mitigate further damage and speed up the recovery process. In this blog post, we’ll guide you through the essential steps homeowners should take immediately after a flood damages their property, from securing your safety to finding flood repair services.

By following these steps, you can effectively address the situation and start the flood damage repair process as quickly as possible.

  1. Ensure Your Safety First

Before you do anything, your safety should be the top priority. Floods can present numerous hazards, from electrical risks to structural instability. Taking the right precautions is essential to protect yourself and your loved ones.

  • Turn off the electricity: If it is safe to do so, switch off the main power supply to prevent electrical hazards. Water and electricity can be a dangerous combination, so don’t touch electrical outlets, switches, or appliances if you are standing in water.
  • Evacuate if necessary: If floodwaters are still rising or your home is at risk of collapse, evacuate immediately. If you have to leave, do so safely by using an elevated escape route and avoid walking through floodwaters, as they can contain hidden debris or contaminants.
  • Avoid contaminated water: Floodwaters can be contaminated with bacteria, sewage, and chemicals. Keep your distance from the water to avoid exposure to harmful substances.

By prioritizing safety, you can avoid putting yourself and your family in harm’s way during this stressful situation.

  1. Document the Damage for Insurance Claims

Once you’ve ensured your safety, it’s time to start documenting the damage. Proper documentation is critical for insurance claims and for understanding the extent of the damage to your property.

  • Take photos and videos: Capture clear images of damaged areas, including walls, flooring, furniture, and appliances. It’s best to take photos of both the visible damage and any hidden areas, such as under floors or inside cabinets.
  • List damaged items: Make a detailed list of damaged or destroyed belongings. Include descriptions, quantities, and the approximate value of each item. This list will be helpful for your insurance provider during the claims process.
  • Contact your insurance company: Notify your insurance company immediately to start the claims process. They may have specific guidelines for submitting your documentation, so follow their instructions carefully.

Having thorough documentation will support your flood damage repair claim and ensure you get the compensation you’re entitled to.

  1. Stop the Water Flow

If you have not already done so, it’s crucial to stop the flow of water into your home to prevent further damage. Depending on the source of the flooding, different actions may be required:

  • Shut off the water supply: If the flooding is due to a burst pipe or plumbing issue, locate the main water valve and turn it off. This will prevent any more water from entering your home.
  • Seal leaks: If floodwaters are coming from external sources, like heavy rain or storm surges, check doors, windows, and other entry points for leaks. Use temporary barriers like sandbags or plastic sheeting to block water from entering if possible.

Stopping the flow of water helps prevent additional damage to your home and makes it easier to begin the repair process.

  1. Remove Standing Water

The next step is to remove as much standing water as possible to prevent it from seeping into walls, floors, and furniture. Standing water can cause more damage to your property and create conditions conducive to mold growth.

  • Use pumps and vacuums: If the floodwaters are shallow, you can use a wet/dry vacuum to remove the water. For larger floods, you may need to rent or hire professionals who can use industrial pumps to extract the water quickly.
  • Ventilate the area: Open windows and doors to allow fresh air to circulate and help dry out the space. If possible, use fans and dehumidifiers to speed up the drying process.
  • Wear protective gear: Floodwaters may be contaminated with bacteria and other harmful pathogens, so wear protective gear, such as rubber gloves, boots, and masks, while working in the flooded areas.

Removing the standing water will help limit the damage and prevent issues like mold growth and structural deterioration.

  1. Dry Out the Property

After removing the water, drying out your property is the next critical step. If not properly dried, moisture can linger in walls, floors, and other hidden areas, leading to further damage and mold growth.

  • Use dehumidifiers and fans: Dehumidifiers will help extract moisture from the air and materials in your home. Place fans in the affected areas to circulate air and speed up the drying process.
  • Remove soaked materials: In some cases, materials like carpets, insulation, and drywall may need to be removed if they are saturated and cannot be effectively dried. These materials can trap moisture, leading to mold and mildew growth.
  • Inspect for hidden moisture: Use moisture meters to check areas that may be difficult to access, such as behind walls or under floors, for any remaining water. This is especially important in basements or areas with poor ventilation.

Thorough drying is essential for preventing mold, structural damage, and further complications down the line.

  1. Call a Flood Damage Repair Specialist

After performing these initial steps, it’s time to contact a professional flood damage repair company. Flood repair experts have the tools, knowledge, and experience to assess the damage, safely remove contaminants, and restore your home to its pre-flood condition.

  • Find a reputable company: Search for a local flood damage repair service. Look for a company that specializes in flood repair near you and has a proven track record of restoring homes after water damage.
  • Request an inspection: A flood damage restoration company will conduct a thorough inspection to assess the full extent of the damage. They’ll identify structural issues, water damage to the foundation, and any hidden mold growth.
  • Let professionals handle it: Flood repair experts will handle everything from water extraction and mold remediation to structural repairs and reconstruction. This ensures that your home is fully restored and safe to live in.

Hiring a professional flood repair service is essential for effective restoration and ensuring that your home is safe and secure after the flood.

  1. Take Steps to Prevent Future Flooding

Once your home is restored, consider taking steps to prevent future flooding. Although floods can sometimes be unavoidable, there are ways to reduce the risk of future damage.

  • Install flood barriers: For homes in flood-prone areas, installing flood barriers or sump pumps can help protect your property from future floods.
  • Improve drainage: Ensure that your gutters and downspouts are clean and functioning properly. You can also regrade the landscape around your home to direct water away from the foundation.
  • Waterproof your home: Apply waterproof coatings to your basement walls and floors to help prevent water from seeping into your home.

Taking these precautions can help protect your home from future floods and reduce the likelihood of damage.

Conclusion: Act Quickly and Hire Professionals for Effective Flood Damage Repair

Floods can cause devastating damage to your home, but by taking the right steps immediately after the incident, you can minimize the impact and get your home back to normal faster. Ensure your safety first, document the damage, and remove standing water as soon as possible. Dry out the affected areas thoroughly, and don’t hesitate to contact a professional flood damage repair company to handle the more complex restoration process.

By acting quickly and professionally, you can restore your home to its pre-flood condition and take steps to prevent future water damage.